Copyright © 2010 by OKINA USA
D-202
www.okinausa.com 8
rev070710
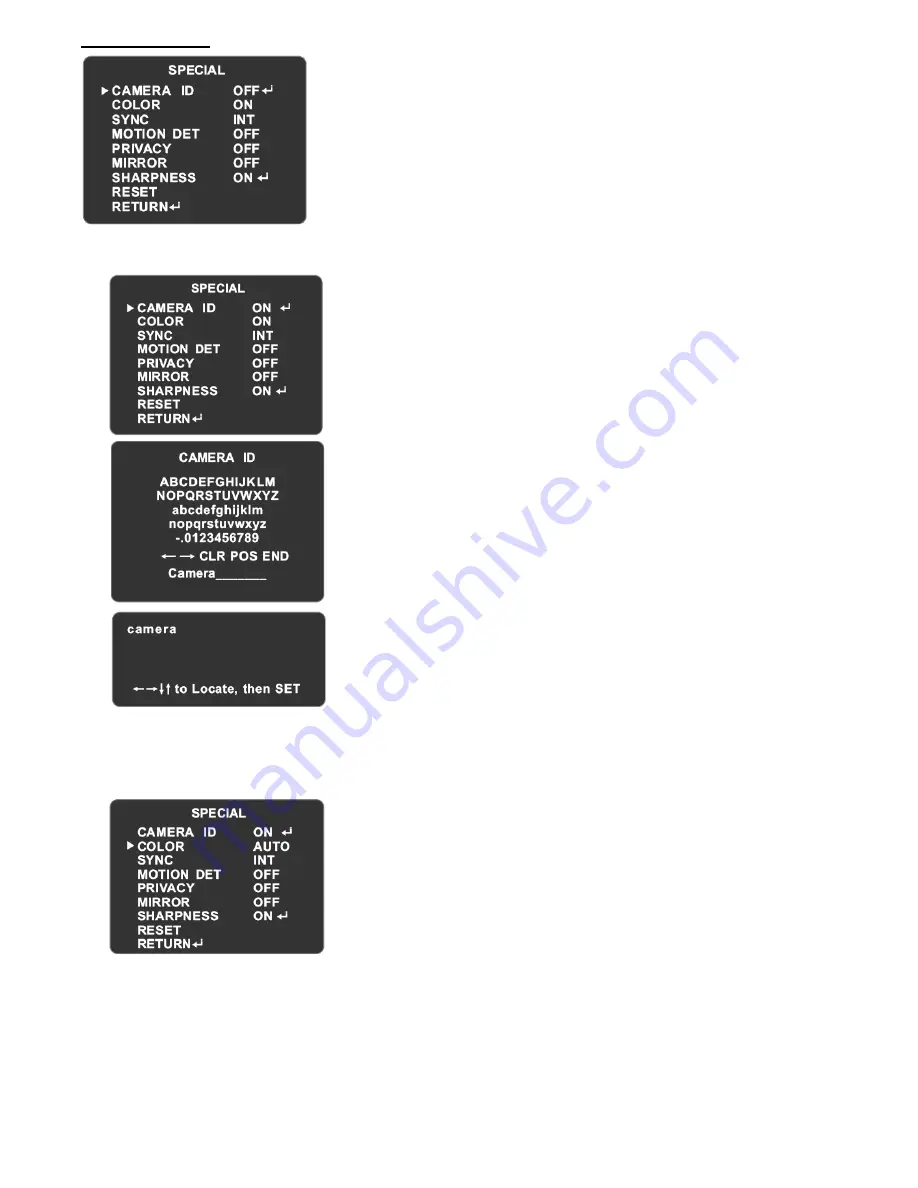
Setup: Special
A)
Camera ID
B)
Color
1.
Position the arrow to SPECIAL in setup menu by pressing
UP/DOWN button.
2.
Select the mode you wish to operate by pressing LEFT/RIGHT
button.
1.
Position the arrow to CAMERA ID in setup menu by pressing
UP/DOWN button.
2.
Select the mode you wish to operate by pressing
LEFT/RIGHT button.
OFF: ID does not appear on monitor
ON: ID appears on monitor
Enter into CAMERA ID by pressing SETUP when in ON mode
1.
Move the cursor to the letter to choose by positioning
UP/DOWN/LEFT/RIGHT button.
2.
Enter the letter by selecting SETUP button
3.
While modifying the letters in the CAMERA ID, select
『
→
』
or
『←』
and press SETUP button to move the cursor to the
letters that need to be corrected.
4.
CLR is to clear letters.
5.
Position the cursor to POS and press SETUP when the ID is
completed.
6.
The modified ID will be shown on the top left corner.
Position the ID to the place where you would like it to be
displayed by moving UP/DOWN/LEFT/RIGHT. Return to last
menu by pressing SETUP while finishing modification.
7.
Select END and press SETUP to complete ID.
NOTE: Up to 15 letters or numbers can be used for CAMERA ID.
1.
Position the arrow to COLOR in setup menu by pressing
UP/DOWN button.
2.
Select the mode you wish to operate by pressing
LEFT/RIGHT button.
AUTO: The camera has a function which automatically
switches to the appropriate mode for daytime or night
time. The camera displays a color image in day and it
converts to B/W mode at night.
ON: Default value. It is fixed to color mode and the
image does not switch to B/W at night.
NOTE: When AGC is off, COLOR function will be fixed to ON
which cannot be modified.


