5
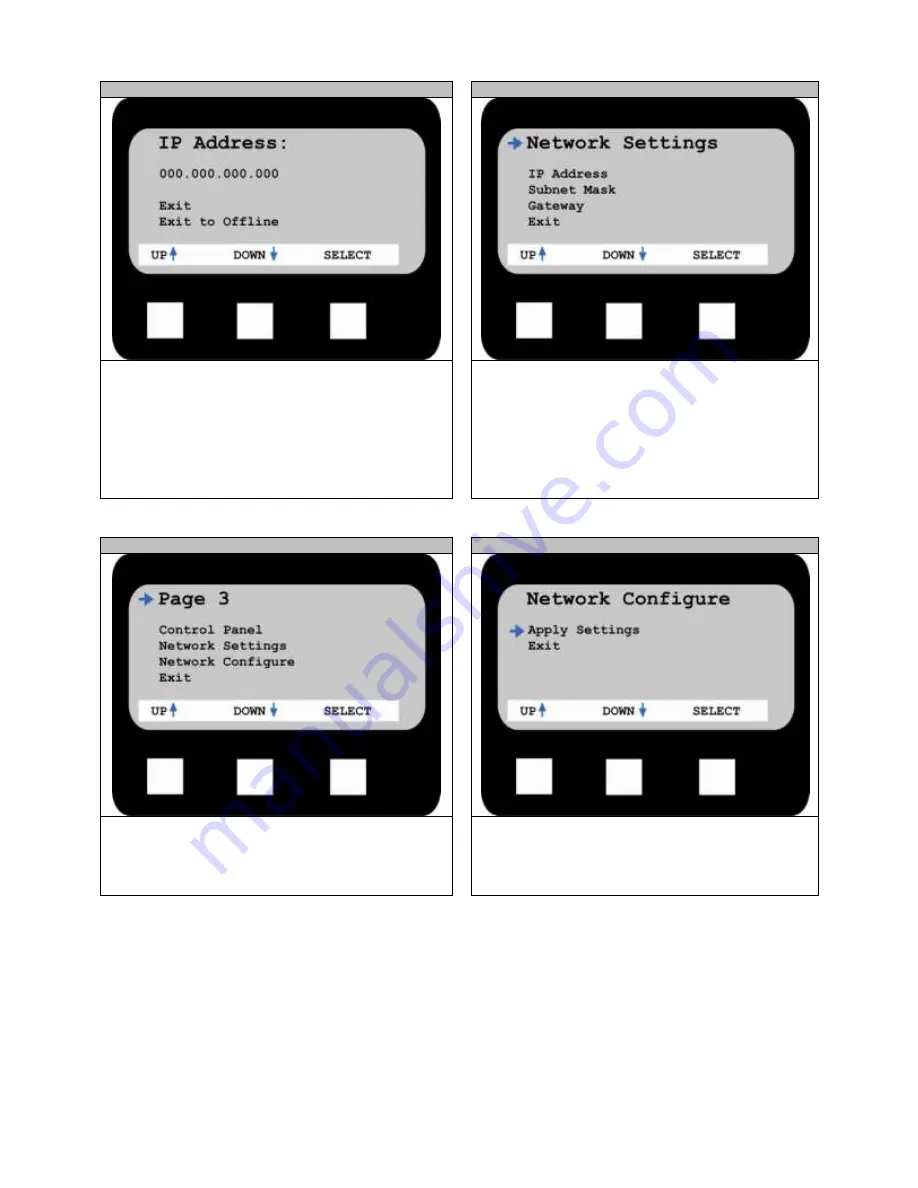
STEP 2-5
STEP 2-6
Press
Select.
The first three zero’s will be highlighted.
Press
Up
and
Down
to get to the appropriate number.
Press
Save
. Press
Select
, then the next set is now
ready to be entered and you can use the
Up
and
Down
arrows to continue this process until your done. Select
Save
and then
Exit.
You will be taken back to the
Network Settings
page.
Select
Exit.
STEP 2-7
STEP 2-8
You will be taken back to
Page 3.
Scroll down and
select
Network Configure.
From
Network Configure
, scroll down to
Apply
Settings
and
Select.
Summary of Contents for proColor Pro510DW
Page 1: ......
Page 17: ...17 STEP 6 3 Open the Workflow STEP 6 4 This screen will pop up Click Allow Access...
Page 18: ...18 STEP 6 5 Right click the Printer Output icon and select Setup STEP 6 6 Select Edit...
Page 24: ...24 STEP 7 7 Click Close STEP 7 8 From the General Options side bar click Update Stock Database...
Page 35: ...35 STEP 9 7 After the job has finished submitting click Close...
Page 41: ...41 STEP 11 5 From the File menu select Print STEP 11 6 Select OK...


