


31
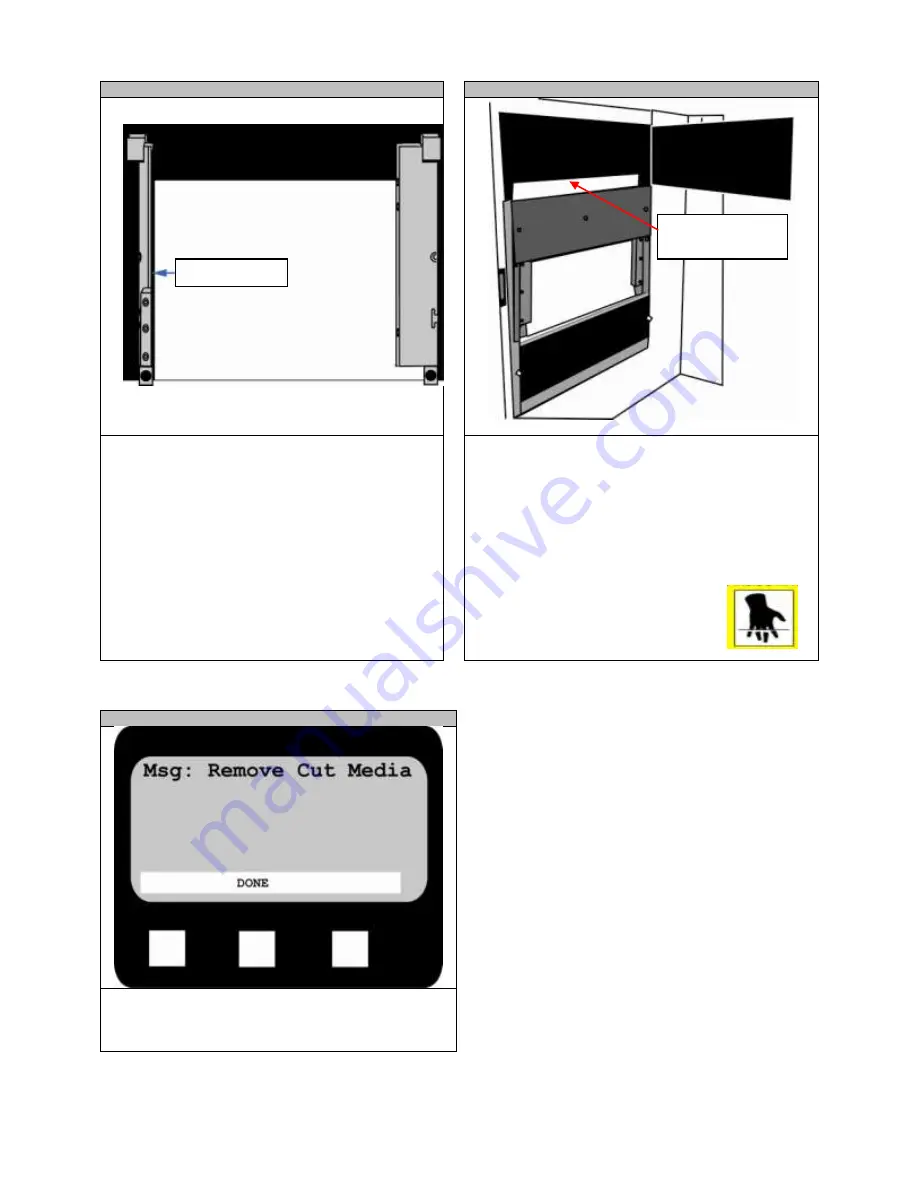
STEP 8-5
STEP 8-6
Ensure the Channel Gap (the distance between the
edge of the paper and the Guide Channel) is less than
0.5mm on each side and the paper aligned with the
right side Guide Channel.
Ensure the Channel Gap is not too small so that the
paper does not fit between the Guide Channels. The
paper should lay flat against the back of the feeder.
Use the
Open and Close
buttons to make an
adjustment if necessary.
Close the Guide Channels, Load Door and Guide
Cover.
Press the
Load
button to load the media.
The roll will begin to load and cut off a section for proper
alignment. Open the cutter door and while using
caution, carefully remove the piece of cut paper. Close
the cutter door.
Note: Depending on the type of media being used,
the paper may fall inside the feeder. Use caution
when retrieving cut media.
STEP 8-7
The control panel screen should look like this after a few
moments. Press the
Done
button. The media will then
load.
Channel Gap
Remove cut
piece of media.
Summary of Contents for proColor Pro510DW
Page 1: ......
Page 17: ...17 STEP 6 3 Open the Workflow STEP 6 4 This screen will pop up Click Allow Access...
Page 18: ...18 STEP 6 5 Right click the Printer Output icon and select Setup STEP 6 6 Select Edit...
Page 24: ...24 STEP 7 7 Click Close STEP 7 8 From the General Options side bar click Update Stock Database...
Page 35: ...35 STEP 9 7 After the job has finished submitting click Close...
Page 41: ...41 STEP 11 5 From the File menu select Print STEP 11 6 Select OK...