


- 71 -
Connecting the PC
Appendix
Printing
3
Setting Up
2
B
efore use
1
Basic D
evice Oper
ations
4
Index
USB Connections
1
Make sure that the machine and a
computer are connected and the
machine is turned on.
2
Insert the “Software DVD-ROM” into a
computer.
3
Double-click the [OKI] icon on the
desktop.
4
[Drivers] > [PS] > Double-click
[Installer for OSX].
5
Enter the administrator password, and
then click [OK].
Follow the on-screen instructions to
complete the installation.
6
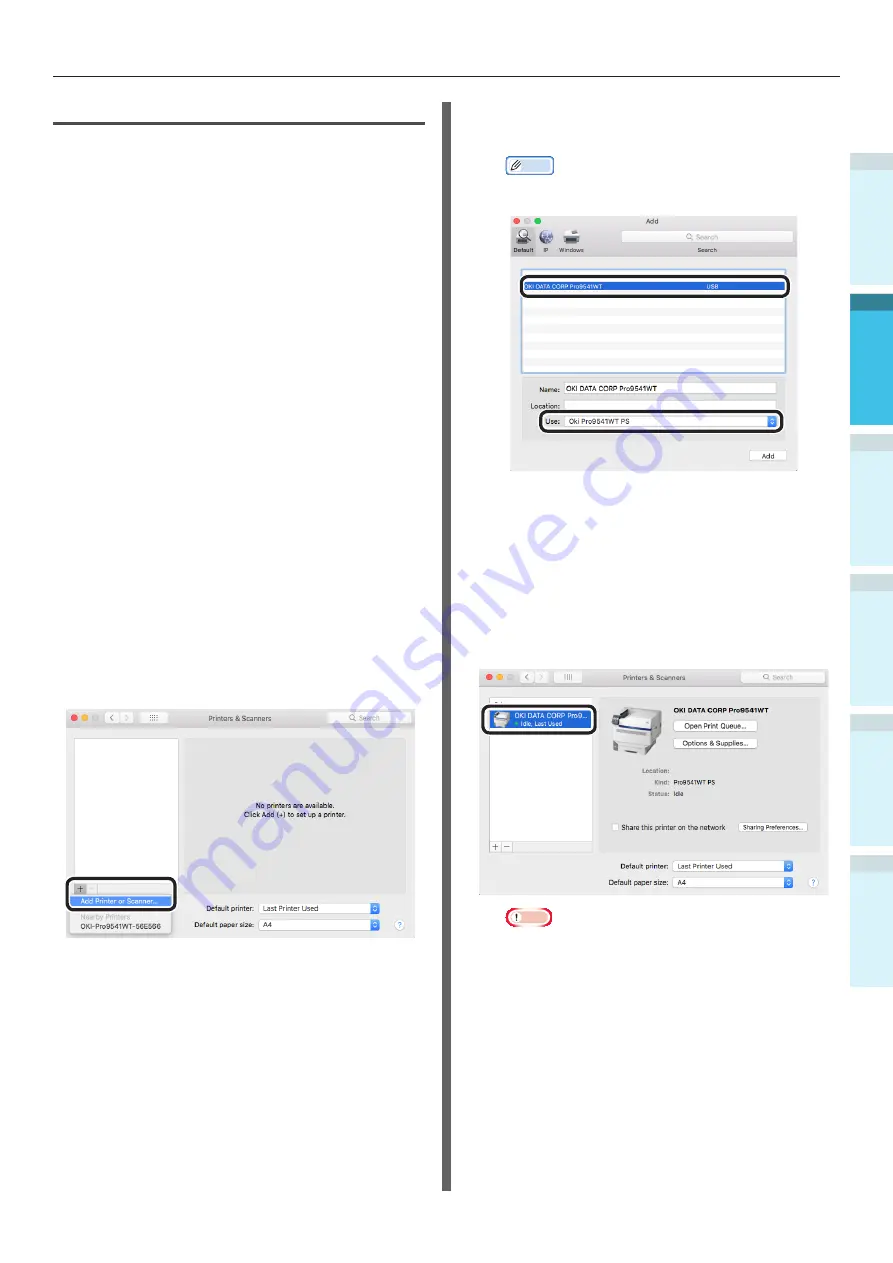
Select [System Preferences] from the
Apple menu.
7
Click [Printers & Scanners].
8
Click [+].
Select [Add Printer or Scanner...] when
the menu is displayed.
9
Click [Default].
10
Select the machine, and then select
[OKI DATA CORP Pro9541WT] in [Use].
Memo
z
To change the name, enter a new name into
[Name:].
11
Click [Add].
12
If the confirmation screen for optional
equipment appears, click [OK].
13
Make sure that the machine is added
to [Printers] and [Pro9541WT PS] is
displayed for [Kind].
Note
z
If [Pro9541WT PS] is not displayed for [Kind]
correctly, click [-], delete the machine from
[Printers], and then newly perform steps 8 to 12.
14
Click [Open Print Queue...].
15
Select [Print Test Page] from the
[Printer] menu.
Summary of Contents for Pro9541WT
Page 16: ...16 Viable with Pro9541WT Memo...