


- 43 -
Installing the Device
Appendix
Printing
3
Setting Up
2
B
efore use
1
Basic D
evice Oper
ations
4
Index
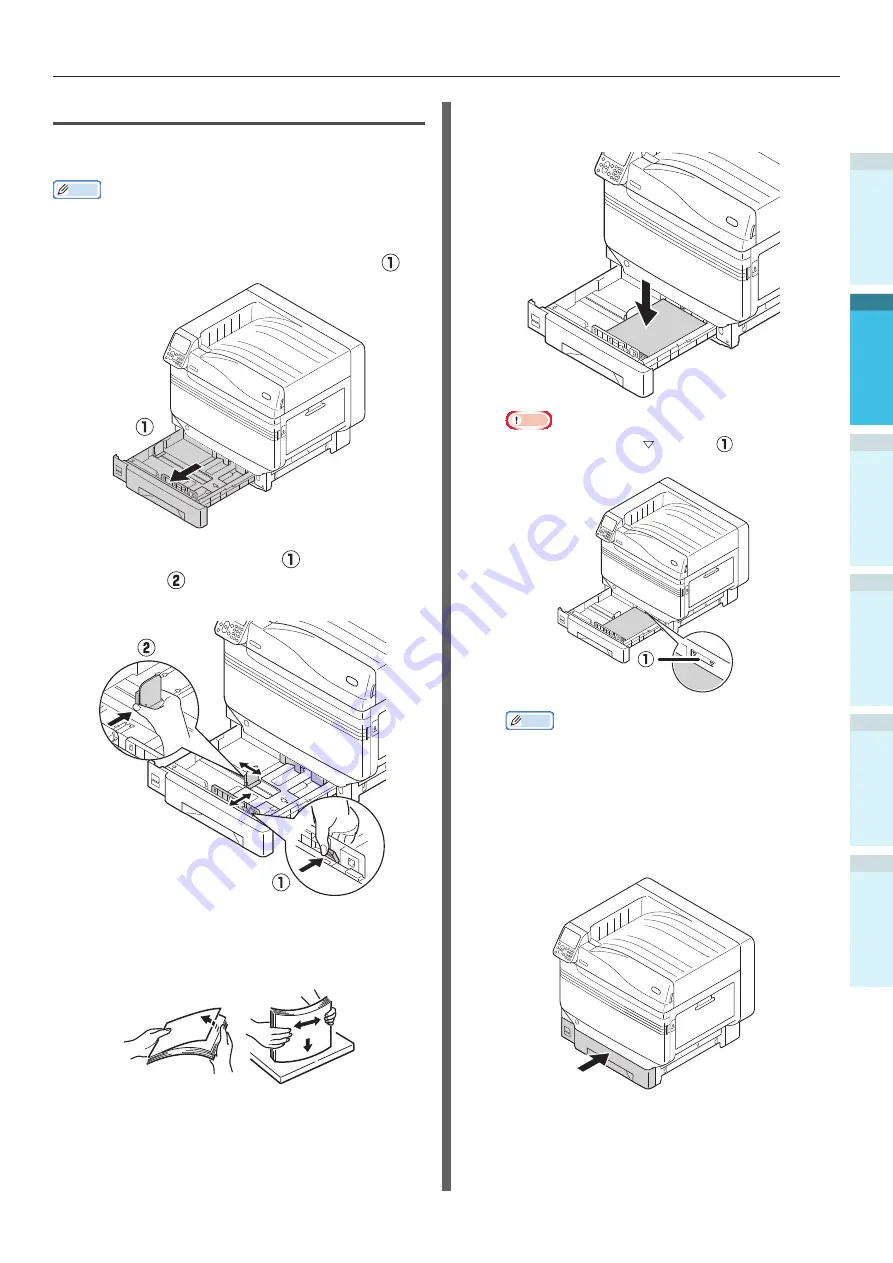
Setting Paper
This section explains how to set the paper in tray
1 or trays 2/3/4/5.
Memo
z
In this section, setting paper in tray 1 is used as an
example. Set trays 2 to 5 using the same procedure.
1
Pull out the tray 1 paper cassette ( ).
2
Slide the paper guide ( ) and paper
stopper ( ) to align to the size of the
paper that has been set.
3
Thoroughly sort the paper. Carefully
align the edges of the paper
horizontally.
4
Set the paper with the print surface
face-down.
Note
z
Do not exceed the " " symbol (
) on the paper
guide when setting the paper.
Memo
z
Set so there is no gap between the paper and the
paper guide or paper stopper.
5
Use the paper guide to secure the
paper.
6
Return the paper cassette to the tray.
Summary of Contents for Pro9541WT
Page 16: ...16 Viable with Pro9541WT Memo...