Consumables and maintenance > 53
9.
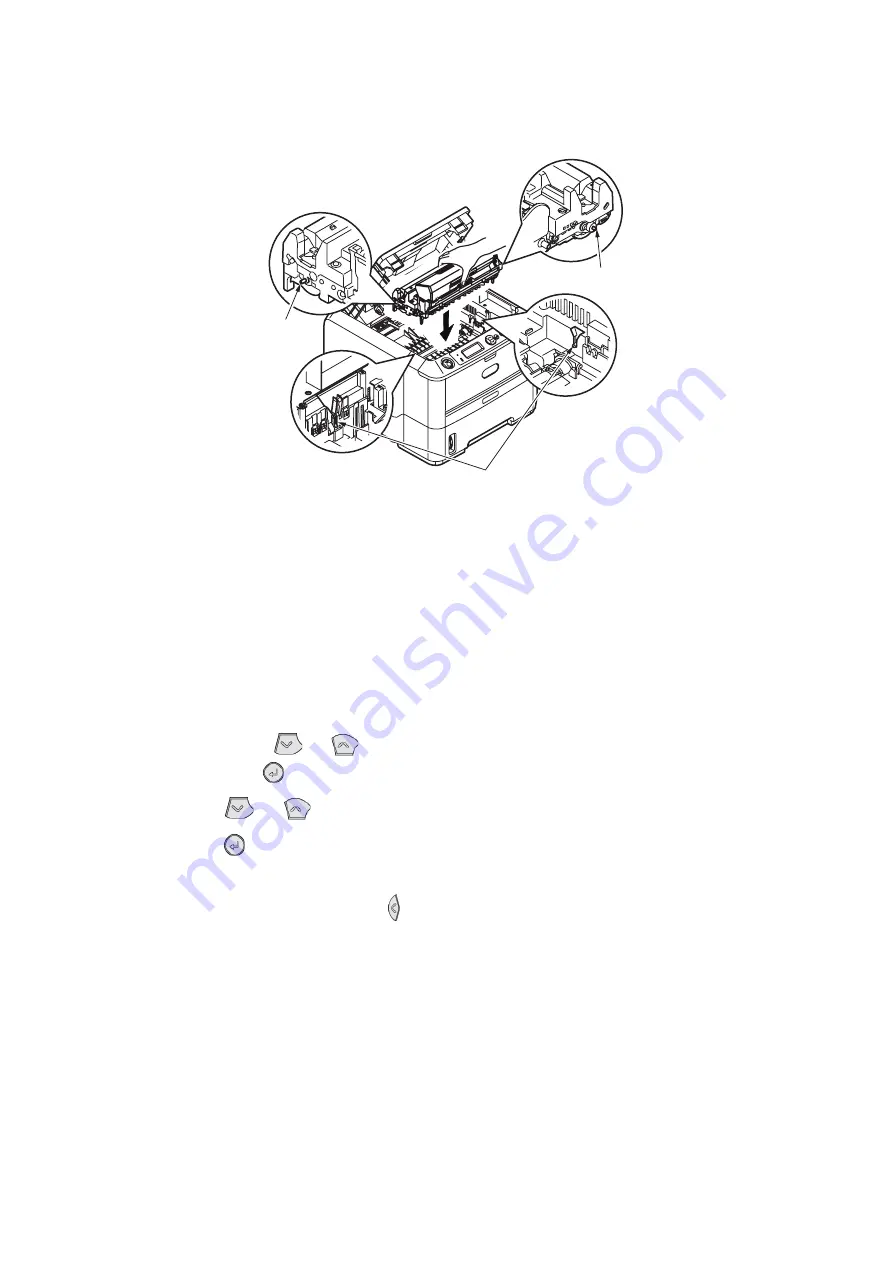
Holding the complete assembly by its top centre, lower it into place in the printer
locating the pegs (1 & 2) at each end into their slots in the sides of the printer cavity
(3).
10.
Gently wipe the LED array surface with a soft tissue.
11.
Close the top cover and press it down to latch it closed.
G
ENERATING
A
CLEANING
PAGE
If the printed page shows signs of fading, streaking or erratic marks, the problem may be
cleared by generating a drum cleaning page as follows.
1.
Open the Multi Purpose Tray and insert a sheet of A4 plain paper between the paper
guides, for loading paper
See “Multi purpose tray” on page 24.
To print from the
Paper Tray, press the Online button when the LCD display prompts you to insert a
sheet of paper in the Paper Tray.
2.
Press the
Menu
or
button repeatedly until
MAINTENANCE MENU
is displayed,
then press the
button.
3.
Press the
or
button until
CLEANING PRINT
is displayed.
4.
Press the
button.
5.
The printer grips the paper and prints a cleaning page.
6.
Press
Cancel
or
Online
or the repeatedly to exit the
MENU
mode. The printer
should now be
ON LINE
.
7.
If subsequent printing appears faded or uneven, try replacing the toner cartridge.
C
LEANING
THE
LED
ARRAY
Clean the LED array whenever a new toner cartridge is installed or if there are faded vertical
areas or light printing down a page.
Wipe the LED array gently with a soft tissue.
3
1
2
Summary of Contents for ES4140dn
Page 1: ...ES4140dn User s Guide...


