background image

7

Check for Proper Installation

1. On the printer control panel, press MENU once 

or twice until INFORMATION MENU appears 
on the display.

2. Press SELECT.

PRINT MENU MAP appears on the display.

3. Press SELECT.

The MenuMap prints.

4. Check the MenuMap printout:

• At the top of the printout you should see 

"HDD:20.00 GB."

• In the right column you should see a new 

menu section entitled DISK 
MAINTENANCE.

5. If you do not see these, remove the control 

board, lift the hard drive handle and check to be 
sure that the hard drive is firmly inserted in the 
connector. Then reinstall the control board and 
print the Menu Map again.

Summary of Contents for C7300

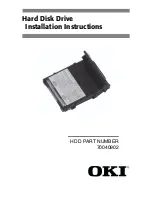
Page 1: ...Hard Disk Drive Installation Instructions HDD PART NUMBER 70040902...

Page 2: ...gnated Tabloid take the larger tabloid and tabloid extra size paper as well 1 Turn off the printer and unplug the power cord 2 Detach the interface cable from the back of the printer 3 Remove and save...

Page 3: ...2 4 Grasp the control board and loosen it by wiggling it back and forth then slide it out of the printer Tabloid Models Letter Legal Models...

Page 4: ...3 Install the Hard Disk Drive HDD 1 Locate the drive connector 1 on the control board 2 Remove the HDD from its shipping package...

Page 5: ...4 3 Lift the handle on the HDD and lower it onto the control board 4 Insert the board firmly into the connector and press down on the handle to lock it in place...

Page 6: ...5 Complete the Installation 1 Align the bottom of the control board with the track in the printer and slide it back into place Letter Legal Models Tabloid Models...

Page 7: ...6 2 Reinstall the screws at the top and bottom of the board 3 Reattach the interface cable then plug the power cord into the power outlet and turn on the printer Letter Legal Models Tabloid Models...

Page 8: ...The MenuMap prints 4 Check the MenuMap printout At the top of the printout you should see HDD 20 00 GB In the right column you should see a new menu section entitled DISK MAINTENANCE 5 If you do not...

Page 9: ...lts depending on the Windows system 3 Click Device Option tab 4 Click Printer Hard Disk to select it then click OK 5 Click OK then close the Printers dialog box Windows Adobe PostScript Driver 1 Click...

Page 10: ...nter Setup Utility 2 Select the appropriate OKI printer 3 Click Show Info 4 Select Installable Options from the drop down list 5 Click Hard Disk to select it then click Apply Changes 6 Close the Print...

Page 11: ...equest or claim for service under this Limited Warranty the original purchaser must return the Oki Data product shipping prepaid in the original shipping container or equivalent to Oki Data or an auth...

Page 12: ...Some states do not allow limitations on how long an implied warranty lasts so the above limitation may not apply to you OKI DATA SHALL NOT BE RESPONSIBLE OR LIABLE FOR ANY SPECIAL INCIDENTAL OR CONSE...

Page 13: ...service information This warranty gives you specific legal rights and you may also have other rights which vary from state to state For the most comprehensive up to date listing of Oki Data authorize...

Page 14: ...Mexico S A de C V Mariano Escobedo No 748 8 Piso Col Anzures e p 11590 Mexico DF Tel 52 55 263 8780 Fax 52 55 250 3501 BRAZIL ___________________________________ Oki Data do Brasil Inform tica Ltda Ru...

Page 15: ......

Page 16: ...Oki Data Americas Inc 2000 Bishops Gate Blvd Mt Laurel NJ 08054 4620 Tel 800 654 3282 Fax 856 222 5320 http www okidata com 58365202...

Reviews: