Riverlea SmartStore SM2020, Assembly Instructions Manual
The Riverlea SmartStore SM2020 is a versatile storage solution designed for modern homes. Our Assembly Instructions Manual provides step-by-step guidance for easy setup. Download this comprehensive manual for free from manualshive.com and effortlessly assemble your SmartStore to organize your belongings with style and convenience.
Share
Download


Reviews:
No comments
Related manuals for SmartStore SM2020

DNS-312H
Brand: D-Link Pages: 10
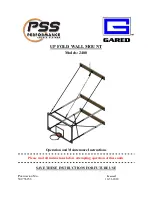
2400
Brand: Gared Pages: 25

DAS-100
Brand: dallmeier Pages: 34

SL532
Brand: VELAMP Pages: 20

Rugged Triple USB 3.0
Brand: LaCie Pages: 2

Rugged Triple USB 3.0
Brand: LaCie Pages: 2

RUGGED MINI
Brand: LaCie Pages: 5

RUGGED BOSS SSD
Brand: LaCie Pages: 60

Minimus
Brand: LaCie Pages: 2

Little Big Disk Quadra
Brand: LaCie Pages: 4

Little Big Disk Quadra
Brand: LaCie Pages: 24

Biggest FW800
Brand: LaCie Pages: 53

Biggest F800
Brand: LaCie Pages: 59

5BIG THUNDERBOLT 2
Brand: LaCie Pages: 54

Starck Desktop Hard Drive
Brand: LaCie Pages: 2

301527
Brand: LaCie Pages: 24

301490
Brand: LaCie Pages: 52

Rugged Hard Disk
Brand: LaCie Pages: 2


