10
Network Connection
Note
: For Mac OS 10.2 or above, and an EtherTalk
interface. The Ethernet cable is not supplied
with the printer. Use an Ethernet cable with
RJ45 connectors at either end.
□
Turn off the printer.
□
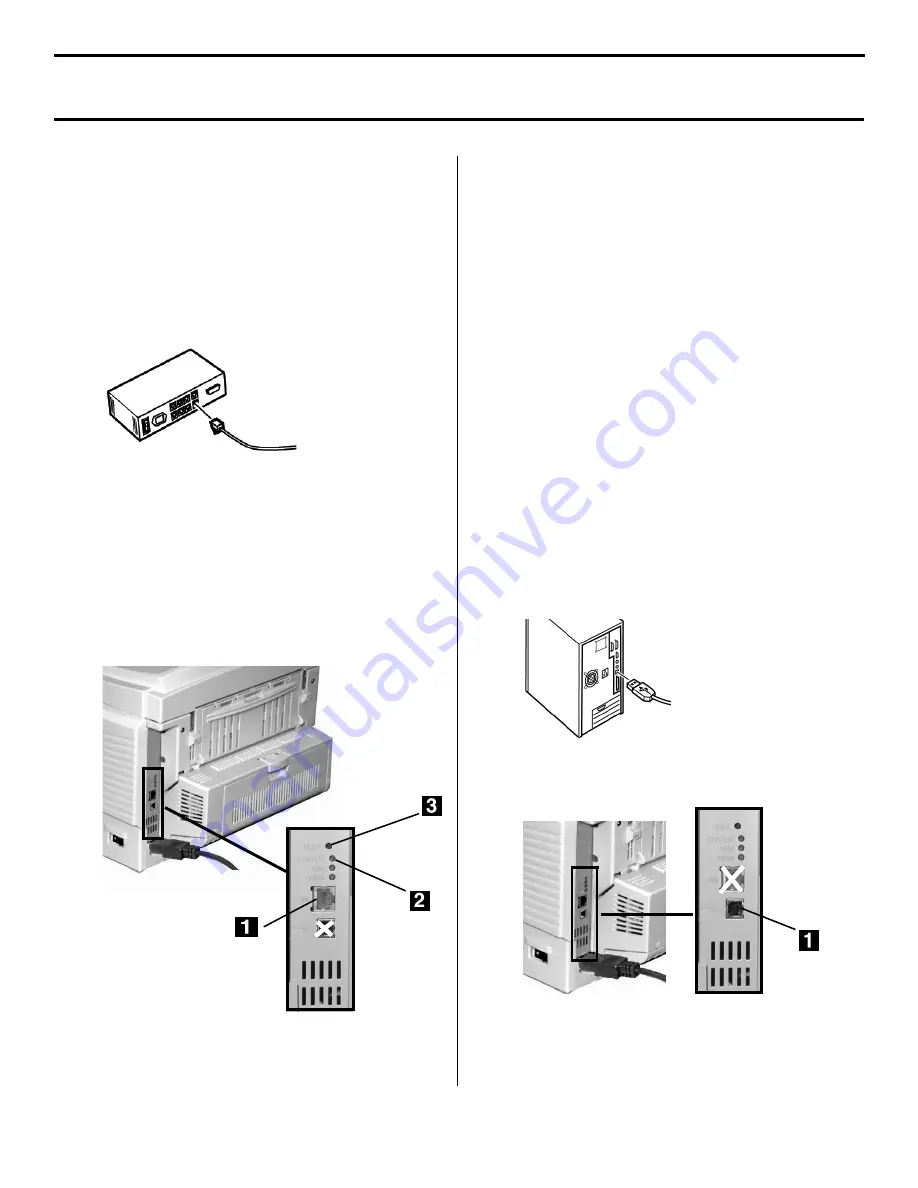
Connect your Ethernet cable to the network
port on the hub or switch.
□
Remove the plastic cap from the Ethernet
port (
1
) on the printer and connect the other
end of the cable to the port.
□
Turn on the printer and wait for the print
server status light (
2
) to stop blinking.
□
Press the Test button (
3
). The Network
Information configuration sheets print. Keep
these sheets handy: they contain information
you need to set up the printer on your
network.
USB Port Connection
Note
: No USB interface cable is supplied with the
printer. Use a cable that is compatible with
USB specification 1.1 or 2.0.
•
Printer operation is not assured if another USB
compatible device is connected concurrently with
it.
•
If a USB hub is used and you encounter problems,
connect the printer directly to the computer.
•
Depending upon the size of the document, if the
memory setting for the print monitor is low, you
may not be able to print in the background. To
correct for this, increase the memory setting for
the print monitor.
•
Depending on the Macintosh model you have, you
may need to install updates to the operating
system in order to use USB: e.g., iMac Update
1.0, iMac Update 1.1, iMac Firmware Update, etc.
For further information, contact Apple Computers.
□
Turn off the computer and the printer.
□
Connect the USB cable to the USB port on the
computer.
□
Connect the other end of the cable to the
black USB Port (
1
)—
not the plugged Ethernet
port
!—on the printer.
Macintosh Installation: Connections


