background image

B6250 User’s Guide> 99
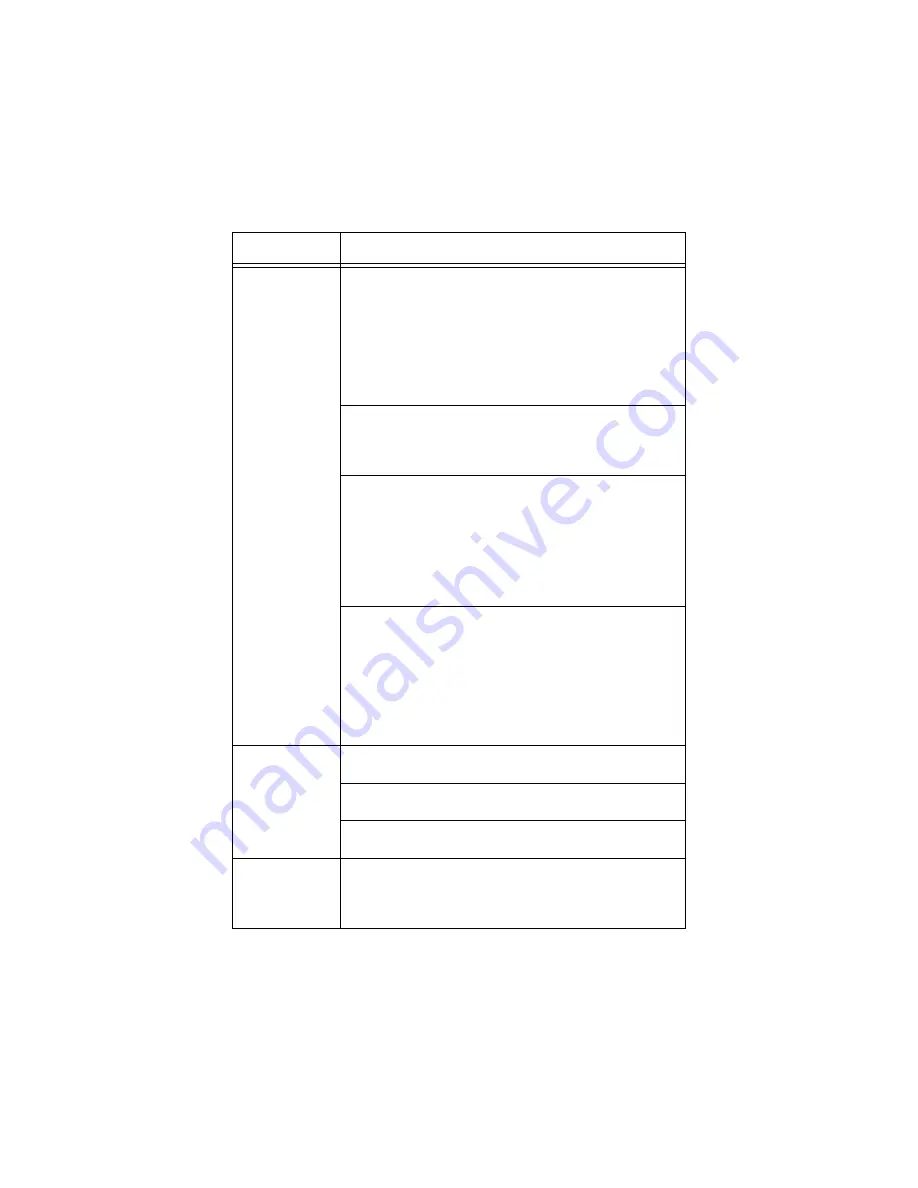
Cannot print. 

Is the light of the <READY> indicator off? If so, this printer is 

off-line or in menu setting mode. Fix the problem according to 

the following display status:
“Off-line” 


Press the <ON LINE> button to exit the off-line mode. 
Others 


Press the <MENU> button to exit the menu setting mode. 

“Main Components and Their Functions” on page 9

Is there a message displayed on the control panel? Follow the 

message to rectify the problem. 

“Message List” on page 108

When a parallel cable is used for connection, are you using a 

computer that supports bi-directional communication? By 

default, the bi-directional communication setting of the 

printer is set to [Enable]. If the computer is not responding to 

bi-directional communication, printing cannot be done. In this 

case, turn the bi-directional communication setting to 

[Disable] on the control panel and then print again. 

“Parallel Menu” on page 69

If insufficient memory, use one of the following methods to 

rectify the problem. 
When the printer driver is set to [1200dpi] on the [Graphics] 

tab, set it to [600dpi]. 
Install the additional memory (optional) to increase the 

memory. 
Reduce the complexity of the print job.
[Print Mode] / [Page Print Mode]: Online Help for the printer 

driver.

Print job sent 

but the light of 

the <READY> 

indicator is not 

blinking or on. 

Is the interface cable disconnected? Switch off the power and 

check the connection of the interface cable. 

Is the interface configured? Check the port status of the 

interface. 

Is the computer environment correctly set up? Check the 

computer environment, such as the printer driver. 

Light of 

<ATTENTION> 

indicator is on. 

Is there an error message displayed on the control panel? 

Check the displayed message and rectify the error. 

“ Message List” (P. 108)

Symptom

Reason/Action

Summary of Contents for B6250dn

Page 1: ......

Page 2: ...essarily constitute endorsement by the manufacturer While all reasonable efforts have been made to make this document as accurate and helpful as possible we make no warranty of any kind expressed or i...

Page 3: ...ademarks of Sun Microsystems Inc in the United States and other countries All product brand names are trademarks or registered trademarks of the respective holders Data Loss in Hard Disk Compact Flash...

Page 4: ...ssumption that you are familiar with the basic knowledge and way of operating your computer environment and the network environment In this manual safety instructions are described with the following...

Page 5: ...rmation on operations or features Refer to Indicates reference sources 3 The following conventions are used in this guide Refer to xxx The cross reference is within this guide Refer to YYYThe cross re...

Page 6: ...f items that may be illegal to copy or print in your country Currency Banknotes and checks Bank and government bonds and securities Passports and identification cards Copyright material or trademarks...

Page 7: ...r 18 Printing on Envelopes 19 Printing on Transparencies 20 Printing on Custom Size Paper Long Paper 22 Print Confidential Document Secure Print 25 Proof Print Print After Checking Printing Result 27...

Page 8: ...en Paper Jams 94 When Problems Occur 98 When the Print Quality is Poor 104 Message List 108 Network Related Troubles 112 Mail Related Troubles 117 Daily Care 118 Replacing the Drum Toner Cartridge 118...

Page 9: ...t the interior of the printer from heating up 4 Paper meter A meter to check the amount of remaining paper Attached to the 550 tray 5 Tray 1 Sets the 150 tray 6 Tray 2 Sets the 550 tray 7 Power switch...

Page 10: ...ing the serial cable No Name Description 1 Offset catch tray optional Allows you to stagger the output position for each print job offset output 2 Cover D optional Open this when paper is jammed insid...

Page 11: ...this when installing optional accessories such as hard disk and additional memory no Name Description 1 Paper stopper Raise this when printing on paper larger than A4 size 2 Drum toner cartridge Conta...

Page 12: ...ATTENTION indicator When the light is on there is a malfunction in the printer 6 On Line button Press to enter the off line status When in the off line status the machine cannot receive data or proces...

Page 13: ...ppears when the machine is printing or waiting for data The following contents are shown on the screen Menu Screen Screen for configuring settings related to the printer This screen appears when you p...

Page 14: ...ng Online will be displayed Important If error message is displayed refer to Message List alphabetical order on page 108 on how to fix it Switching Off the Power Important Do not switch off the printe...

Page 15: ...p mode to a print ready status is about 10 seconds NOTE You can also enable either the low power mode or sleep mode Both low power mode and sleep mode cannot be disabled at the same time The sleep mod...

Page 16: ...the document name that you wish to delete and press the Delete key Checking Status of Print Data Checking in Windows Double click the printer icon on the task bar at the bottom right of the screen Fr...

Page 17: ...settings here they will not be reflected on the printer itself NOTE When using this feature you have to activate the SNMP port default Enable on the printer using the control panel For Windows NT 4 0...

Page 18: ...ay the printer properties dialog box to set the necessary items For details on each item and how to set them refer to the Online Help for the printer driver Important If the paper tray information is...

Page 19: ...t on envelopes is as follows Loading Envelopes You have to close the flaps of the envelopes and load them with the address side facing up in the orientation shown in the diagram below The following ex...

Page 20: ...o print on envelopes display the Tray Output tab and Basic tab This section explains the procedure using WordPad on Windows XP as an example NOTE The way to display the printer properties dialog box d...

Page 21: ...the printer properties dialog box differs according to the application software Refer to the manual of your respective application software Printing transparencies continuously may lead to the output...

Page 22: ...r For details refer to Loading Paper P 40 To load long paper in tray 1 follow the procedure below 1 Pull the paper tray out to its maximum NOTE Pull the extendable part out to its maximum For details...

Page 23: ...used Setting the wrong size for printing will cause the machine failure This is especially true if you configure a bigger size when using a narrow width paper On the printer driver set the custom siz...

Page 24: ...tom size Printing on Custom Size Paper The procedure to print on custom size paper is as follows This section explains the procedure using WordPad on Windows XP as an example NOTE The way to display t...

Page 25: ...omputer send it to the printer for temporary storage and then print the job from the printer control panel When the printing of a Secure Print job is complete the job is automatically deleted Stored J...

Page 26: ...ons tab in the Job Type group select Secure Print 4 In the Job Identification group enter a name at Job Name A job name must be entered The job name will be used at the printer to retreive the job 5 E...

Page 27: ...red then press Select 8 After printing the job is deleted 9 Press Cancel to exit the menu Proof Print Print After Checking Printing Result When the optional hard disk or compact flash has been install...

Page 28: ...f your respective application software 1 From the File menu select Print 2 Select this printer from the drop down list and click Properties NOTE Copies must be set to at least two before Proof Print c...

Page 29: ...Press the SELECT button 6 Press the or button until the required document is displayed and then press the Select button The proof document will print 7 Press the or button to select print or delete t...

Page 30: ...ore printing For Real Time specify the Year Month Day Hour and Minute to start printing 5 In the Job Identification group enter a name at Job Name The default job name is blank if left blank the job m...

Page 31: ...rd disk drive or compact flash is installed You can send a PDF file directly to the printer for printing without using the printer driver As the print data is sent directly to the printer the printing...

Page 32: ...inting PDF File The following specification on the computer is an example of using lpr command to print PDF file NOTE indicates space Example Printing a event pdf file with a printer IP address of 192...

Page 33: ...NOTE Wrong e mail environment settings may cause disruptions in your network Always ask your network administrator to configure e mail environment settings Sending E mails Attachments That Can Be Sent...

Page 34: ...column 3 Send the e mail The printer will print the e mail automatically after receiving it Points to Note When Sending E mails Security Issues E mails are sent via the Internet connecting computers...

Page 35: ...sing a common e mail account shared with other users will result in errors When the internet connection speed is slow it takes time to receive huge data such as image data There are also providers tha...

Page 36: ...d on this printer are as follows When printing on paper that is commonly sold use the types of paper in the following table However it is recommended to use paper in the next category standard paper f...

Page 37: ...vapor For details contact service Standard Paper The following table shows the standard paper for this printer Trays 2 to 4 trays 3 and 4 are optional Standard sizes that can be automatically detecte...

Page 38: ...es XEROX P N 3R2780 XEROX P N JE 001 XEROX P N 3R91334 3M P N CG3300 Transparency Transparency without any white frame Note As output transparencies may stick together remove the transparencies from t...

Page 39: ...paper jams malfunctions or damage to the machine Do not use them Fuji Xerox full color transparencies example V556 V558 V302 Paper exclusively for ink jet printer use Paper that is too thick or thin P...

Page 40: ...er Store paper in the following locations Temperature of 10 30 C with a relative humidity of 30 65 After opening a ream of paper use the original cover sheets to wrap up the paper not used and store i...

Page 41: ...aper tray outwards to unlock them 4 Hold the grip of the paper tray and pull its extendable part to the front until it reaches its maximum 5 Squeeze the length guide and slide it to the desired paper...

Page 42: ...are loaded Configure the paper size when custom size paper is loaded Refer to Paper type and size that can be loaded Usable Paper on page 36 Setting paper size Setting Custom Paper Sizes on page 43 Se...

Page 43: ...ELECT button to print on paper of another type or press CANCEL to cancel the job Refer to Specify Paper Type Online Help for the printer driver Setting Custom Paper Sizes To print on custom size paper...

Page 44: ...ize then press the button Enter values for the paper size to be used by pressing the or button 7 Press the SELECT button 8 Press the CANCEL button to exit the menus Setting Paper Types Settings on the...

Page 45: ...ss the button 4 Press the or button until the desired media type is displayed then press the SELECT button 5 Press the CANCEL button to exit the menu Plain Post Card Colored Other Card Stock Letter He...

Page 46: ...contains the display LCD indicators and push buttons that allow you to view and change the printer settings Name Description MENU button Press to move to the menu operation Once in the menu operation...

Page 47: ...ta or process printing Press again to exit the off line status and enter the on line status where the machine can receive data from the computer CANCEL button Press to cancel printing Press to exit th...

Page 48: ...u system At that point the first line of the display lists the active menu You can change the active menu by pressing the or button or by pressing the MENU button If you press the button repeatedly th...

Page 49: ...lp you to navigate through the menus 1 Press the MENU button on the control panel 2 The LCD will display Print Jobs Menu on the first line of the display 3 Press the button to display Information Menu...

Page 50: ...u Information Menu Print Menu Media Menu Sys Config Menu PCL Emulation FX Emulation Parallel Menu Serial Menu USB Menu Network Menu Sys Adjust Menu Date Time Menu Maintenance Menu Usage Menu Flash Men...

Page 51: ...r is displayed press the button to move to the next digit position 6 Repeat steps 4 5 until all four numbers are correct 7 Press the SELECT button to enter the submenu 8 All the jobs associated with y...

Page 52: ...B6250 User s Guide 52 Submenu Default Setting Available Settings Procedure for Changing Setting Enter Password User Selected User Selected See Steps Above...

Page 53: ...CT button to print the displayed submenu Use the procedures in the following table to access and change the printer information settings Submenus Default Setting Available Settings Procedure for Chang...

Page 54: ...on allows you to print a demo page Press SELECT to print a Demo Page Print Error Log This function allows you to print the error log Press SELECT to print the Error Log Submenus Default Setting Availa...

Page 55: ...the procedures in the following table to access and change the print menu settings Submenus Default Setting Available Settings Procedure for Changing Setting Copies This submenu allows you to change t...

Page 56: ...ay 1 Tray 2 Tray 3 Tray 4 Press or buttons to scroll through the available trays Press SELECT to save the tray Resolution This submenu allows you to set the resolution dpi 600 dpi 600 dpi 1200 dpi Pre...

Page 57: ...buttons to toggle between Portrait and Landscape Press SELECT to save this setting Lines Per Page 60 5 to 128 Press or buttons to increase or decrease the setting Press SELECT to save this setting Sub...

Page 58: ...the following table to access and change the printer media settings Submenus Default Setting Available Settings Procedure for Changing Setting Tray1 Auto Sense This submenu allows you to set the Paper...

Page 59: ...e selected size Tray2 Paper size This submenu allows you to set the media size Tray 2 Auto Sense must be off Letter US else A4 Letter B5 A5 A6 Statement Executive C5 Envelope DL Envelope Com10 Envelop...

Page 60: ...ss or button to scroll through the available sizes Press SELECT to set a paper size Tray3 Media Type This submenu allows you to set the media type Plain Plain Transparency Prepunched Letterhead Colore...

Page 61: ...or button to scroll through the available media types Press SELECT to set a type Unit Of Measure This menu is used to set the unit of measurement for the Custom Paper Size feature Inches Default If U...

Page 62: ...ress or button to select the X dimension Press SELECT to set dimension Tray2 Y Dimen Sets the paper length 11 00 in 279 4mm 5 83 14 00 in 148 255 6mm Press or button to select the Y dimension Press SE...

Page 63: ...ugh the submenus 5 Press the button to enter the submenu Use the procedures in the following table to access and change the Sys Config Menu settings Submenus Default Setting Available Settings Procedu...

Page 64: ...ng the last digit to save this setting Toner Low This submenu sets the printer to either stop or continue printing when it goes into a low toner condition Continue Continue Stop Press or buttons to to...

Page 65: ...vailable Settings Procedure for Changing Setting Font Source This submenu allows you to choose a font source Internal Internal Compact Flash User Flash Disk Drive Press or buttons to scroll through th...

Page 66: ...CR Function This submenu allows you to define the action prompted by a carriage return a carriage return equals either a carriage return alone or a carriage return and a line feed together CR CR CR LF...

Page 67: ...access and change the FX Emulation settings Submenus Default Setting Available Settings Procedure for Changing Setting Character Pitch This submenu allows you to choose the Characters Per Inch 10 cpi...

Page 68: ...Top Position This submenu allows you to shift the image down in 0 1 inch increments 0 inch 0 inch 0 1 inch 0 2 inch 1 0 inch Press or buttons to scroll through the selections Press SELECT to save the...

Page 69: ...se the procedures in the following table to access and change the Parallel Menu settings Submenus Default Setting Available Settings Procedure for Changing Setting Parallel This submenu allows you to...

Page 70: ...se the procedures in the following table to access and change the Serial Menu settings Submenus Default Setting Available Settings Procedure for Changing Setting Serial Enable Enable Disable Press or...

Page 71: ...ss or buttons to toggle between Off and On Press SELECT to save the selection RTS Ready Busy Off Off On Press or buttons to toggle between Off and On Press SELECT to save the selection RTS On1 Off1 Of...

Page 72: ...ns to toggle between High and Low Press SELECT to save the selection RTS Polarity High High Low Press or buttons to toggle between High and Low Press SELECT to save the selection Robust XON Off Off On...

Page 73: ...buttons to move through the submenus 5 Press the button to enter the submenu Use the procedures in the following table to access and change the USB Menu settings Submenus Default Setting Available Se...

Page 74: ...s 5 Press the button to enter the submenu Use the procedures in the following table to access and change the Network Menu settings Submenus Default Setting Available Settings Procedure for Changing Se...

Page 75: ...ber Press to save the current set of numbers and move to the next set Repeat the procedure for each set of numbers When the last set of numbers is set press SELECT to save the IP address Gateway Addre...

Page 76: ...ble Press SELECT to save the selection Hub Link Setting Auto Negotiate Auto Negotiate 10 Base T Full 10 Base T Half 100 Base T Full 100 Base T Half Press or buttons to scroll through the selections Pr...

Page 77: ...Default Setting Available Settings Procedure for Changing Setting Tray1 X Adjust This submenu fine adjusts the registration in the X axis 8 0 to 15 Press increase number to move the image to the righ...

Page 78: ...sts the registration in the Y axis 8 0 to 15 Press increase number to move the image to the down or press decrease number to move the image to the up Press SELECT to save the selection Tray4 X Adjust...

Page 79: ...he size selected Disable Enable Disable Press or to toggle between Enable and Disable Press SELECT to save this setting PCL Tray1 ID PCL escape sequence parameter value 0001 0000 to 9999 Press or butt...

Page 80: ...it in the selected position Press the to select the digit and move to the next position Press SELECT after changing the last digit to save this setting PCL Auto ID PCL escape sequence parameter value...

Page 81: ...Menu settings Submenus Default Setting Available Settings Procedure for Changing Setting Month This submenu allows you to set the current month Current month January thru December Press or to scroll...

Page 82: ...onds Press SELECT to choose and set the second GMT Offset Hours This submenu allows you to set time for a different time zone in hours 0 12 through 12 Press or to scroll through the offset selections...

Page 83: ...enu 4 Press the or buttons to move through the submenus 5 Press the button to enter the submenu Use the procedures in the following table to access and change the Maintenance Menu settings Submenus De...

Page 84: ...procedures in the following table to display the Usage Menu settings Submenus Example Available Settings Procedure for Changing Setting Page Count 123456 Press SELECT to display the total prints prod...

Page 85: ...edure for Changing Setting Data Security When set to ON as data is deleted the location where the data was stored is overwritten by random data When set to OFF the data is deleted Press or to toggle b...

Page 86: ...This selection will reformat the FLASH DIMM Press SELECT to reformat the FLASH DIMM Flash Summary This selection will print a page containing information about the installed FLASH DIMM including a lis...

Page 87: ...e for Changing Setting Data Security When set to ON as data is deleted the location where the data was stored is overwritten by random data When set to OFF the data is deleted Press or to toggle betwe...

Page 88: ...his selection will reformat the hard disk Press SELECT to reformat the hard disk Disk Summary This selection will print a page containing information about the installed hard disk including a list of...

Page 89: ...ions Submenus Procedure for Changing Setting Data Security When set to ON as data is deleted the location where the data was stored is overwritten by random data When set to OFF the data is deleted Pr...

Page 90: ...selection will reformat the Compact Flash Press SELECT to reformat the Compact Flash CFlash Summary This selection will print a page containing information about the installed compact flash including...

Page 91: ...ob Accounting Menu 4 Press the or buttons to move through the submenus 5 Press the button to enter a submenu Use the procedures in the following table to access and change the Job Accounting settings...

Page 92: ...enu Use the procedures in the following table to access and change the spooling settings SubMenu Default Settings Available Settings Procedure for Changing Setting Start Spooling The spooling feature...

Page 93: ...ct Flash Press to enter the location Press or to select the file Press SELECT to delete the file Destination The spooling feature allows print jobs to be automatically spooled to the Flash memory or H...

Page 94: ...Following the message on the control panel open the cover and remove the jammed paper If paper is torn check for any remaining torn pieces of paper Cover A When the optional offset catch tray is insta...

Page 95: ...E When the optional offset catch tray is installed close cover A first before returning the tray to its original position If you continue to print with the offset catch tray folded this may cause a pa...

Page 96: ...the paper trays completely back into the printer 2 Open and close cover A Doing this will clear the error message Cover B Remove the rear tray when opening the back cover Raise the lever as shown in...

Page 97: ...B6250 User s Guide 97 Cover C Duplex unit Remove the rear tray when opening the back cover Push up the lever shown in the diagram to open the cover Cover D Offset catch tray...

Page 98: ...sed may be discarded Refer to Information Menu on page 53 on how to print the Error Log Limitations of the printer and incorrect settings at the printer computer and server corresponding to your netwo...

Page 99: ...n the bi directional communication setting to Disable on the control panel and then print again Parallel Menu on page 69 If insufficient memory use one of the following methods to rectify the problem...

Page 100: ...n Download the necessary fonts when using PostScript The printout is different from what is displayed on the screen Did you change the TrueType font settings to printer fonts Change to TrueType font p...

Page 101: ...ng the setting to 600dpi will shorten the print time Online Help for the printer driver Printing with TrueType fonts may take up printing time Change the printing method for TrueType fonts in Specify...

Page 102: ...ray set correctly Push the paper tray completely into the printer Is the printer placed on a flat location Place the printer on a stable surface Setup Guide Safety Notes Are the paper tray guides set...

Page 103: ...original positions Strange noise Is the printer placed on a flat location Place the printer on a stable surface Setup Guide Safety Notes Is cover A open Close cover A securely Is the paper tray set co...

Page 104: ...rtridge is defective damaged or there is no more toner inside the cartridge Replace with a new drum toner cartridge Replacing the Drum Toner Cartridge P 118 The Toner Saving feature is on Uncheck the...

Page 105: ...es when rubbed with your finger The toner is not fixed on the paper Paper is smeared with toner The paper loaded in the paper tray does not match the paper type set on the control panel Set the approp...

Page 106: ...is not suitable Load the correct type of paper Usable Paper P 36 Text is blurred The paper used is not suitable Load the correct type of paper Usable Paper P 36 The paper is damp Replace with paper f...

Page 107: ...he correct type of paper Usable Paper P 36 Check that the paper type on the printer driver or the control panel is correctly set Setting Paper Types P 44 The Draft Mode feature is turned on and the re...

Page 108: ...Bad PORT Cmd Format error on PORT command Bad Target Str TARGET string format error Bad TEntry CMD Unrecognized Target Entry command Call Service Help message used for service type errors Cancel Job C...

Page 109: ...ng attempted format of flash Formatting Status display for file status Fuser Failure Error message for Fuser Failure ID Mismatch Displayed for OEM ID Mismatch on EP Cartridge Initializing Displayed du...

Page 110: ...isabled Panel Enabled Used when panel is being Enabled Panel Locked Message flashed when user requests panel function that has been disabled Paper Low Tray 1 Tray 1 is low on paper Paper Low Tray 2 Tr...

Page 111: ...g message displayed when Tray 1 is missing Tray 2 Missing Warning message displayed when Tray 2 is missing Tray 3 Missing Warning message displayed when Tray 3 is missing Tray 4 Missing Warning messag...

Page 112: ...n the window displayed by clicking Start Settings Printers Cause Verification Action The printer and the computer are connected to different networks Check with your network system administrator to ve...

Page 113: ...to print NetworkError is displayed None Printing will be resumed automatically Printing files cannot be spooled due to insufficient disk capacity of the computer Unable to print SpoolError is displaye...

Page 114: ...f LPD Spool and compare it with the print data which was sent in the single print instruction 1 If a single file of print data has exceeded the upper limit of the memory capacity divide the file into...

Page 115: ...roughout the Web browser Wait for a while as instructed If the problem persists refresh the Web browser If nothing happens check if the printer is working properly The Refresh button is not working Ar...

Page 116: ...t button prompts messages such as no data or the server has returned invalid or unrecognizable response Are the user name and password correct Enter the correct user name and password Switch off and t...

Page 117: ...network administrator During E mail printing the attached PDF file was not printed If the memory capacity is insufficient it may not be printed If you print big attachments frequently we recommend ad...

Page 118: ...h as the print contents paper size paper type environment used and the frequency of switching on off the power of the machine If you continue to print with a drum toner cartridge whose replacement is...

Page 119: ...touch the surface of the photosensitive drum Do not let the drum toner cartridge stand or place it upside down The drum might be damaged A drum shutter protects the photosensitive drum from light Do...

Page 120: ...ting noise or the interior of the cartridge may be damaged during operation Do not touch the surface of the photosensitive drum 4 Place the drum toner cartridge on a flat surface and pull out the seal...

Page 121: ...ettings List Press Info Prints status of the printer such as hardware configuration and network information Print this report to check whether optional accessories have been correctly installed Print...

Page 122: ...Use the following procedure to enter the Job Accounting Menu and print the summary 1 Press the MENU button on the control panel 2 Press the button until the text Job Accounting is shown on the first l...

Page 123: ...Computer When the printer is installed in a TCP IP environment you can check printer status and configure settings using a web browser on a network computer You can also check the remaining volume of...

Page 124: ...crosoft Windows Server 2003 cluster and virtual servers Microsoft Windows XP Professional Microsoft Windows XP Home Edition Mac OS 9 10 or later Browsers Netscape Internet Explorer Opera Firefox Web B...

Page 125: ...ns of stored pages either the setting that displays it or the setting that checks it every time Internet Explorer starts is selected Setting the Printer To use Printer Web Page the IP address of this...

Page 126: ...Edit button 4 Set the IP address permitted for TCP IP connection in Permitted IP Address 5 Set the address mask in IP Mask corresponding to the registered IP address in Permitted IP Address For exampl...

Page 127: ...ment Register user account Setting the E mail Environment at This Printer Activate Printer Web Page and set Port Status Machine E Mail Address TCP IP environment and mail server Configure the followin...

Page 128: ...ion Mail Notice Service Select Enable Network General Settings Administrator E mail Address recommended setting Machine E mail Address For details refer to Environment Settings for E mail Printing on...

Page 129: ...d Pages This section explains how to check the total number of printed pages Checking Total Printed Pages on Meter The total number of printed pages for different meters can be checked on the display...

Page 130: ...n the exterior of the printer about once a month Wipe the parts with a wet but well wrung soft cloth Then wipe with another dry soft cloth For stubborn stains moisten a soft cloth with a small amount...

Page 131: ...roller do not try to remove it bym yourself to avoid injuries or burns Switch off the machine immediately and contact service Remove any remaining pieces of paper Remove any dust or stains with a cle...

Page 132: ...d roller C Tray module one location 3 Even without uninstalling the tray module you can clean the feed roller after pulling out the paper tray D Paper tray one location 4 Pull out the paper tray and c...

Page 133: ...iden the tab on the feed roll to loosen it 2 and then slowly remove the feed roll from the shaft of the paper tray 3 3 Wipe the rubber parts with a wet but well wrung soft cloth 4 Turn the short tab o...

Page 134: ...r weighs 18 8 kg When moving the equipment make sure that there are two or more persons carrying it When lifting the machine be sure to observe the following points failure to do so may cause the mach...

Page 135: ...apped and away from humidity and dirt 5 Push the paper tray completely into the printer 6 Open cover A Important Do not touch any parts inside the printer 7 Hold the drum toner cartridge by the grip a...

Page 136: ...PANISH OG GERMAN 1S SPANISH 90D ISO DUTCH 0E ROMAN EXT 91S ISO SWEDISH 1 92S ISO SWEDISH 2 93S ISO SWEDISH 3 2038Z IBM 437 2039Z IBM 850 2037Z IBM 860 2036Z IBM 863 2035Z IBM 865 8Q PC SET 1 9Q PC EXT...

Reviews: