5
Operating Instructions and Parts Manual
24843
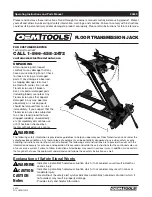
FLOOR TRANSMISSION JACK
11. Hook the chain on the open bracket, wrap the
Chain securely around the transmission, and hook
the chain hook through the other end. Tighten the
Chain Hook securely to tighten the chain.
12. Once it is securely fastened, release the bolts
holding the transmission in place.
13. Make sure the area is clear of people and tools,
and verify that the transmission is securely held
in place. Then, slowly open the Release Valve to
lower the Transmission Jack.
14. Move the Transmission Jack from under the
vehicle and perform your desired maintenance.
15. To re-mount the transmission, reverse this
procedure.
Warning! The Jack is designed to lift loads
only for short periods of time. Do not use to
suspend a load for more than 30 minutes at a
time.
TRANSMISSION INSTALLATION
1. Move the Transmission Jack so that the
transmission is lined up properly with its
connection points.
2. Close the Release Valve.
3. Pump the Handle to gradually raise the
Transmission Jack, while guiding it into place.
4. Secure the transmission into place using its
hardware.
5. Double-check to make sure the transmission is
securely installed.
6. Disconnect the Chain and remove it.
7. Clear the area near the Transmission Jack, and
slowly open the Release Valve to lower the Jack.
8. Move the Transmission Jack clear of the vehicle.
The manufacturer and/or distributor have provided the
parts list and assembly diagram in this manual as a
reference tool only. Neither the manufacturer nor dis-
tributor makes any representation or warranty of any
kind to the buyer that he or she is qualified to make
any repairs to the product, or that he or she is qualified
to replace any parts of the product. In fact, the manu-
facturer and/or distributor expressly states that all
repairs and parts replacements should be undertaken
by certified and licensed technicians, and not by the
buyer. The buyer assumes all risk and liability aris-
ing out of his or her repairs to the original product or
replacement parts thereto, or arising out of his or her
installation of replacement parts thereto.
MAINTENANCE
Important: Use only good grade hydraulic jack oil.
Avoid mixing different types of fluid and NEVER
use brake fluid, turbine oil, transmission fluid,
motor oil or glycerin. Improper fluid can cause
premature failure of the jack and the potential for
sudden and immediate loss of load.
Adding Oil
1. With saddle fully lowered, set jack in its upright,
level position. Remove oil filler plug.
2. Check hydraulic oil level and fill to 1/4” below the
fill port as needed.
Changing Oil
For best performance and longest life, replace the
complete fluid supply at least once per year.
1. With saddle fully lowered, remove oil filler plug.
2. Lay the jack on its side and drain the fluid into a
suitable container.
Note. Dispose of hydraulic fluid in accordance with
local regulations.
3. Set jack in its level position. Fill until oil is level with
the oil filler hole, reinstall oil filler plug.
Lubrication
A periodic coating of light lubricating oil to pivot
points, axles and hinges will help to prevent rust and
assure that casters and pump assemblies move freely.
Cleaning
Periodically check the pump piston and ram for signs
of rust or corrosion. Clean as needed and wipe with an
oily cloth.
Note: Never use sandpaper or abrasive material on
these surfaces!
Storage
When not in use, store the jack with saddle fully
lowered.
Always store the Jack in a well-protected area where
it will not be exposed to inclement weather, corrosive
vapors, abrasive dust, or any other harmful elements.


