


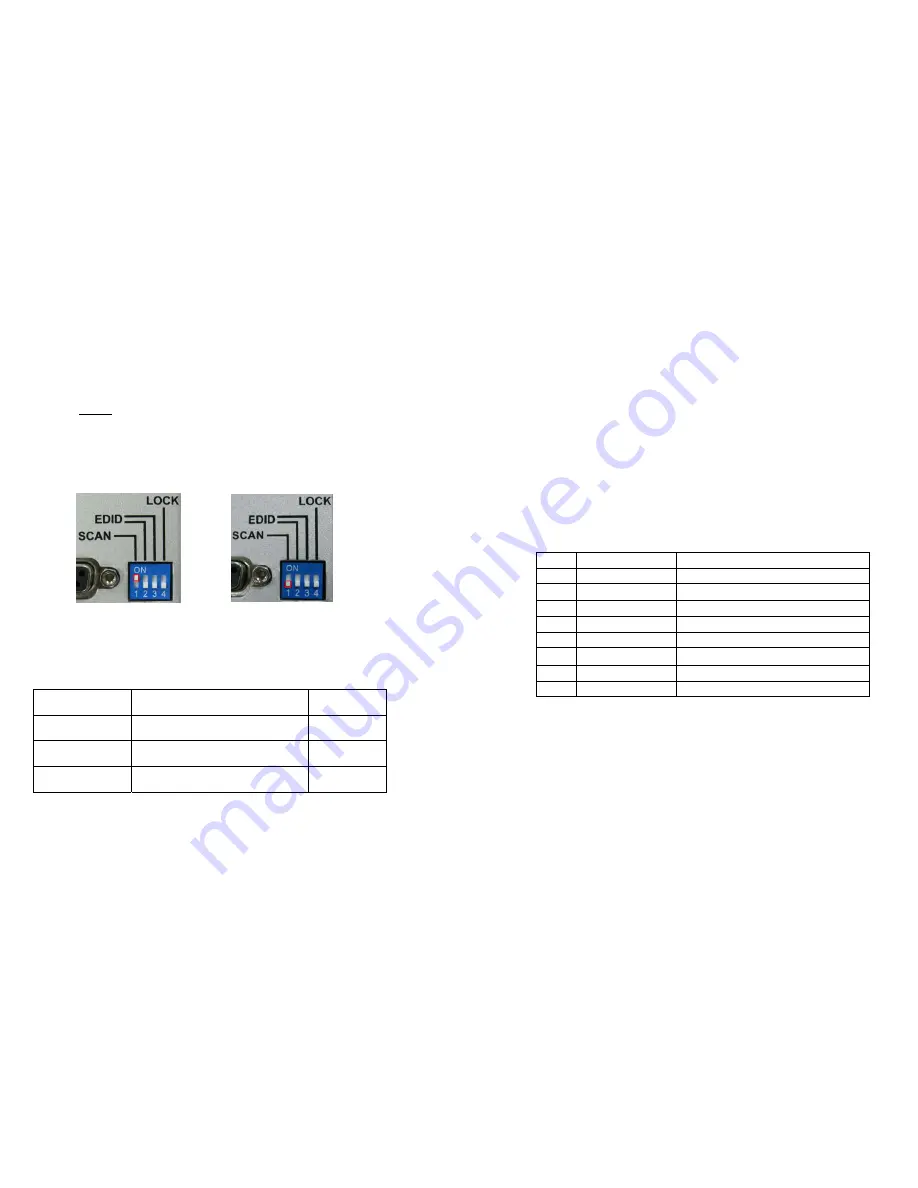
Configuring Smart Scan
TM
:
The Smart Scan is disabled before shipment. It is recommended
to leave Smart Scan disabled in most applications.
To enable the Smart Scan
TM
1) Set the Configuration switch #1 to the up position.
2) Re-power the matrix.
To disable Smart Scan
TM
1) Set the Configuration switch #1 to the down position.
2) Re-power the matrix.
.
Short Cuts:
The Octava 4x2 HDMI Matrix Switch offers several “short cuts”
with the remote control for the most common scenarios.
Number of HDMI
Sources ON
Short Cut
How
1
Switch picture between Display A
and B.
Press A or B
2
Swap the 2 HD video sources
between Display A and B.
Press + or -
3-4
Cycle thru all the HD picture
combinations on the display(s)
Press + or
Press -
RS232 Controls:
The Octava HDMI Distribution Amp can be easily integrated
with 3
rd
Party control systems via RS232 control. The following
shows the control protocol:
Baud rate=9600
Data bits=8
Parity check=None
Stop bits=1
Flow Control=None
Protocol:
<STX>Command to Execute<ETX>
Basic controls
Note
<STX> denotes Start of Text (0x2)
<ETX> denotes End of Text (0x3)
Input
ASCII Function
Selection
1 <STX>001<ETX>
Port
Status
2
<STX>2XX<ETX>
Source display switching(See Page 9)
3
<STX>003<ETX>
Turn ON LED
4
<STX>004<ETX>
Turn OFF LED
5
<STX>005<ETX>
Turn ON Power
6
<STX>006<ETX>
Turn OFF Power
7
<STX>007<ETX>
Turn ON Smart Scan
8
<STX>008<ETX>
Turn OFF Smart Scan
7
8


