6
2. Set-up
To use the printer as a network printer, it is necessary to set an IP
address for the printer.
Notes
• The IP address that should be registered here will differ depending
upon your network environment. Check with your network
administrator BEFORE performing this setting.
• If you are using a DHCP server to automatically configure the IP
address, this setting will not be necessary because DHCP server
configuration is already enabled as the factory default setting.
* To cancel the setting midway through it, press the Stop/Clear key.
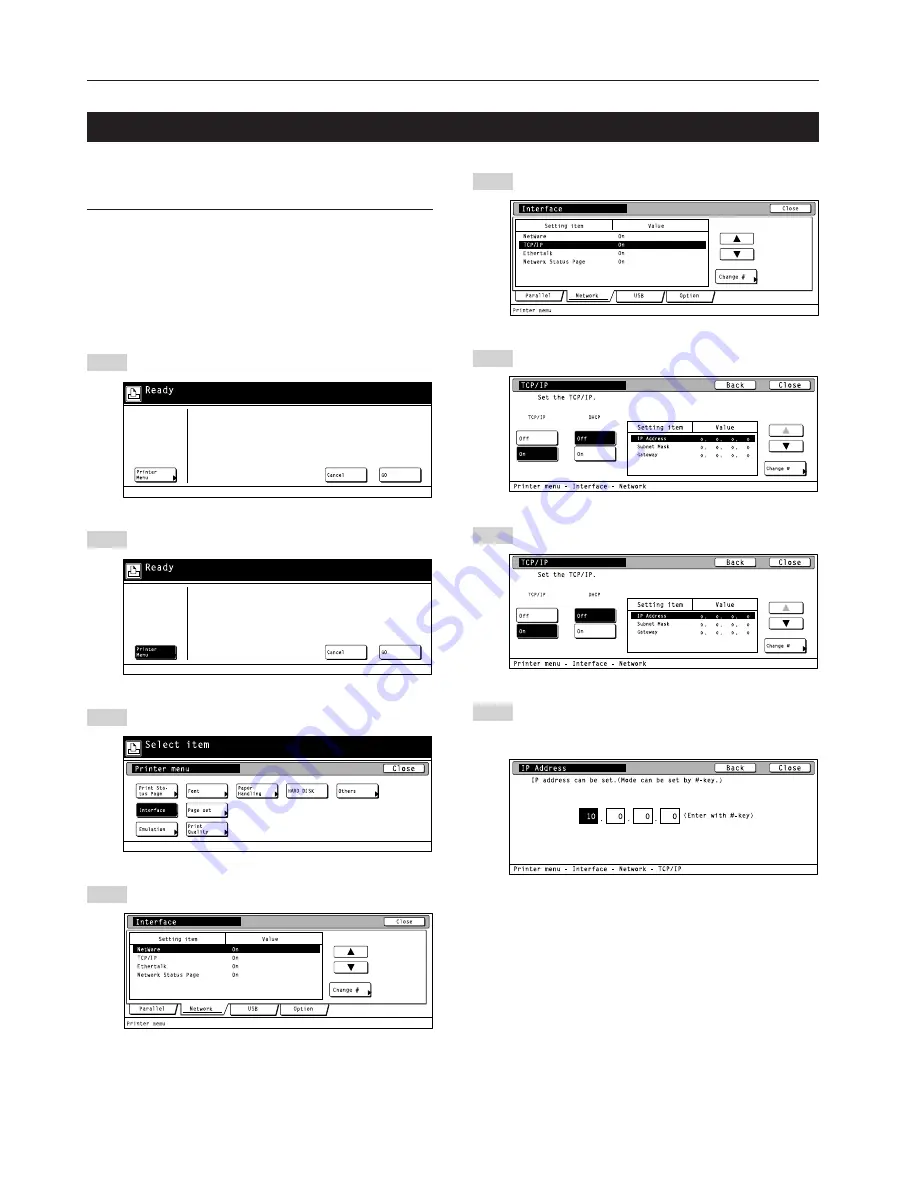
Press the Printer key. The printer will switch to the printer
mode.
Touch the “Printer Menu” key.
Touch the “Interface” key.
Touch the “Network” tab key.
1
2
3
4
5
6
7
8
2-4 Network (TCP/IP) settings
Use the “
▲
” and “
▼
” cursor keys to select “TCP/IP” and
then touch the “Change” key.
Select “On” under the “TCP/IP” setting and “Off” under the
“DHCP” setting.
Use the “
▲
” and “
▼
” cursor keys to select “IP Address” and
then touch the “Change” key.
Use the numeric keys to input the address. Input the first
block of 3 digits of the address in the highlighted area.
• Press the sharp (#) key to set the address after inputting
each block of 3 digits.
Summary of Contents for OP1030
Page 2: ......
Page 21: ...MEMO ...
Page 22: ...W ...
Page 23: ......
Page 24: ...2003 9 3H880020A ...


