


CONNECT VIA WIRELESS CONNECTION
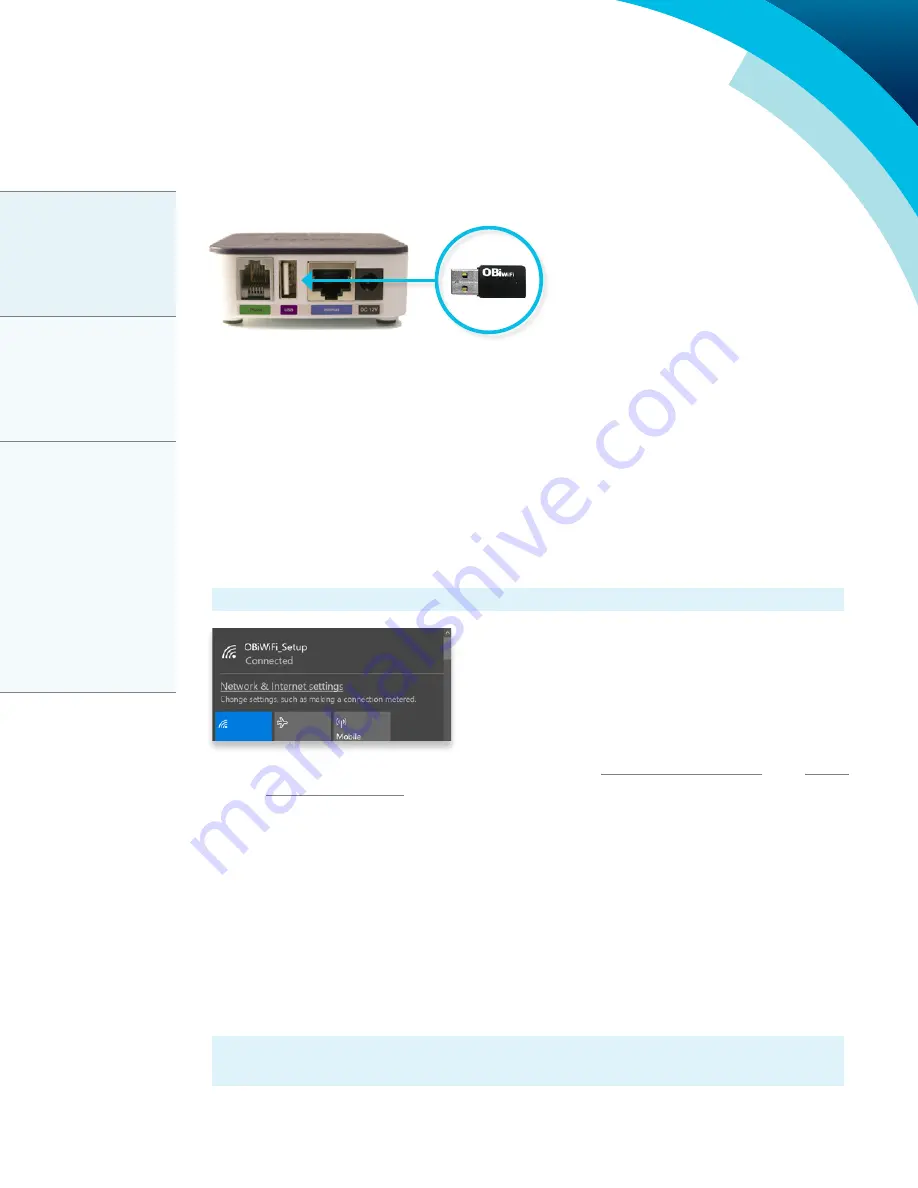
1. Plug the OBiWiFi USB dongle to the OBi300 ATA USB port.
2. Check if the OBiWiFi USB dongle has a blinking BLUE light. The OBiWiFi USB dongle
MUST show a blinking blue light to proceed with the setup. If you do not see a blinking
blue light, please do the following:
i. Unplug and reinsert the OBiWiFi USB dongle.
ii. Restart the OBi300 ATA.
If you still do not see a blinking blue light on the OBiWiFi USB dongle, please open a support
ticket through your AccountView portal.
3. From a WiFi enabled device (e.g., laptop, tablet, or smart phone), open network settings
and connect to the WiFi network called OBiWiFi_Setup.
Note: If you do not see the network, dial *27 on a phone connected to the OBi300 ATA.
4. Wait 30 seconds. Open a browser window and visit http://192.168.10.1/wifi or try http://
5. When prompted, enter the default username and password.
The default username is: admin
The default password is: admin1
6. Select your WiFi network name (SSID) from the dropdown list and enter your WiFi
network password. Leave the security mode as Auto; the OBi300 ATA will automatically
detect this setting.
7. Click Connect to complete the setup. If the SSID is not on the dropdown list, choose Other
Network, and enter the SSID of your wireless router.
8. Allow 30 seconds for the OBiWiFi USB adapter to connect to your wireless network. When
successful, the OBi300 ATA’s power LED should turn from blinking green to solid green.
Note: You can also verify if the OBiWiFi USB dongle is working properly by checking if the
OBi300 ATA has acquired a valid IP address (dial ***1 to listen to the IP address).
OBi300 Adapter Setup Guide
Page 2 - Version 1.0
Updated 09/06/18
Step 2
Setup Your ONEplace
Voicemail Password
and PIN
Step 3
Set Your Emergency
Response e911
Location
Step 4
Test Your Line
Step 1
Connect the OBi300
ATA to the Internet


