background image

GB 9

Adjusting the backrest angle 

The backrest angle is adjustable and may be adjusted during use.

1. Relieve the tension on the backrest by reducing the pressure on it

a little. Move the red control bracket under the seat upwards.

2. Set the desired backrest angle.

3. Release the red control bracket. When tension is placed on the

backrest a clicking sound will be heard.

Tips:

• Select a larger backrest angle in places with

a high rolling resistance, this makes riding

easier.

• When ascending a slope, select a smaller

backrest angle.

RCA-Seat System

Setting the seat height

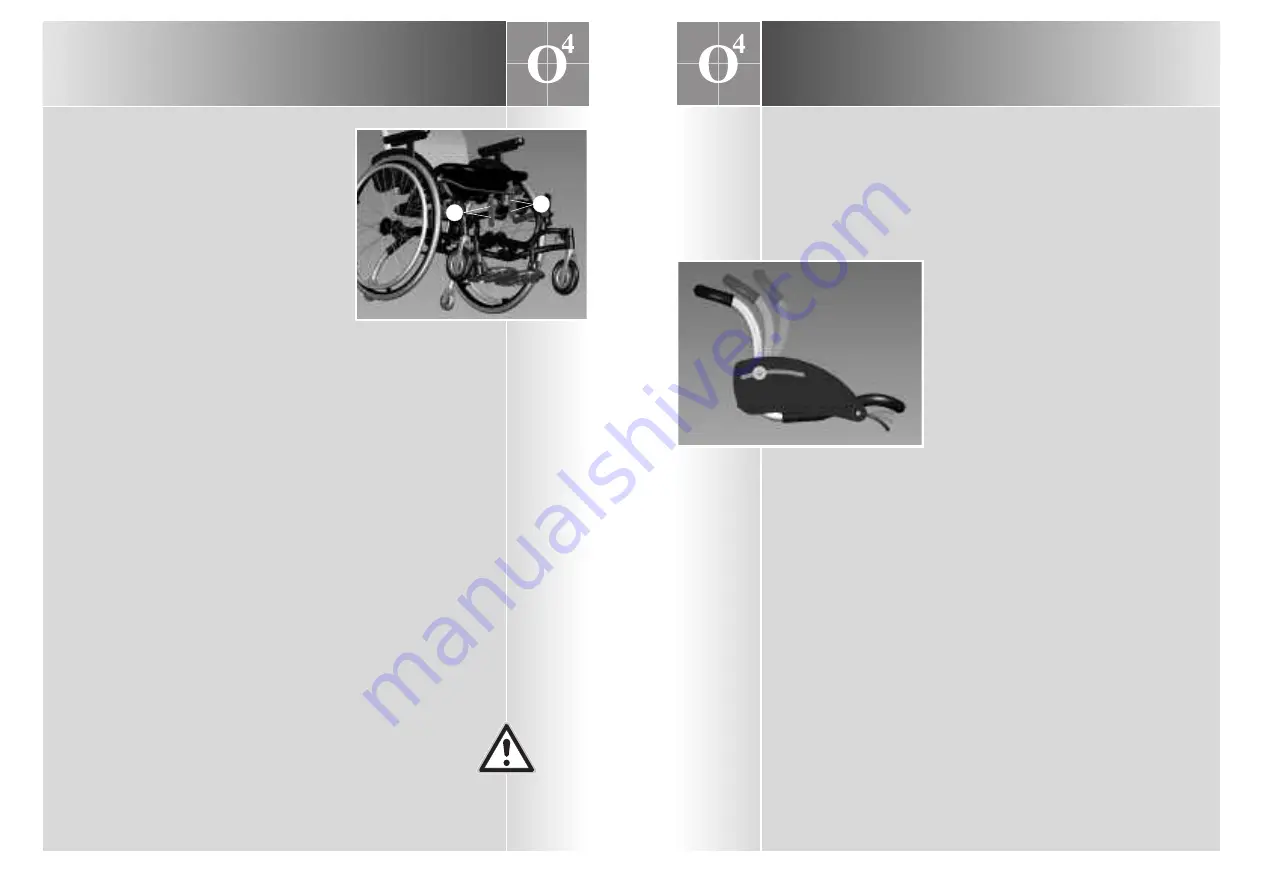
1. Loosen the Allen screws (A and B) a little on

both sides. 

First adjust the height of the front.

2. Remove the Allen screws B on both sides.

3. Set the desired seat height (front).

4. Insert and hand-tighten the Allen screws B 

on both sides.

Then adjust the height of the back.

5. Repeat steps 2 to 4, but for the Allen 

screws A on both sides.

6. Finally, fully tighten all the screws.

Setting the sitting angle

You can set the sitting angle to various positions.

1. Loosen the Allen screws (A and B) a little on both sides.

2. If the seat height is set correctly at the front, 

remove Allen screws A. If you want to change the seat height at the

front, remove Allen screws B.

3. Set the desired sitting angle.

4. Place and insert the Allen screws.

If necessary, adjust the wheel balance again.*

5. Finally, fully tighten all the screws.

Setting the sitting angle moves the centre of gravity with respect to

the rear wheels.

*Wheel balance 

• Loosen the Allen screws (A and B) on both sides.

• Slide the RCA Seat System forwards (more stable) or backwards

(more manoeuvrable and agile).

• Tighten the Allen screws again.

Caution:

when adjusting the wheel balance, too much rear wheel

pressure increases the risk of tipping backwards.

Settings and adjustments

Settings and adjustments 

GB 8

Settings and adjustments 

Settings and adjustments 

Adjusting the backrest angle

A

B

Setting the seat height, sitting angle and

riding characteristics

Summary of Contents for MultiHopper

Page 1: ...O4 GmbH Siemensstraße 31 47533 Kleve Germany Phone 31 315 396 900 Fax 31 315 396 909 sales O4 eu www O4 eu ...

Page 2: ...ingen aan de stoelen zijn aangebracht die niet in deze handleiding zijn opgenomen Wijzigingen onder voorbehoud Contents Foreword 2 Product description 3 Technical specifications 5 Safety instructions 6 Settings and adjustments 8 Use 12 Folding up the wheelchair 13 Transportation 14 Maintenance 15 Warranty 17 Details subject to change The information in this manual is based on the technical specifi...

Page 3: ... enable the wheelchair to be perfectly aligned to the user s wishes and the specific situations in which it is used The user can find an ideal balance between manoeuvrability and stability by the infinite adjustment of the RCA Seat System in relation to the rear wheels The comfort of the ergonomically curved seat frame is increased by the additional backrest angle adjustment which may be adjusted ...

Page 4: ...g Moving the left and right footrest changes the foot position short or long High detachable folding legrest High detachable folding angle adjustable comfort legrest Anti tip wheels Adjustable rotating anti tip wheels e g for transportation Wheel combinations Detachable rear wheel with standing lock Various wheel combinations Removable front wheelset e g for transportation or other wheel combinati...

Page 5: ...ock Otherwise there is a risk that you will lose control of the wheelchair Do not remove the anti tip wheels on account of the active adjustment of the MultiHopper For more information on safe riding in a wheelchair please consult www o4 eu under Comfortably mobile Assembly and adjustments Before using the wheelchair check that the removable parts wheels armrests footrests and front wheelset have ...

Page 6: ...screws A on both sides 6 Finally fully tighten all the screws Setting the sitting angle You can set the sitting angle to various positions 1 Loosen the Allen screws A and B a little on both sides 2 If the seat height is set correctly at the front remove Allen screws A If you want to change the seat height at the front remove Allen screws B 3 Set the desired sitting angle 4 Place and insert the All...

Page 7: ... the warranty and to ensure your safety the manufacturer recommends that the settings should be carried out by your supplier MultiHopper Pressure brakes The pressure brakes are attached to the front of the frame on the left and the right Pushing the pressure brake handle forward locks the wheel Caution make sure that your fingers do not become trapped between the frame and the wheels or between th...

Page 8: ...e 3 Push the wheelchair further and lift the rear wheels over the obstacle with the handles Getting up a kerb can be done forwards getting down a kerb is better carried out backwards Caution when descending a slope keep the speed under control Before tackling obstacles independently the manufacturer advises that you should first practise extensively under the supervision of a therapist For tips an...

Page 9: ...e frame Remove the front wheelset After folding up the wheelchair all the components can be transported separately Caution make sure that your fingers do not become trapped between the separate components Folding up the wheelchair GB 14 Removing the front wheelset Transportation The MultiHopper is not designed as a crash proof wheelchair and is not suitable for transport in taxi buses when occupie...

Page 10: ...carry out the annual maintenance of your wheelchair free of charge In this way you can be sure that your wheelchair is in optimum condition Please also contact your supplier for the replacement of parts There is no service manual available for the MultiHopper Repairs In the unlikely event of technical problems with your wheelchair we advise you to immediately contact your supplier The supplier wil...

Page 11: ...f non compliance with operating or maintenance instructions non standard use normal wear and tear negligence overloading accidents caused by third parties the use of non original parts or defects of which the cause is located outside the product This warranty supersedes any other warranties laid down by law or communicated verbally except that which is warranted by the manufacturer in writing Warr...

Page 12: ...Your supplier ...

Reviews: