


English
- 17 -
When set, this option gets the maturity information
from the broadcast and if this maturity level is disabled,
does not show video-audio.
Menu Lock
In menu lock you can set locking for all menus, or the
Installation Menu to restrict access to these menus.
If the menu lock is disabled, there will be free access
to the menu system. Use “ ” or “ ” buttons to go to
Menu Lock option. Use “ ” or “ ” buttons to choose
Menu Lock Mode.
DISABLED
: All menus are unlocked.
ALL MENUS
: All Menus are accessible only with
the correct lock key. So the user cannot add, delete,
rename, channels, cannot set timers.
INSTALLATION MENU
: Installation menu is locked.
So the user can’t add channels. Changes will be
updated after exiting ‘Con
guration Menu’.
Set PIN
Use “ ” or “ ” buttons to go to “Set PIN” option.
Press “
OK
” to display the “Set PIN” window. Use
numeric buttons to enter new pin number you will need
to input your new pin a second time for veri
cation
purposes.The factory default pin number is 0000, if
you change the pin number make sure you write it
down and keep it safe.
Time Settings (Optional)
In the con
guration menu, highlight the Time Settings
item by pressing “ ” or “ ” buttons.
Press “
OK
” and Time Settings sub menu will be
displayed on the screen. Current Time,Time Zone
Setting and Time Zone will be available.
Use “ ” or “ ” buttons to highlight the Time Zone
Setting. Time Zone Setting is set using “ ” or “ ”
buttons. It can be set to AUTO or MANUAL.
When AUTO is selected, Current Time and Time Zone
options will not be available to be set. If MANUAL
option is selected as the Time Zone Setting, Time
Zone can be altered:
• By pressing “ ” or “ ” buttons select Time Zone.
Use “ ” or “ ” buttons to change the Time Zone
between GMT-12 or GMT+12. Current Time on the
top of the menu list will then change according to the
selected Time Zone.
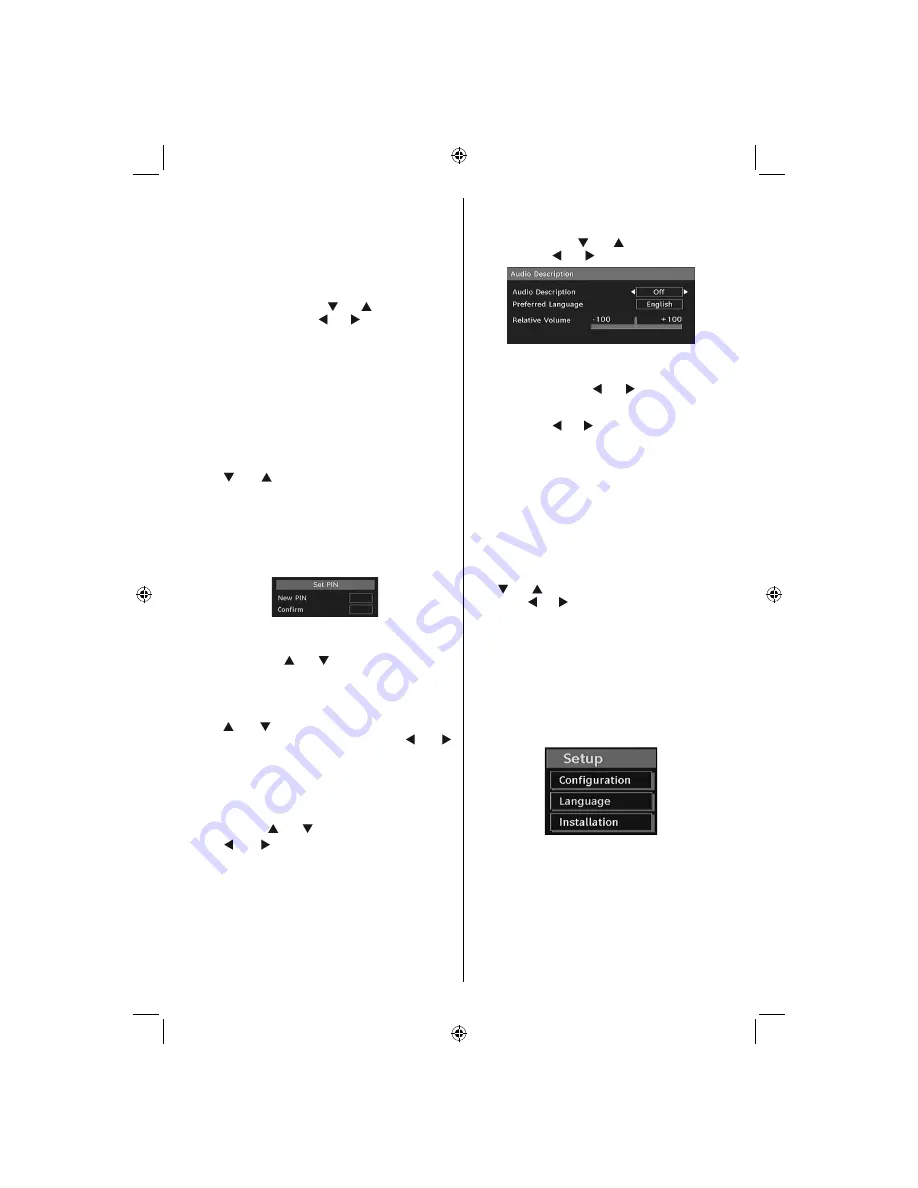
Audio Description (Optional)
Audio description refers to an additional narration
track for blind and visually impaired viewers of
visual media, including television and movies. The
description narrator talks through the presentation,
describing what is happening on the screen during the
natural pauses in the audio (and sometimes during
dialogue, if deemed necessary). You can use this
feature, only if the broadcaster supports that additional
narration track. Use “ ” or “ ” buttons to select an
item. Then use “ ” or “ ” buttons to set.
Audio Description (Optional)
This function enables or disables the audio description
feature by pressing the “ ” or “ ” buttons.
Preferred Language (Optional)
By pressing the “ ” or “ ” buttons the preferred audio
description language is being changed.
This setting can be used, only if it is available.
Relative Volume (Optional)
Using this option, the Audio Description volume level
can be increased or decreased relatively, according
to the general volume.
Standby Search (*)
(*) This setting is visible only when the Country option
is set to Denmark, Sweden, Norway or Finland.
Use “ ” or “ ” button to select Standby Search and
then press “ ” or “ ” button to set this setting as On or
Off. If you change Standby Search to Off, this function
will be unavailable.
To use Standby search please make sure that
you select Standby Search as On.
Language
In this menu the user can adjust the preferred
language. Language is changed by pressing “
OK
”
button.
MB45_[GB]_3902UK_IDTV_BRONZE11_22920W_LED_POWER SAVE MODE_10068917_50168693.indd 17
MB45_[GB]_3902UK_IDTV_BRONZE11_22920W_LED_POWER SAVE MODE_10068917_50168693.indd 17
04.06.2010 17:15:01
04.06.2010 17:15:01
Helpline number: 0845
199 1574
Summary of Contents for 22920
Page 33: ...50168693...