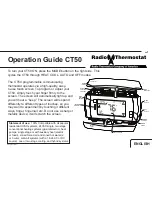
To power up thermostat:
When power is applied for the first time, the
display must show the time 00:00, the floor
temperature and the manual mode icon (
).
Other information might show up on the display if
installation is defective or does not comply with
the instructions. The warning light (GFI) must be
off.
L0 will appear if temperature is below 0 °C
(30 °F), temperature probe defective (open) or not
connected. Also, the heating indicator will be
present on display and the relay will be closed
(current going in the load).
HI will appear if temperature higher than 60 °C
(140 °F) or temperature probe shorted.
Checking ground fault circuit interrupter (GFCI)
Adjust the setpoint temperature until heating indicator (
) appears on
display. Press on TEST button. The test is conclusive if the warning light (GFI) on
the thermostat is ON and power to the load is cut-off. If these events do not occur,
check the installation. Press on RESET button to reset the GFCI.
If the GFCI test fails:
Check the load wires. The thermostat
must be in heating mode to carry out the
test (heating indicator ON).
The GFCI test should be carried out
monthly. If the test fails, cut off the electric
power to the heating system and call
customer service or return the thermostat
to your supplier for verification. If the
warning light comes on during normal
operation, cut off power to the heating
system and have an electrician verify the
installation.
OPERATING MODES
The FTGF2P has two (2) operating modes.
M
ANUAL
(
)
This mode allows you to maintain a constant temperature on the floor.
1- To activate this mode, press on Mode button to display the
icon.
2- Set the desired temperature using the
buttons or select the
pre-programmed
or
or
settings.
(To select the
setting, press on
and
simultaneously.)
AUTO
MATIC
(
)
This mode executes your own programming.
To activate this mode, press on Mode button to display the
icon.
The
or
icon indicates which temperature setting is used. Also, the icon
of the program number will be shown.


