Page 9
How to Operate
Work Piece Setup
1.
Set your work piece on the work bench and secure it using appropriate clamps. Take
care to leave enough overhang for the grinding pad to get all the way to the end of the
slab, and for the guide rail clamps to clear the work bench.
NOTE: To allow for removing material, the seam should be “overcut” during the sawing
process by as much as the largest chips in the upper edge (typically around 1 mm
or 0.04”).
Guide Setup
2.
Using your template or other method, determine final location for the seam. Mark with
tape cut to the template or other preferred method.
3.
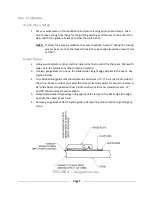
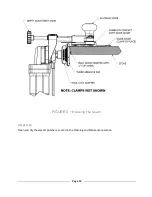
Use two gauge blocks to line up the Glide Guide straight edge parallel to the seam. See
Figure 4 below.
4.
Your Glide Guide (guide rail) should extend a minimum of 3” (7.5 cm) past both sides of
the stone. Make sure that you select the correct size Glide Guide for your work piece. A
48” Glide Guide is supplied with each kit and will work for most standard seams. 72”
and 92” Glide Guides are also available.
5.
Clamp Glide Guide straight edge using appropriate clamps on the back edge (the edge
opposite the seam) at each end.
6.
Remove gauge blocks after the glide guide is clamped in place and prior to grinding any
stone.
FIGURE 4 –
Gauge Block Use
Summary of Contents for 0010-1
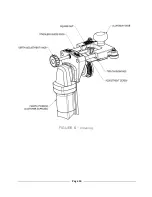
Page 14: ...Page 14 FIGURE 6 Cleaning...


