background image

 
10 

7. Dispensing


oils


To use the aromatic oils you must do the following. 
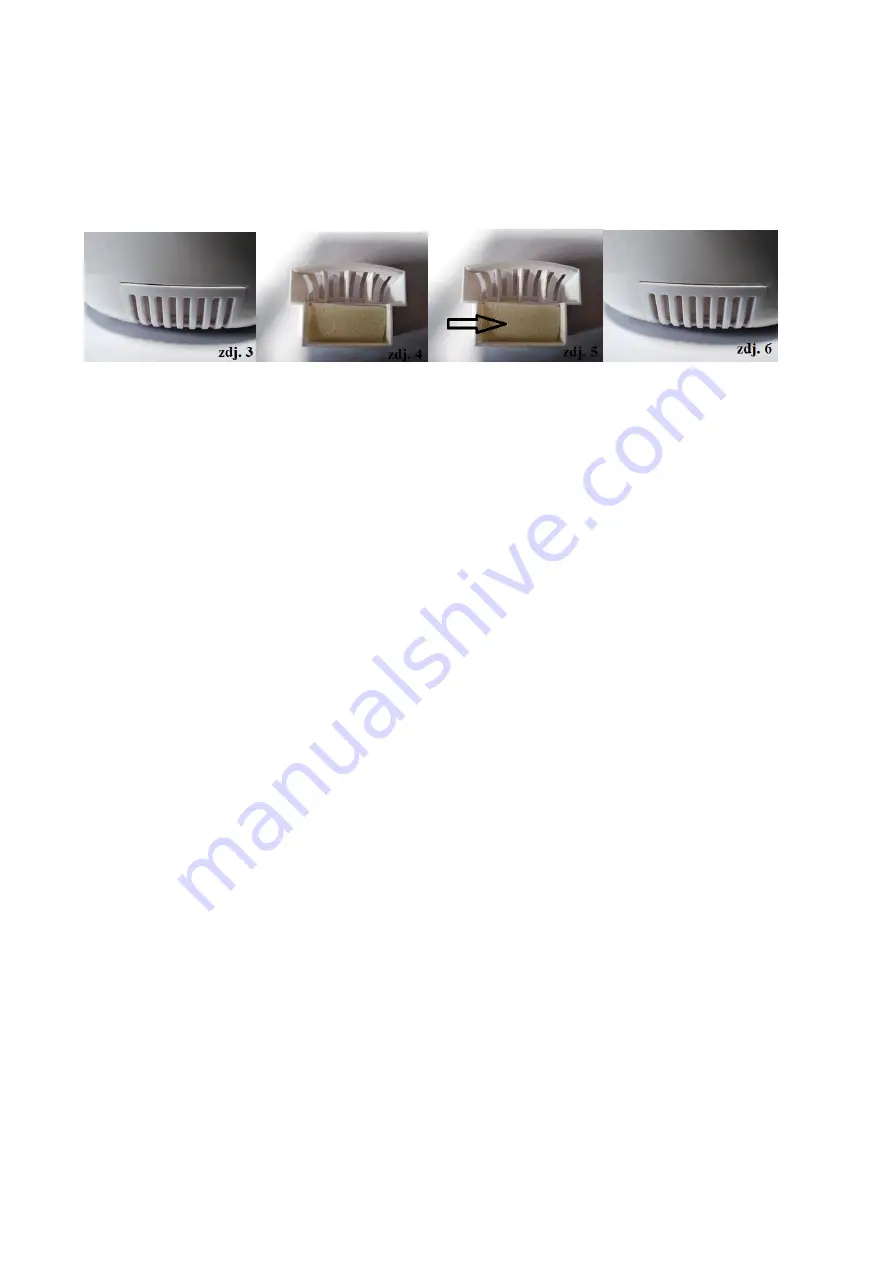
The dispenser is located on the back of the device (zdj. 3), pull it out (zdj. 4), then on the 
sponge in the middle (zdj. 5), put the right amount of oil (as desired). Then, close the 
dispenser to the position as in a photo (zdj.6). The device is ready for use. 


8. Cleaning and Maintenance 

8.1 Water Tank


Before cleaning, ensure that the unit is switched off. Clean after every use and do not  

keep water in the tank for longer than 2 days.


8.2 Transducer


To clean the (main body) transducer, add some de-scaling cleanser (about 0.5 g 

powder) onto the transducer and then add a small amount of water and wait for 2-5  

minutes. Use a soft brush to clean. Do not use soap or other alkaline substances to clean 

the transducer.


Summary of Contents for UH115

Page 1: ...1 ULTRADŹWIĘKOWY NAWILŻACZ POWIETRZA UH115 116 UTLRASONIC HUMIDIFIER UH115 116 INSTRUKCJA OBSŁUGI USE INSTRUCTIONS POLSKI s 2 ENGLISH p 7 ...

Page 2: ... dala od innych sprzętów AGD Ustaw urządzenie na równej stabilnej powierzchni podczas pracy Podczas czyszczenia lub przenoszenia urządzenia należy je wyłączyć odłączyć od źródła zasilania i wyjąć zbiornik na wodę Należy zachować szczególną ostrożność aby woda nie dostała się do podstawy Nie umieszczaj nawilżacza w miejscach nasłonecznionych przez dłuższy czas Nie należy samodzielnie naprawiać ani ...

Page 3: ...3 1 Specyfikacja techniczna Pojemnik na wodę 3 5 L Moc 24 W Maksymalna wydajność nawilżacza 350 ml godz 2 Opis urządzenia ...

Page 4: ...ierwszym uruchomieniem Zaleca się używanie urządzenia w temperaturze od 5 do 40 C i wilgotności względnej poniżej 80 RH Upewnij się że w głównym korpusie nie znajdują się żadne zanieczyszczenia które mogą spowodować uszkodzenie membrany Podłącz wtyczkę i włącz urządzenie NIGDY NIE WŁĄCZAJ URZĄDZENIA JEŚLI W ZBIORNIKU NIE MA WODY włącza się główna lampka kontrolna Urządzenie jest teraz gotowe do uż...

Page 5: ...rzed czyszczeniem upewnij się że urządzenie jest wyłączone Czyść po każdym użyciu i trzymaj wodę w zbiorniku nie dłużej niż 2 dni 8 2 Przetwornik Aby wyczyścić membranę w głównym korpusie dodaj środek do usuwania kamienia około 0 5 g proszku na przetwornik a następnie dodaj niewielką ilość wody i poczekaj 2 5 min Użyj miękkiego pędzla do czyszczenia Do czyszczenia przetwornika nie należy używać my...

Page 6: ...y wydmuch mgiełki Za dużo wody w korpusie Wylej trochę wody z korpusu nawilżacza dokręć pokrywę zbiornika Słaby wydmuch mgiełki Za dużo kamienia na przetworniku Zabrudzony zbiornik lub woda w zbiorniku trzymana przez długi czas Wyczyść przetwornik Wyczyść zbiornik na wodę i napełnij świeżą wodą Dziwny hałas Rezonacja spowodowana zbyt niskim poziomem wody w zbiorniku Rezonacja spowodowana niestabil...

Page 7: ...far away from other home appliances Place the unit on an even stable surface when in operation When cleaning or moving the unit turn it off unplug it and remove the water tank Take special care not to let water spill into the base Do not place the humidifier in sun lit places for long periods of time Do not attempt to repair or replace parts yourself Contact the Service Centre Please unplug and st...

Page 8: ...8 1 Specifications Water tank 3 5 L Power 24 W Maximum rating 360 ml hr 2 Components description ...

Page 9: ...rature conditions of between 5 40 C and a relative humidity of less than 80 RH Remove the water tank from the main body remove the tank cover found at the base of the water tank and fill the tank with tap water not more than 40 C and securely tighten the tank cover to the water tank Make sure that there are no debris in the main body that can damage the transducer Connect the power plug and switch...

Page 10: ...zdj 6 The device is ready for use 8 Cleaning and Maintenance 8 1 Water Tank Before cleaning ensure that the unit is switched off Clean after every use and do not keep water in the tank for longer than 2 days 8 2 Transducer To clean the main body transducer add some de scaling cleanser about 0 5 g powder onto the transducer and then add a small amount of water and wait for 2 5 minutes Use a soft br...

Page 11: ...ater tank and fill with clean water Power light on with low intensity Too much water in the main body Pour some water out from the main body close the tank cover securely Low intesity mist Too much scale in the main body Dirty water in the tank or water in the tank has been kept for too long Clean the transducer Clean the water tank and fill with clean water Abnormal noise Resonance caused by too ...

Page 12: ...wy z dnia 29 lipca 2005r o ZSEiE zabronione jest umieszczanie łącznie z innymi odpadami zużytego sprzętu oznakowanego symbolem przekreślonego kosza Użytkownik chcąc pozbyć się sprzętu elektronicznego lub elektrycznego jest obowiązany do oddania go do punktu zbierania zużytego sprzętu Powyższe obowiązki ustawowe zostały wprowadzone w celu ograniczenia ilości odpadów powstałych ze zużytego sprzętu e...

Page 13: ...godnego z Instrukcja Obsługi usterek powstałych w wyniku niewłaściwego montażu sprzętu samowolnych dokonywanych przez użytkownika lub inne nieupoważnione osoby napraw przeróbek lub zmian konstrukcyjnych używania urządzeń w celach komercyjnych zaniki sygnału podczas jazdy spowodowane odległością od nadajnika lub źle wykonaną instalacją antenową uszkodzenie sprzętu który nie został dostarczony do se...

Page 14: ...14 ...

Page 15: ...15 ...

Reviews: