


2
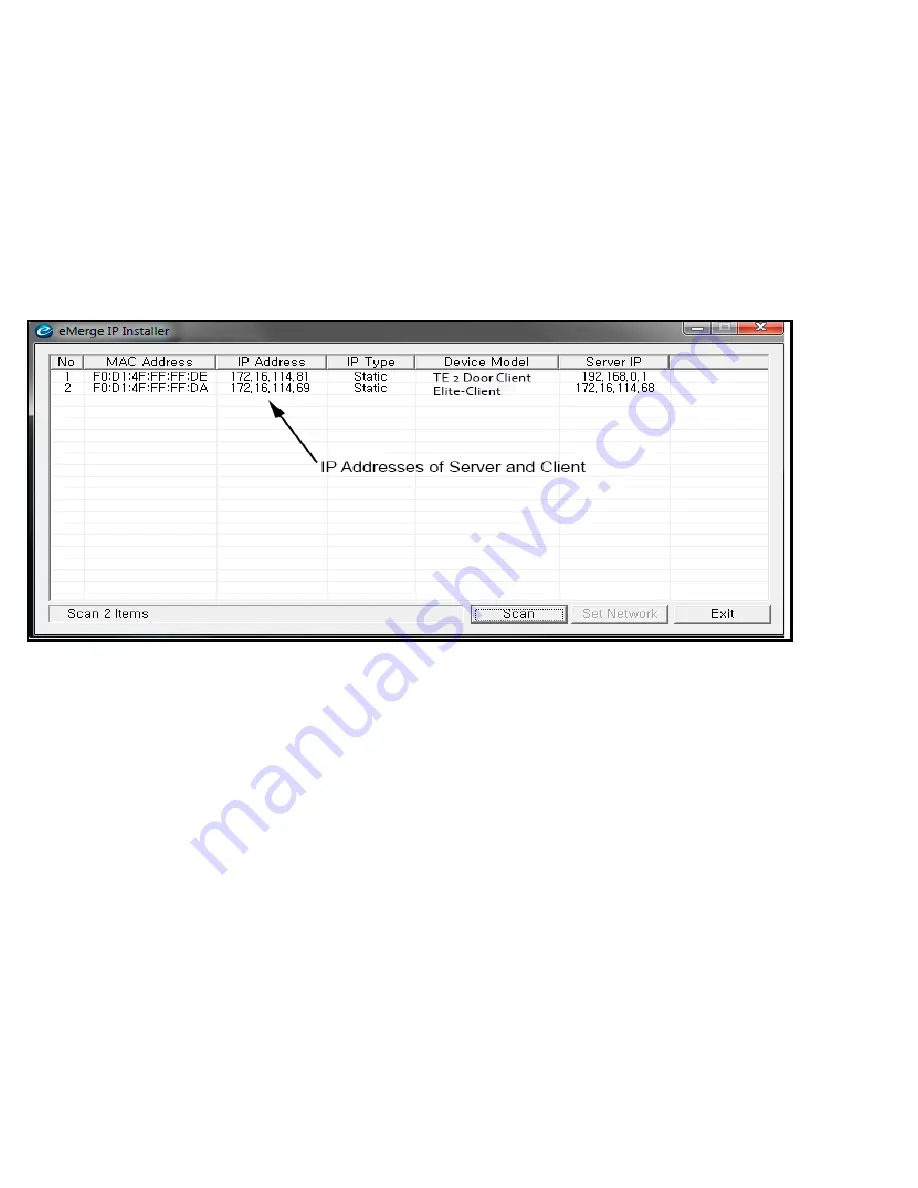
Identifying the Server and Client
EN Series units provide the ability to add additional controllers to expand the amount of doors, inputs, and outputs. These additional controllers are
referred to as clients. A client can be mounted on top of the main controller (server) or in a separate enclosure. IP Installer is a utility located on a thumb
drive shipped with all systems. This utility provides a simple method of identifying the IP address of the controller(s).
1. Connect all controllers to the local network.
2. Connect a thumb drive to a Windows computer on the local network.
3. Locate IPInstaller.exe and double-click the file.
4. IP Installer will open. Click Scan to search the network for controllers.
5. When controllers are identified they will be listed in IP Installer.
Configuring the Server and Client
The default IP address of the server and client is 192.168.0.250. To avoid conflict on the network, the IP address of the client and server must be
changed as follows:
1. Connect the server to the network.
2. Open IPInstaller.exe and click Scan.
3. Select the server from the list and click Set Network.
4. Enter a new IP address for the server. This information must be provided by the IT Administrator.
5. Change the Subnet Mask and Gateway to meet the requirements of the local network. This information must be provided by the IT
Administrator.
6. Enter the IP Installer password (default = 4321) and click OK.
7. Connect the client to the network and repeat steps 1 through 4 to change the client’s IP address.


