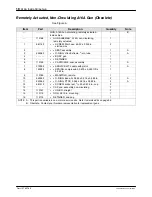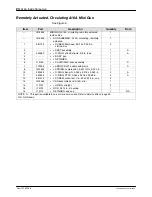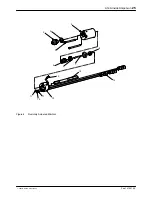
A16A Inside Stripe Gun
15
Part 107907-06
E
2020 Nordson Corporation
NOTE:
Replace the O-rings whenever you disassemble the gun.
1. Remove the manifold / end cap O-rings (10, 11) and discard them.
2. Lightly lubricate the new O-rings and install them in the manifold (9) /
end cap.
3. Remove the worn seal cartridge assembly (6) and discard it.
4. Lightly lubricate the O-rings on the new seal cartridge assembly.
5. Remove the seat assembly O-ring (3) and discard.
6. Lightly lubricate the O-ring (3) and install on the seat assembly (2).
7. Assemble the gun. Refer to
Assembly
Solenoid Replacement (Locally Actuated Gun Only)
1. Remove the screws (14) securing the solenoid (13) and gasket (15) to
the manifold (9).
2. Install a new gasket and solenoid into the manifold using the screws.
Tighten the screws to 0.88
−
0.98 N
•
m (7.8
−
8.7 in-lb).
Assembly
1. Install the seat assembly (2) into the gun body and tighten it securely.
2. Install the seal cartridge assembly (6) into the gun body.
3. Install the retainer (5) into the gun body and tighten securely.
CAUTION:
To prevent damage to the piston seal, use extreme care when
installing the needle and piston.
4. Carefully install the needle and piston (7) into the gun body (4).
5. Install the spring (8) into the manifold (9) / end cap..
6. Install the gun body to the manifold using the screws (1). Tighten the
screws securely.
7. Install the gun manifold / gun body to the end cap (13 or 16). Tighten
the end cap retainer (16 or 19) securely.
8. Install the gun to the mounting rod (15 or 18). Tighten the set
screws (12) securely.
9. Locally actuated guns: Connect the electrical connectors.


