background image

3

4 x B 

4

9

Summary of Contents for Wortham CO207001

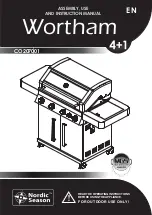
Page 1: ...ASSEMBLY USE AND INSTRUCTION MANUAL EN Wortham CO207001 READ THE OPERATING INSTRUCTIONS BEFORE USING THE APPLIANCE FOR OUTDOOR USE ONLY ...

Page 2: ... 4 Exploded drawing 5 Parts list 6 Hardware 7 Assembly instructions 8 Gas leak test 16 Connecting gas 17 Lighting instructions 18 Before using the grill 20 Fat Fire 21 Maintenance 21 Cleaning 22 Troubleshooting 23 Consumer Contact 24 2 ...

Page 3: ...ing use Keep children and others who need supervision at a safe distance Do not move the grill while in use or connected to the gas bottle Shut off the gas on the regulator after use and disconnect from the gas bottle Modification of the grill can cause danger and will invalidate the warranty Never keep the gas bottle under the grill when in use Gas leaks can cause serious damage Place the gas bot...

Page 4: ...ropan and mixture of these LPG 50mbar I3B P 50 Total effect 17 kW main burner heat input 14 kW 1020 g h side burner heat input 3 kW 218g h Total gas consumption 1238 g h Hose and regulator not included Must be approved according to EN standard Gas bottle not included Use standard bottle approved for use in the Nordic Region 10 11 kg recommended Even though butane and propane gas can be used we rec...

Page 5: ...Exploded drawing 5 ...

Page 6: ...nel 1 14 Grease tray cup 1 43 Control panel ornament 1 15 Grease tray 1 44 Gas connection nozzle 1 16 Side burner lid axis 1 45 Gas connection fixation 1 17 Side burner lid 1 46 Gas connection pipe 1 18 Side burner cooking grid 1 47 Gas pipe assembly 1 19 Side burner assembly 1 48 Main burner gas valve 4 20 Side burner base 1 49 Side burner gas valve 1 21 Side burner connection bar 1 50 Inner cont...

Page 7: ...0 10 20 30 40 50 60 70 80 90 100 110 120 130 140 150 0 1 2 3 4 5 6 0 10 20 30 40 50 60 70 80 90 100 110 120 130 140 150 0 1 2 3 4 5 6 Medium size flat blade or Philips cross point screwdriver Adjustable spanner or metric spanner set WARNING Exercise caution when using electric tools their strength can damage the screws 7 ...

Page 8: ...2 Assembly instructions Please follow these instructions step by step We recommend two people to assemble the grill to avoid heavy lifting 1 8 ...

Page 9: ...3 4 x B 4 9 ...

Page 10: ...5 6 10 ...

Page 11: ...7 8 4 x B 2 x D 2 x B 11 ...

Page 12: ...10 9 2 x D 2 x B 12 ...

Page 13: ...2 x C 11 12 1 x A 13 ...

Page 14: ...13 14 2 x A 14 ...

Page 15: ...ASSEMBLY IS NOW COMPLETE ALL JOINTS AND CONNECTIONS MUST NOW BE LEAK TESTED BEFORE USING THE GRILL READ CAREFULLY CHAPTER ON LEAK TESTING 15 ...

Page 16: ...no naked flames heat sources and cigarettes in the vicinity when performing a leak test 3Check that all controls on the grill are in the OFF position 4Set the regulator to the OFF position and connect it to the gas bottle 5Apply the liquid to all joints and connections on the gas bottle regulator the entire hose and all valves on the grill ALL JOINTS AND CONNECTIONS MUST NOW BE LEAK TESTED BEFORE ...

Page 17: ...ly instructions supplied with the regulator set Check the gas hose regularly for cracks damage and de cay Never use a damaged gas hose Check that the movable plastic collar on the regulator is intact and that it has not been damaged by hot grill parts Check that the gas bottle stands on a firm flat surface and is lower than the connector Use an approved gas bottle that fits the regulator supplied ...

Page 18: ...f ignition PILOT GAS CONTROL IGNITION 2With all gas controls on the gas grill in the OFF position turn the gas cylinder valve to the ON position at the regulator 3To create a spark you must push the control knob in A and hold in this position for 3 5 seconds to allow gas flow and then turn anticlockwise to HIGH B It can spark to the burner lighting tube C You will hear a snap from the igniter and ...

Page 19: ...ield with the minimum consumption of gas it is handy to keep the following points in mind 1Once the burner has been alighted adjust the flame according to your needs from Maximum to Minimum position 2Use proper pan size with flat bottom only for each burner 3When the content of the pan start to boil turn the knob down to Reduced rate position small flame 4Always put a lid on the pan TURNING OFF TH...

Page 20: ... THE GRATES WITH AN OIL that can tolerate high temperatures This prevents food from burning onto the grates PREHEAT THE GRILL for around 10 minutes at full power before placing food on the grates This gives a better result and cuts grilling time DO NOT GRILL FROZEN FOOD The cold will extend grilling time and give a poorer result DIVIDE THE GRILL INTO HOT AND COLD ZONES When the food is half ready ...

Page 21: ...never be sealed or blocked Check that the venturi ventilation on burners and side burners are not sealed or blocked before use Wear gloves when assembling or lifting Sharp edges can cause injury Do not place the grill cover or other flammable material in the compartment under thegrill when it is in use or hot Clean the grill regularly and thoroughly PREVENT FAT FIRE Keep the grill clean to prevent...

Page 22: ...ur on cast iron and steel parts and will not affect the grill in the shortterm Superficial rust can be washed polished off Keep the grill free of fat and grease to maintain performance The fat cup should be emptied regularly to avoid it running over When using a grill cover the grill must be clean and dry and sufficient ventilation must beensured If not moisture will accumulate under the cover cau...

Page 23: ...is mounted correctly Burners will not light when lighting manually Empty gas bottle Replace gas bottle Irregular gas supply Check replace the regulator The burner is blocked Clean the burner Gas supply or hose is blocked Clean gas ventury or hose Low flame or backfire Gas bottle is too small 10 11 kg or larger bottle is recommended Burner is blocked Clean the burner Gas supply or hose is blocked C...

Page 24: ... missing or the product has been damaged please contact your dealer or the consumer contact below for help Faults due to misuse lack of maintenance or modification of the product will invalidate the warranty Damaged parts not due to a fault with the product will be invoiced according to our price list carriage and administration fee If new parts are needed or in the event of a warranty claim pleas...

Reviews: