background image

IT

EN

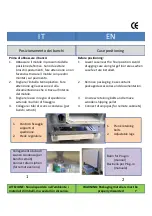
Posizionamento dei banchi

Case positioning

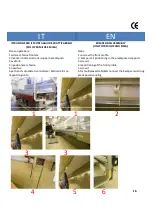
Prima di abbassare il banco:

1.

Abbassare il mobile in prossimità della 
posizione definitiva. Sono da evitare 
bruschi spostamenti, fare attenzione a non 
facendo strisciare il mobile con piedini 
montati, sul pavimento.

2.

Togliere l’imballo termoplastico. Fare 
attenzione agli accessori ed alla 
documentazione che si trova all’interno 
del mobile.

3.

Togliere le assi in legno di spedizione 
svitando i bulloni di fissaggio. 

4.

Collegare i tubi di scarico condensa (per 

Before positioning: 

1.

Lower case near the final position. Avoid 
dragging case along large floor areas when 
case feet are installed.

2.

Remove  packaging. Case contains 
packaged accessories and documentation.

3.

Unscrew retaining bolts and remove 
wooden shipping pallet

4.

Connect drain pipes (for remote cabinets)

4.

Collegare i tubi di scarico condensa (per 
banchi remoti).

4.

Connect drain pipes (for remote cabinets)

ATTEZIONE: Non disperdere nell’ambiente i 
materiali di imballi, ma avviarli in discarica.

WARNING: Packaging materials must be 

properly discarded

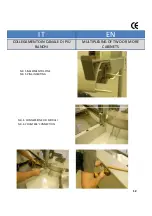
Collegamento tubo di 
scarico condensa (per 
banchi remoti)
Connect drain siphon
(for remote verions)

Basin for Plug-in 

(manual)

Bacinella per Plug-in 

(manuale)

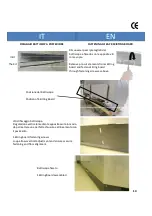
1.

Punto di fissaggio 
supporti di 
spedizione.

2.

Piede regolabile

.

1.

Plank retaining 
bolts.

2.

Adjustable legs

7

1

2

Summary of Contents for 4547012841

Page 1: ...MANUALE DI INSTALLAZIONE INSTALLATION INSTRUCTION TRADIZIONALI SERVE OVER COUNTERS KÜHLTHEKEN Kai Kai Milos Mika Kami Revision date 05 03 2015 IT EN ...

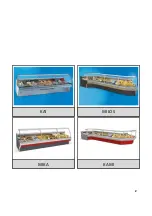
Page 2: ...KAI 2 KAMI MIKA MILOS ...

Page 3: ...e ed utilizzabile non convogliarlo alla discarica dei rifiuti comuni ma rivolgersi agli appositi centri di raccolta per il recupero dei materiali e delle sostanze lesive dell ambiente IT 3 WARNING Before starting any cleaning maintenance or replacement of approved parts including non electric make sure the power supply is disconnected and or the all pole switch are off Technical service must be ca...

Page 4: ...abinet and accessories Case connections Notes Pag 14 Pag 15 Pag 16 Pag 17 Pag 21 Pag 22 Page 14 Page 15 Page 16 Page 17 Page 21 Page 22 I prodotti sono realizzati in accordo con le seguenti normative e i loro aggiornamenti specifici EN 60335 2 24 1994 A51 95 A52 96 A53 97 EN 60335 1 1988 A2 88 A5 89 A6 89 A51 91 A52 92 A53 92 A54 92 A55 93 A56 95 IEC 60335 2 24 1997 A1 98 IEC 60335 1 1991 A1 94 N ...

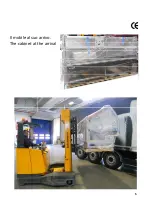
Page 5: ...Il mobile al suo arrivo The cabinet at the arrival 5 ...

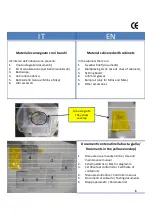
Page 6: ...ments 2 Multiplexing kit in case of lines of cabinets 3 Skirting board 4 Anti mist glasses 5 Bumprail only for Milos and Mika 6 Other accessories La busta gialla The yellow envelop Documenti contenuti nella busta gialla Documents in the yellow envelop 1 Manuale uso e manutenzione Use and maintenance manual 2 Schema elettrico Electric diagramm 3 Certificato di conformità Certificate of conformity 4...

Page 7: ...ition Avoid dragging case along large floor areas when case feet are installed 2 Remove packaging Case contains packaged accessories and documentation 3 Unscrew retaining bolts and remove wooden shipping pallet 4 Connect drain pipes for remote cabinets 4 Collegare i tubi di scarico condensa per banchi remoti 4 Connect drain pipes for remote cabinets ATTEZIONE Non disperdere nell ambiente i materia...

Page 8: ...leveling of cases Adjust case feet to compensate for floor drops or rises Connection screws ensure alignment of cases and are put under strain when cases are moved or lifted Strain can alter screws and deform connections Elenco punti di giunzione List of connections 1 Piedi regolabili Adjustable feet 2 Sigillatura con gommapiuma tutto attorno ed applicare il silicone sulla gommapiuma e tra scocca ...

Page 9: ... leveling of cases Adjust case feet to compensate for floor drops or rises Connection screws ensure alignment of cases and are put under strain when cases are moved or lifted Strain can alter screws and deform connections Elenco punti di giunzione List of connections 1 Piedi regolabili Adjustable feet 2 Sigillatura con gommapiuma tutto attorno ed applicare il silicone sulla gommapiuma e tra scocca...

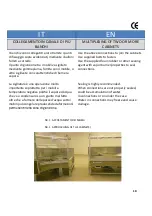
Page 10: ...hi vanno collegati tra loro tramite i punti di fissaggio sopra evidenziati mediante i bulloni forniti a corredo Il punto di giunzione tra i mobili va sigillato mediante gommapiuma fornita con il mobile o altro sigillante con caratteristiche di barriera vapore La sigillatura è una operazione molto importante soprattutto per i mobili a temperatura negativa poiché il vapore d acqua che va a condensar...

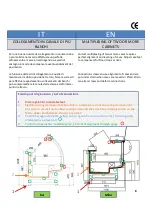
Page 11: ...ELLI DELL ANGOLO NR 2 CHECK PERFECT COUNTERS ALIGNMENT WORKING ON THE LEGS THE LEGS OF THE SERVE OVER SHOULD BE AS STANDARD LOWER THAN THE CORNER ONE 11 NR 3 ISOLAMENTO CON GOMMAPIUMA INCLUSA DA PORRE LUNGO LA SCOCCA IN CORRISPONDENZA DEL POLIURETANO E SILICONE NON FORNITO A CARICO DELL INSTALLATORE NR 3 INSULATION BY MEANS OF FOAM RUBBER INCLUDED TO BE PUT ALONG THE POLYURETHANE AND SILICON NOT I...

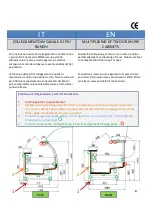
Page 12: ...IT EN COLLEGAMENTO IN CANALE DI PIÙ BANCHI MULTIPLEXING OF TWO OR MORE CABINETS NR 5 INSERIMENTO SPINE NR 5 PINS INSERTING 12 NR 6 CONNESSIONE DEI MODULI NR 6 COUNTERS CONNECTION ...

Page 13: ...e viti predisposte per il fissaggio Unscrew the screws for fixing 13 Posizionare il profilo e avvitare le viti Position of the profile and screw the screws Agganciare il profilo nella parte inferiore e posizionarlo Hook the profile in the under part and its positioning ...

Page 14: ...fastening screws as above FASTENING OF BACK SKIRTING BOARD Posizione del Battiscopa Position of Skirting Board 14 Viti di fissaggio battiscopa Regolazione verticale mediante apposita asola in modo da permettere una perfetta chiusura e allineamento con il pavimento Skirting board fastening screws Loop allows vertical adjustment and ensures secure fastening and floor alignment Battiscopa fissato Ski...

Page 15: ...IT EN Sedi per vetri anticondensa Prearranged points for the anti mist glasses ANTIMIST GLASS ASSEMBLY ISTRUZIONE PER IL MONTAGGIO DEI VETRI ANTICONDENSA 15 Inserire i vetri Positioning of the glasses ...

Page 16: ...atticarrelli con l apposito giunto BUMPER RAIL ASSEMBLY ONLY FOR MILOS AND MIKA ISTRUZIONE PER IL MONTAGGIO DEL BATTICARRELO SOLO PER MILOS E MIKA Steps 1 unscrew the front profile 2 bumper rail positioning in the predisposed supports 3 screw it 4 repositioning of the front profile 5 screw it 6 for multiplexed cabintets connect the bamper rails trough the presisposed coupling 16 2 1 1 4 3 3 5 6 ...

Page 17: ...ETWEEN PLUG IN REMOTE DIFFERENZE NELLE STRUTTURE PLUG IN REMOTI Plug n con cellette refrigerate Plug in back with refrigerated under storage 17 Possibili accessori retrobanco Accessories for the back possible Lunghezza modulo Module length N cellette Nr Back doors 937 1875 1562 1250 1 2500 3125 3750 1 1 2 3 4 5 ...

Page 18: ...a Only for remote cabinets 18 Plug n con cellette refrigerate Profilo per il fissaggio accessori retrobanco presente solo se questi accessori sono ordinati con il banco Rail for fastening of the back accessories delivered only for cabinets where these accessories have been ordered Plug in back with refrigerated under storage ...

Page 19: ...NELLE STRUTTURE PLUG IN REMOTI Solo per banchi versione remota Only for remote cabinets Sistema di fissaggio 1 Fixing system 1 Sistema di fissaggio 2 Fixing system 2 1 1 1 2 19 Sequenza fotografica sistema 1 Photographic sequence for system 1 1 1 1 1 2 3 4 5 6 7 8 ...

Page 20: ... STRUTTURE PLUG IN REMOTI Solo per banchi versione remota Only for remote cabinets Sistema di fissaggio 1 Fixing system 1 Sistema di fissaggio 2 Fixing system 2 1 1 1 2 20 Sequenza fotografica sistema 2 Photographic sequence for system 2 1 1 1 1 2 3 4 5 6 7 12 11 10 9 8 ...

Page 21: ...COLLEGAMENTI FRIGORIFERI SOLO PER BANCHI REMOTI Foto uscita tubi dell evaporatori scambiatore IT EN PIPING CONNECTIONS ONLY FOR REMOTE CABINETS Exit of evaporator 21 ...

Page 22: ...s In order not to have to disconnect the whole system should a fault occur it s advisable to use as an switch a magnetothermic switch with a high sensitivity differential WATER DRAINAGE SYSTEM 22 mm Il montaggio di tale interruttore è comunque consigliato anche in caso di carichi inferiori Al fine di non dover disinserire tutto l impianto in caso di guasto si consiglia di utilizzare come sezionato...

Reviews: