36
EN
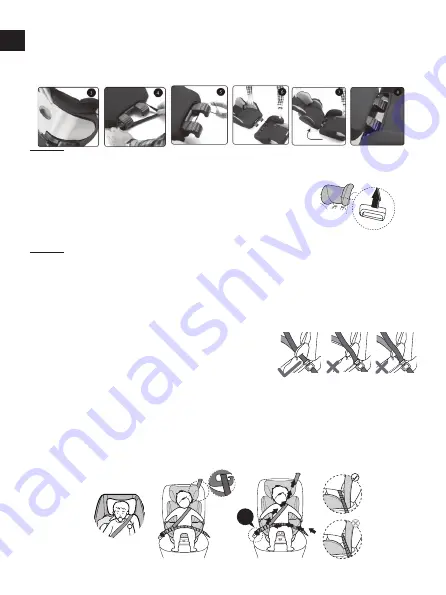
5. Then, tight the elastic band on the hooks.
6. Combine the base with the backrest, as shown in the picture. Make sure the hooks are
secured. Push the latches down until they click into place.
7. Raise the support back.
You will hear an audible CLICK!
To remove the cover, reverse the above steps.
USAGE
HEADREST ADJUSTMENT
1. Press the headrest adjusts button, and move the headrest up
or down to the desired position.
2. Release adjust button and slide headrest slightly up or down
to lock into the appropriate use position.
NOTE:
Headrest has
4 h
eight positions. The height can be
changed for child comfort.
INSTALLATION
WARNING:
If the child is not secured properly, the child could be ejected in a sudden stop
or crash, resulting in serious injury or death.
WARNING:
If in doubt about the installation, consult either the child restraint manufacturer
or the retailer.
GROUP II (15-25 KG)
1. Place child restraint forward-facing (in the direction
of travel) in proper seating location, flat on the
vehicle seat bottom and touching vehicle seat-back.
2. To fasten seat belt across child: lap portion of the
vehicle seat belt should rest within both lower belt
guides with buckle located on the outside of the
child restraint. On the side of the seat belt buckle, route the shoulder belt together with
the lab belt under the armrest. Route the lap belt under both armrests.
3. Place shoulder portion into the upper belt guide on the headrest so that belt lays
properly across child: on the collar bone, interior (A) to the shoulder (B).
4. Make sure seat belt is not twisted and remove slack from seatbelt so it lays flat, smooth
and snug across child in all locations.
5. Fasten the vehicle seat belt. You will hear an audible CLICK! Pull the seat belt tight to
make sure it is not twisted.
A
B
CLICK


