OPERATION
14
Speed Scrub
t
1701 Plus (02–04)
ADJUSTING PAD PRESSURE
NOTE: On rough surfaces it may be necessary to
reduce brush pressure.
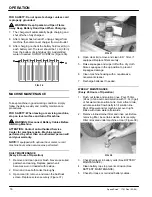
To adjust pad pressure, turn adjustment knob
clockwise to decrease or counterclockwise to increase
pad pressure. Adjustment knob is located below brush
lift pedal (Figure 29).
FIG. 29
ADJUSTING SQUEEGEE LIFT CABLE
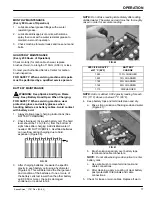
To adjust squeegee lift cable, loosen lock nuts and
turn adjustment stem on squeegee cable. Retighten
lock nuts after adjusting (Figure 30).
FIG. 30
DRAINING TANKS
When to drain recovery tank:
– After each use.
– Between solution tank fill ups.
– When solution flow stops during operation.
– When ball float screen is activated.
– When squeegee starts trailing water.
NOTE: If using the ES
t
recycling system, be certain
to drain and rinse both tanks after each use.
FOR SAFETY: Before leaving or servicing
machine, stop on level surface and turn off
machine.
DRAINING RECOVERY TANK
ATTENTION: Do not allow foam or water to enter
float shut–off screen, vacuum motor damage will
result; not covered by warranty. Foam will not
activate float shut–off screen.
1.
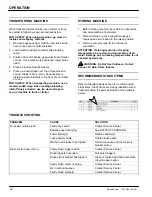
Push machine to floor drain and turn off all
switches. Remove left side drain hose from holder,
position hose over drain, twist loose, and remove
drain hose cap (Figure 31).
FIG. 31
NOTE: If using a bucket to drain machine, do not use
same bucket for filling solution tank. This will prevent
possible solution line clogs.
2.
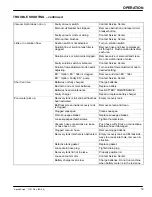
Open clear recovery tank lid and rinse tank, ball
float screen and ES
t
filter if equipped. Remove
and rinse ball float screen and ES
t
filter if they
are excessively dirty. Replace screen and filter
securely.
3.
Replace drain hose plug securely when empty.


