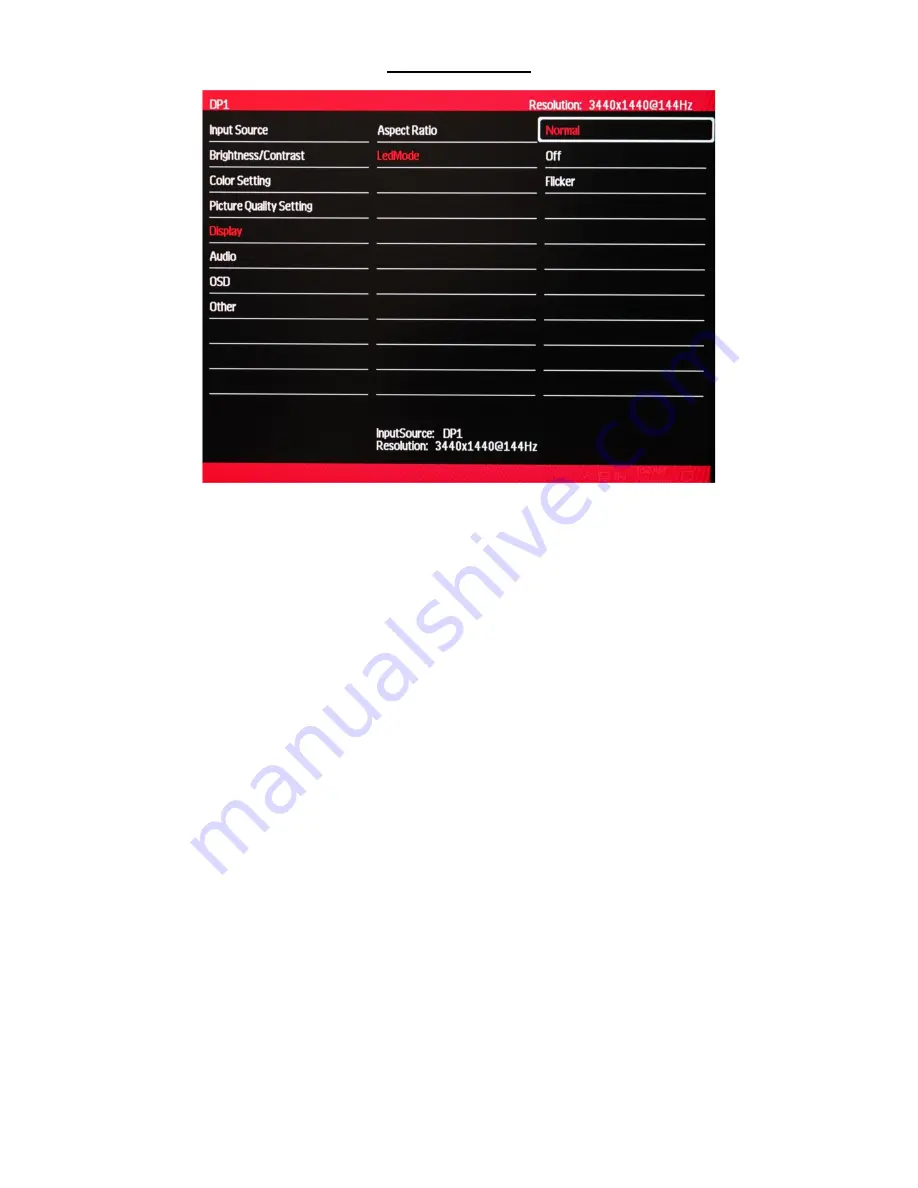
Nixeus NX-EDG34S User Manual Download Page 33

33 


Display – LEDMode 


e)


To adjust the behavior of the LED lights on the back of the monitor, in the DISPLAY submenu, use the 
buttons 

 and 

∆ 

to highlight LEDMODE and press 

[1]

 to confirm selection.  


f)


Use the buttons 

∇ 

or 

∆ 

to adjust the LEDMODE setting to either Normal, Off, or Flicker. The default setting 

is Normal. 
 

g)


Once you adjust the LEDMode settings to your desired setting, press 

[1]

 once to confirm and exit to the 

DISPLAY sub-menu. 

 
h)


Press

 [2]

 once to exit out of DISPLAY sub-menu and again to close the OSD menu.  


Summary of Contents for NX-EDG34S

Page 1: ...1 NX EDG34S User Manual Version 11 30 19 www nixeus com...

Page 2: ...Contrast Ratio DCR Adjustment 18 On Screen Display OSD Color Setting Sub Menu 19 Gamma 19 Picture Mode 20 Color Temperature Presets 21 User Settings Red Green Blue Adjustment for Color Calibration 22...

Page 3: ...DP Version 43 AMD FreeSync Technology 44 46 HDR 47 Reset 48 Warranty Information 49 50 Electronics Recycling and Proper Electronics Disposal 51 Nixeus Technology Inc Contact Information 51 Disclaimer...

Page 4: ...apply excessive force to the LCD panel or drop the monitor Warranty does not cover physical damages over clocking and modifications to the monitor 8 When monitor is not in use for a long period of ti...

Page 5: ...your monitor to prevent serious brand incidental image or after image Larger display panels may have some glow around the edges or corners This is known as back light bleed and Glow this is normal du...

Page 6: ...6 Getting Started Box Contents Quick Start Guide 75mm x 75mm Adapters...

Page 7: ...t 10 HDMI Connectors Insert one end of the HDMI cable into the computer s HDMI output and connect the other end to the monitor s HDMI port NOTE Do not use cable adapter converters to connect the NX ED...

Page 8: ...e stem Next use two screws to fasten the stand plate to the stem 4 Insert the stand s plate into the opening on the back of the monitor It should click into place Make sure the stand is securely attac...

Page 9: ...f the stand was not installed press the button to remove the stand plate 3 Remove the original screws x 4 1 from the opening in the back of the monitor and put them aside Then use the screws provided...

Page 10: ...to turn the monitor on FreeSync FreeSync is off by default In order to use this feature please note that you must have hardware with FreeSync capability a DP cable and the latest graphics drivers To u...

Page 11: ...Press to display the OSD menu or enter sub menus Down Button Press to move down in the menus Up Button Press to move up in the menus 2 Exit Button Press to Exit or Open Input source menu Power Button...

Page 12: ...ther audio speaker device a To adjust volume level press to open the volume control sub menu b To adjust the volume press to decrease VOLUME or press to increase VOLUME c Once the desired volume is se...

Page 13: ...res for On Screen Display OSD Main Menu 1 1 Press to select confirm 2 Press to move down in the menus or decrease setting status bar 3 Press to move up in the menus or increase setting status bar 4 2...

Page 14: ...OSD menu if you have more than one device connected to the monitor a To bring up the OSD Main Menu press 1 b Using the and buttons navigate to Input Source and select it by pressing 1 c Using the and...

Page 15: ...ure and press 1 to confirm selection Highlight BRIGHTNESS and press 1 to enter into BRIGHTNESS adjustment c Press to decrease brightness or press to increase brightness Default BRIGHTNESS is at 65 d O...

Page 16: ...and to highlight BLACKLEVEL and press 1 to confirm selection b Press to decrease the black level or press to increase the black level Default BLACKLEVEL is at 50 c Once you adjust the BLACKLEVEL sett...

Page 17: ...TNESS CONTRAST sub menu use the buttons and to highlight CONTRAST and press 1 to confirm selection b Press to decrease the contrast or press to increase the contrast Default CONTRAST is at 50 c Once y...

Page 18: ...ht DCR and press 1 to confirm selection b Using buttons and you may set DCR to on or off mode Default DCR setting is set to off mode c Once you adjust the DCR settings to your desired mode press 1 onc...

Page 19: ...TING sub menu use the buttons and to highlight GAMMA and press 1 to confirm selection b Press or to change the GAMMA setting Default GAMMA setting is 2 2 c Once you adjust the GAMMA setting to your de...

Page 20: ...LOR SETTING sub menu use the buttons and to highlight PICTURE MODE and press 1 to confirm selection b Press or to change the PICTURE MODE Default PICTURE MODE is at STANDARD c Once you adjust the PICT...

Page 21: ...Cool a In the COLOR SETTING sub menu use the buttons and to navigate to COLOR TEMPERATURE and press 1 to enable COLOR TEMPERATURE selection b Use and to cycle through the settings and highlight Warm...

Page 22: ...TURE category of the COLOR SETTING sub menu a In the COLOR SETTING sub menu use the buttons and to navigate to COLOR TEMPERATURE and press 1 to enable COLOR TEMPERATURE selection b Use and to cycle th...

Page 23: ...ED temperature settings press 1 to confirm selection and exit to COLOR SETTING sub menu to adjust the next color settings a To adjust the GREEN setting Use the buttons and to navigate and highlight Gr...

Page 24: ...exit out of the COLOR SETTING sub menu To completely exit out of the On Screen Display OSD press 2 three times NOTE When using a colorimeter to calibrate the monitor you may need to exit and enter eac...

Page 25: ...HT and press 1 to confirm selection b Use the buttons and to adjust the LOW BLUE LIGHT setting The default LOW BLUE RAY setting is 0 c Once you finish adjusting the LOW BLUE RAY settings to your desir...

Page 26: ...confirm selection b Press to decrease or to increase the HUE setting Default HUE is at 50 c Once you finish adjusting the HUE settings to your desired setting press 1 once to confirm and exit to the...

Page 27: ...ON and press 1 to confirm selection b Press to decrease the saturation or press to increase the saturation Default SATURATION is at 50 c Once you adjust the SATURATION settings to your desired level p...

Page 28: ...uttons and to highlight SHARPNESS and press 1 to confirm selection b Press to decrease the sharpness or press to increase the sharpness Default SHARPNESS is at 50 c Once you adjust the SHARPNESS setti...

Page 29: ...ired level press 1 once to confirm and exit to the PICTURE QUALITY SETTING submenu d Press 2 once to exit out of PICTURE QUALITY SETTING submenu and again to close the OSD menu NOTE The higher the set...

Page 30: ...se the buttons or to adjust the response time setting to either Off High Middle or Low c Once you adjust the NOISE REDUCTION settings to your desired level press 1 once to confirm and exit to the PICT...

Page 31: ...S CONTROL and press 1 to confirm selection b Use the buttons or to change Dynamic Luminous Control to Off or On mode c Once you adjust the Dynamic Luminous Control settings to your desired level press...

Page 32: ...1 or Auto The default setting is Wide Screen c Once you adjust the Aspect Ratio settings to your desired setting press 1 once to confirm and exit to the DISPLAY sub menu d Press 2 once to exit out of...

Page 33: ...ODE and press 1 to confirm selection f Use the buttons or to adjust the LEDMODE setting to either Normal Off or Flicker The default setting is Normal g Once you adjust the LEDMode settings to your des...

Page 34: ...or to highlight MUTE and press 1 to confirm selection b Press or to change the MUTE setting to OFF or ON c Once you finish adjusting the MUTE settings to your desired setting press 1 once to confirm a...

Page 35: ...to confirm selection b Press to decrease or to increase the VOLUME setting from 0 to 100 c Once you finish adjusting the MUTE settings to your desired setting press 1 once to confirm and exit to the A...

Page 36: ...to confirm selection b Press or to adjust the audio source from HDMI 1 HDMI 2 DP 1 or DP 2 c Once you finish adjusting the AUDIO SOURCE settings to your desired setting press 1 once to confirm and ex...

Page 37: ...uttons or to highlight Language and press 1 to confirm selection b Press or to adjust the language to your desired setting c Once you finish adjusting the LANGUAGE settings to your desired setting pre...

Page 38: ...the buttons or to highlight OSD H Position and press 1 to confirm selection b Press or to adjust the OSD H Position to your desired setting c Once you finish adjusting OSD H Position settings to your...

Page 39: ...the buttons or to highlight OSD V Position and press 1 to confirm selection b Press or to adjust the OSD V Position to your desired setting c Once you finish adjusting OSD V Position settings to your...

Page 40: ...ons or to highlight OSD Transparency and press 1 to confirm selection b Press or to adjust the OSD Transparency to your desired setting c Once you finish adjusting OSD Transparency settings to your de...

Page 41: ...menu use the buttons or to highlight OSD Time Out and press 1 to confirm selection b Press or to adjust the OSD Timeout to your desired setting c Once you finish adjusting OSD Timeout settings to your...

Page 42: ...tons or to highlight OSD Rotation and press 1 to confirm selection b Press or to adjust the OSD Rotation to your desired setting c Once you finish adjusting OSD Rotation settings to your desired setti...

Page 43: ...setting The version can be set in 1 1 1 2 and 1 4 modes c Once you finish adjusting the DP Version settings to your desired setting press 1 once to confirm and exit to the OTHER sub menu d Press 2 on...

Page 44: ...free sync The NX EDG34S has FreeSync OFF by default To use this feature it must be turned on in the OSD settings a In the OTHER sub menu use the buttons or to highlight FreeSync Adaptive Sync and pres...

Page 45: ...tings a After installing the newest AMD Graphics Drivers for your computer restart your computer b Open Radeon Settings and click on the DISPLAY tab c Navigate the mouse curser to the AMD FreeSync sec...

Page 46: ...Screen or Exclusive Full Screen Windowed Mode may not be optimal at this time Please refer to the latest AMD Radeon Graphic Driver release notes for more information at http support amd com en us down...

Page 47: ...s 2 once to exit out of OTHER sub menu and again to close the OSD menu e Next you will need to set HDR ON in the Windows Display Settings NOTE You must set HDR to ON or Auto Detect in the monitor s OS...

Page 48: ...l On Screen Display OSD configurations or changes you have made back to the monitors default settings a In the OTHER sub menu use the buttons or to navigate to RESET Make sure RESET is highlighted see...

Page 49: ...r the liquidators expressly disclaim their warranty obligation whereas the product is being sold As Is without any warranty RMA Return Merchandise Authorization Request The customer shall return the p...

Page 50: ...AGE COMPUTER FAILURE OR MALFUNCTION FAILURE OF OTHER EQUIPMENT OR COMPUTER PROGRAMS TO WHICH NIXES S PRODUCT IS CONNECTED WITH LOSS OF INFORMATION OR DATA CONTAINED IN STORED ON OR INTEGRATED WITH ANY...

Page 51: ...l resources reduce greenhouse gas emissions and avoid air water pollution For more information regarding electronics recycling and proper disposal of electronics please visit http www nixeus com recyc...

Reviews: