Nixeus Fusion HD Quick Start Manual Download Page 23


Nixeus Technology, Inc. 

23 

3.  Press the “MENU” 

  button on the remote control to go to the ‘directory’ bar on the top 

of the screen.   

4.  Pressing  the  numerical  buttons  on  the  remote  control  during  navigation  will  sort  the  file 

names by the first letter of the key pressed. This will  help  you find the file  you  want  when 

there are many files in the folder list. 

Note:  If  you  want  to  use  some  functions  (like  iMEDIA  or  audio  settings  etc)  while  you’re 

navigating  directories  and  files,  press  the  hot  keys  such  as  ‘HOME’,  ‘SETUP’Qon  the  remote 

control instead of just pressing the ‘BACK’ button numerous times. Then it will be quicker to go 

back to where you were in a long directory path by pressing the ‘VIDEO’, ‘MUSIC’ or ‘PICTURE’ 

hot keys again. 

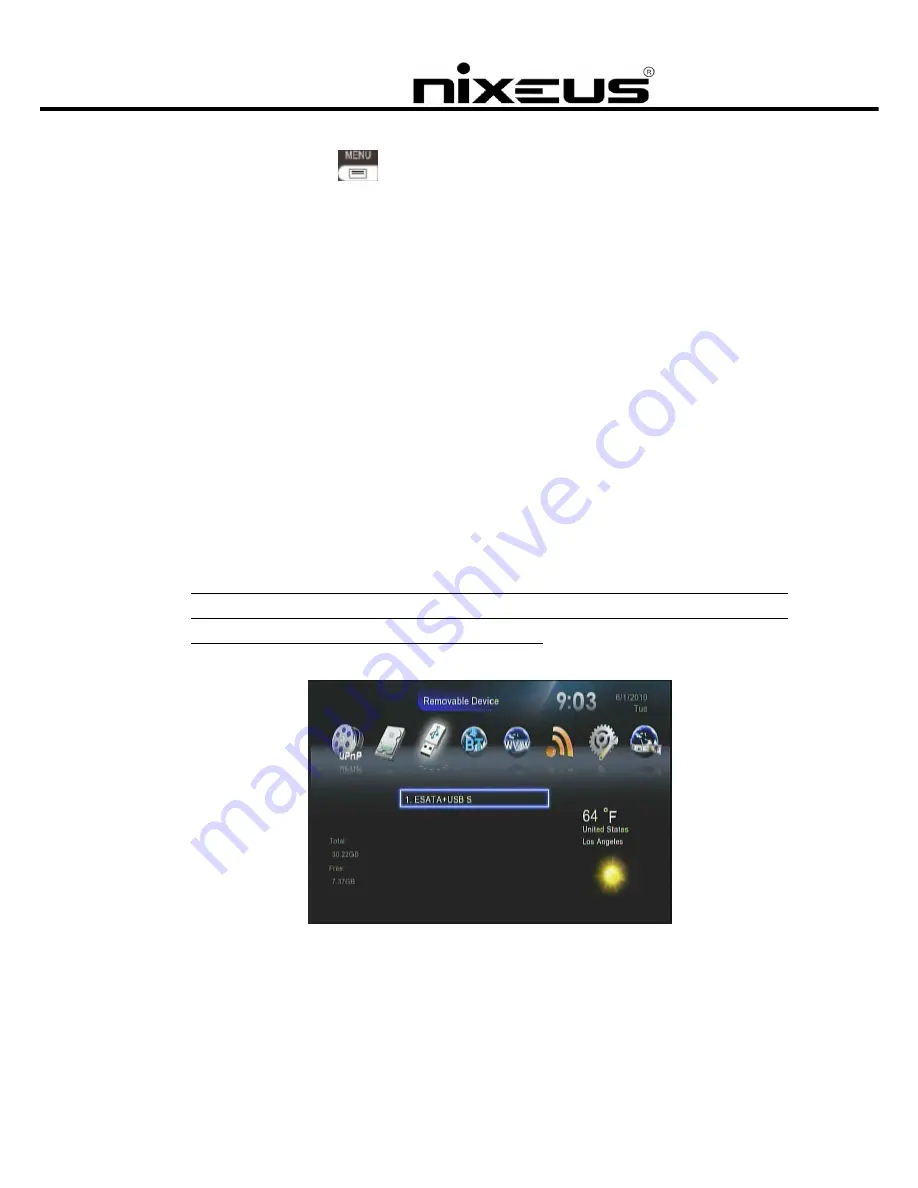
Local Storage Devices 

The unit supports external USB flash disks, USB HDDs SATA HDDs (via the eSATA port). 

In  the  main  menu  select  “Removable  Device”  and  navigate  to  the  device  to  play  the  files  you 

wish to play. 

The  number  of  USB  ports  can  be  extended  by  using  an  externally  powered  USB  hub,  please 

take into consideration the extra power consumption of the additional devices as the unit itself 

supplies only a limited amount of power to the USB port. 


Summary of Contents for Fusion HD

Page 1: ...Version 1 1 Fusion HD Fusion HD Fusion HD Fusion HD Quick Start Guide Quick Start Guide Quick Start Guide Quick Start Guide Nixeus Technology Inc...

Page 2: ...on for you to setup your unit and enjoy viewing your multimedia files The user manual will describe the unit in more detail Please go to www nixeus com to download it For quick help press the button o...

Page 3: ...lightning storms or when unused for long periods of time WARNING To reduce the risk of electronic shock do not remove the cover WARNING The device can display static images which can cause burn in on...

Page 4: ...ions pursuant to Laser Notice No 50 dated July 26 2001 Class 1 Laser Devices Beam description Collimated parallel beam of infrared light invisible to user Laser power output 716 microwatts at 832 nano...

Page 5: ...AAA batteries 2 USB Wi Fi Dongle 12V 2 5A Power supply Mini USB to A type USB cable HDD SATA Data and power cable attached in the box AV phone jack to RCA cable LAN Cable 4 screws for mounting HDD Qui...

Page 6: ...pply is attached but the device has not been powered on yet or the device has been powered off after use Orange The device is in stand by or in the process of turning on Green The device is operating...

Page 7: ...n the unit the system will enter standby mode Power Off If you want to power off the system please press the power key on the remote control for more than 2 seconds when the unit is operating or the O...

Page 8: ...PDIF connections are for connecting your unit to an external decoder or amplifier for high definition audio Press the hotkey button on the remote control and go to System Setup Audio Setup to select A...

Page 9: ...device The USB client port is another option for you to connect the unit to your PC and copy files from your PC to the unit The USB host port can be used to connect external HDD enclosures flash drive...

Page 10: ...ology Inc 10 HDD Installation To install a HDD into your unit follow the instructions below 1 Use a screwdriver to remove the screws on the device 2 Carefully remove the top cover 3 Fit the HDD in as...

Page 11: ...Inc 11 4 Connect the power data cable to the HDD 5 Using a screwdriver secure the HDD to the unit with the 4 screws provided 6 Refit the cover back onto the unit and secure in place with the screws p...

Page 12: ...gy Inc 12 Remote Control The remote control is used to navigate menus and to select and watch videos listen to music or view photos on your TV Please refer to the user manual for full details on each...

Page 13: ...Nixeus Technology Inc 13 1 3 2 17 16 25 22 24 27 28 30 15 31 32 35 34 33 13 5 14 8 18 4 10 12 11 19 23 21 37 20 26 29 36...

Page 14: ...K 1 Return to previous page Save cancel setting in setup pages 2 Escape from Web Browser 16 INFO Display media info Pressing twice will show more information 17 VOLUME Decrease the volume 18 VOLUME In...

Page 15: ...e unit The LED on the front panel of the PowerZest will turn orange during system loading and then green when it s ready START UP PAGE 2 Check the TV display by going to Setup System Setup TV Mode Set...

Page 16: ...ology Inc 16 Networking An example of a network with peripheral devices attached is below NETWORK DIAGRAM Wired Network Setup 1 Press the Setup hotkey on the remote control or select SETUP mode from t...

Page 17: ...ology Inc 17 2 Select Network Setup to configure and make changes to your network settings 3 Once in Network Setup Select IP Setup and Enable DHCP or set your static IP address according to your netwo...

Page 18: ...t before powering on the unit Please note that a USB Wi Fi dongle not supplied with the unit may NOT be supported For high definition video streaming a wired Ethernet connection between the unit and y...

Page 19: ...19 2 Select Network Wizard from setup main menu to start the setup wizard 3 Once the wizard has started choose the Wireless option 4 Select to look for all the available wireless networks and choose t...

Page 20: ...quality or green good quality light 6 Select Key Value and have your password ready to enter 7 The Key Length of each Key Format is described in the table below For WPA and WPA2 format the unit will...

Page 21: ...utomatically detect all available UPnP AV compliant content servers on boot up and list them on the UPnP column of the main menu No additional setup is necessary TVersity TM is a popular and free UPnP...

Page 22: ...are no firewalls blocking the shares from remote sites there are no additional steps needed to enable this feature The following steps show how to access media through the Samba Client Protocol 1 Sel...

Page 23: ...keys such as HOME SETUP Qon the remote control instead of just pressing the BACK button numerous times Then it will be quicker to go back to where you were in a long directory path by pressing the VID...

Page 24: ...File Management by Remote Control 1 Go to Removable Device on the Main Page 2 Select the name of your storage device from the list and press COPY 3 Select the source and destination then Press OK to...

Page 25: ...ss of your unit which you can find by checking in Setup onto the address bar of the file manager on the remote PC and press the enter key to continue The default user name and password to login are bo...

Page 26: ...Nixeus Technology Inc 26 2 Click Entire Network Workgroup...

Page 27: ...default local network location is Workgroup Double click Workgroup and you should see the unit listed as an icon 4 Double click the icon and a login menu will pop up Input the default user name and pa...

Page 28: ...ve and delete your media files between your PC the units local HDD Music Photo Video Playback For detailed information on supported file formats refer to the user manual Some the functions that are mo...

Page 29: ...Nixeus Technology Inc 29 Viewing Video Information 1 Press the Info button to display the video information 2 Press the button again to see any additional info...

Page 30: ...NU button to go to the directory bar on the top of the screen By pressing the numerical buttons on the remote control during navigation will sort the file names by the first letter of the key pressed...

Reviews: