The installation site must be selected according to specific criteria. The following conditions must be avoided
in any case:
l
Direct sunlight
l
Objects that radiate intense heat (maximum ambient temperature: -20...+60°C)
l
Objects with a strong electromagnetic field (frequency converter or similar)
l
Corrosive chemicals or gases
l
Mechanical impacts
l
Direct installation on foot or road ways
l
Vibrations
l
Radioactive emissions
Note:
Leave sufficient space at the upper end to mount the antenna. The space required depends on the
antenna used. Approx. 15 cm of space must be left beneath the device for the cable connections. Further
information about the installation dimensions can be found in the relevant sub-chapter.
7.2.1 Wall mounting
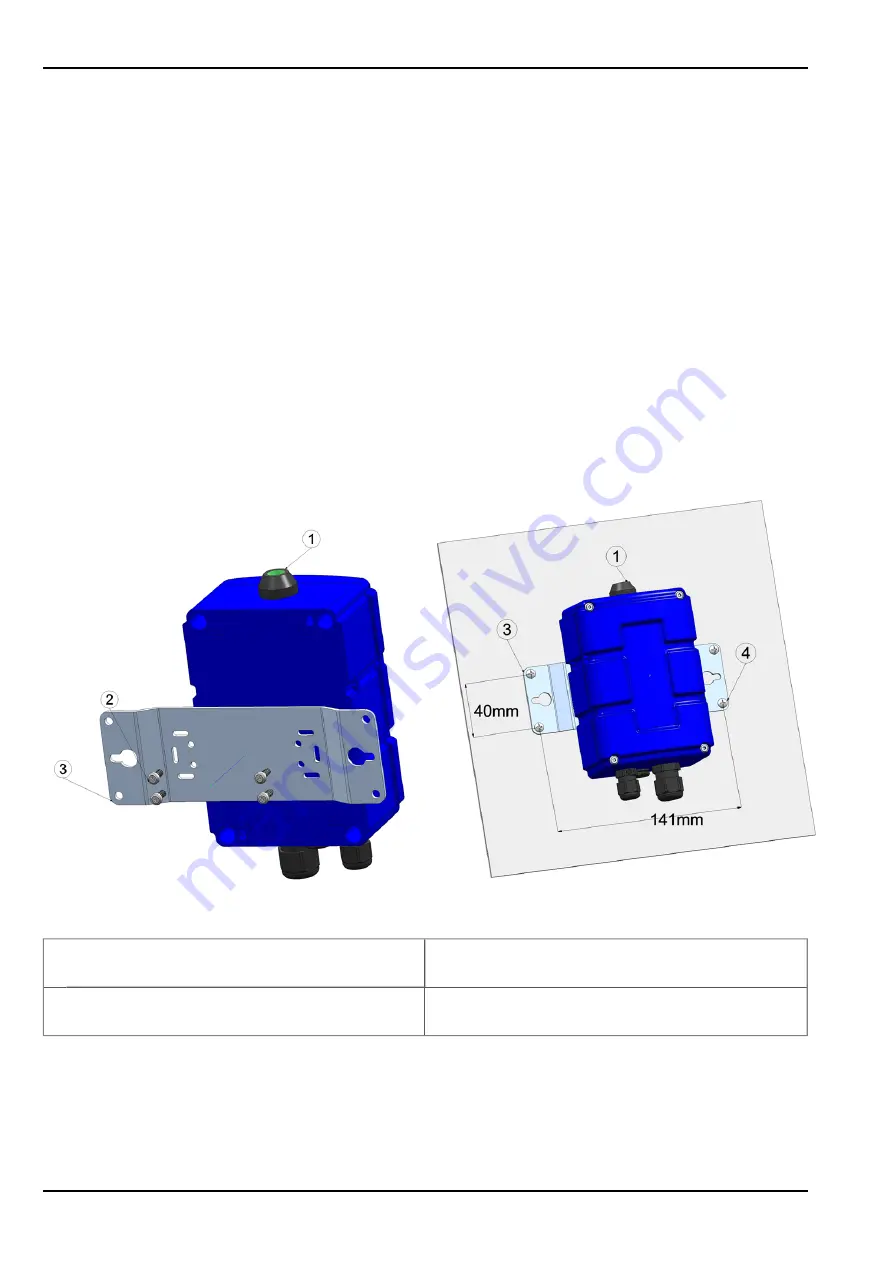
For wall mounting the optional "Universal bracket for housing NivuLog Easy 86x126 (NLM0HALEASY)"
equipment is required.
Step 1 of the wall mounting
Step 2 of the wall mounting
1
NivuLog Easy
3
Assembly loop (included in the delivery scope of
NLM0HALEASY)
2
Delta PT M3.5x8 Torx 15 (included in the delivery
scope of NLM0HALEASY)
4
Raised head tapping screw 3.5x32 (included in
the delivery scope of NLM0HALEASY)
1. First attach the assembly loop (3) using the screws (2) included in the "Universal bracket for housing
NivuLog Easy 86x126 (NLM0HALEASY)" equipment set to the NivuLog Easy (see "Step 1 of the wall
mounting" on page 22).
22 of 73
NivuLog Easy - Rev. 05 as of 02.07.2012


