background image

5. Start & Stop

5.1 Start the Inverter

To start up the Inverter, it is important that the following steps are strictly followed:

1.  Switch the Solar Supply Main Switch (AC) ON first.

2.  Switch the DC Isolator ON. If the voltage of PV arrays are higher than start up voltage, 

    the inverter will turn on. The red LED power will light, and the LCD shows the company's 

    name and the inverter model.

GCI-5K-2G-W-US

Figure 5.1 Company Name and Inverter Model on LCD

3.  When both the DC and the AC grid sides supply to the inverter, it will be ready to 

    generate power. Initially, the inverter will check both its internal parameters and the 

    parameters of the AC grid, to ensure that they are within the acceptable limits.  At the 

    same time, the green LED will flash and the LCD displays the information of 

    INITIALIZING.

4.  After 30-180 seconds (depending on local requirement), the inverter will start to 

    generate power. The green LED will be on continually and the LCD displays 

    GENERATING.

WARNING: 

Do not touch the surface when the inverter is operating. It may be 
hot and cause burns.

5.2 Stop the Inverter

To stop the Inverter, the following steps must be strictly followed:

1.  Switch the Solar Supply Main Switch (AC) OFF.

2.  Wait 30 seconds. Switch the solar panel DC Isolator OFF. All the LEDs of the inverter will 

    be off in a minute.

Ginlong

.15.

.14.

4. Installation

   
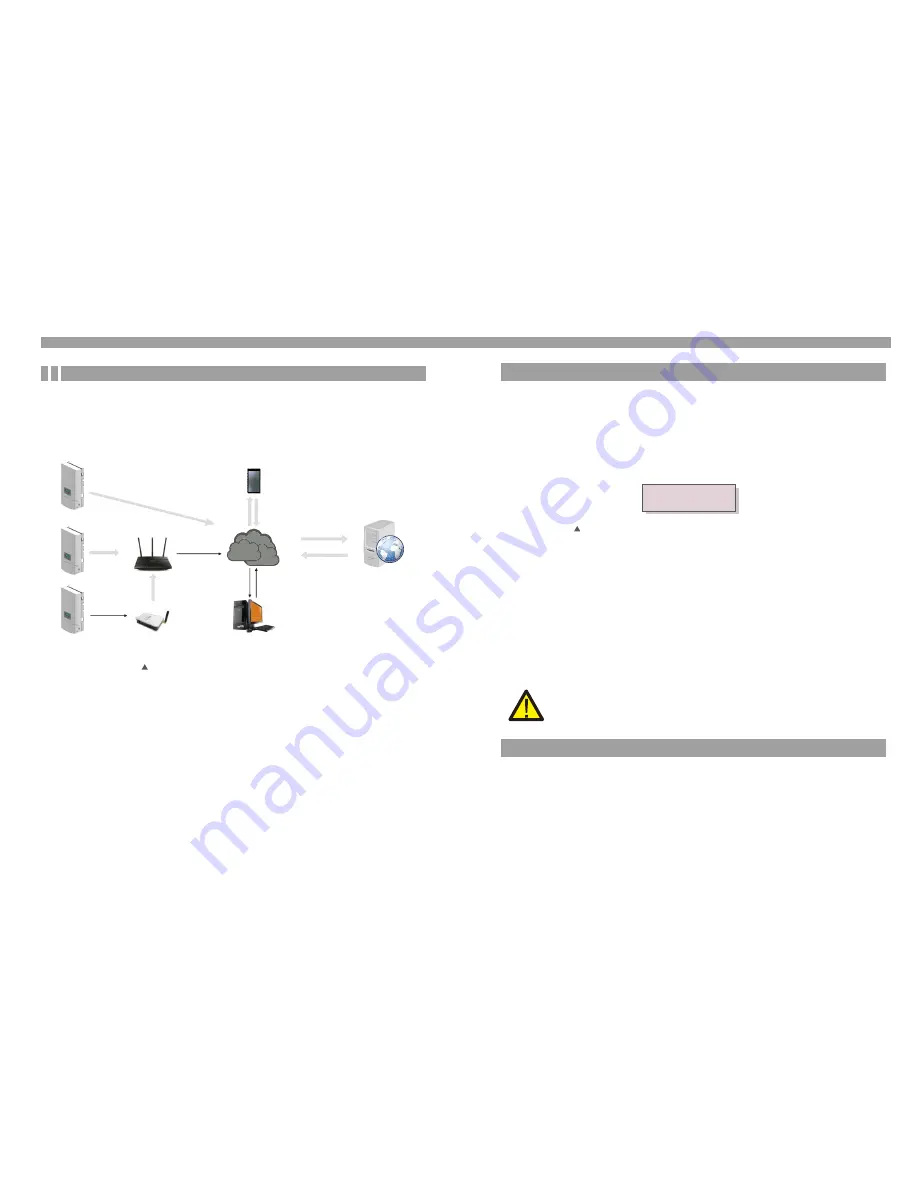
The inverter can be monitored by Wi-Fi or GPRS functions. All the communication 
functions are optional (Figure 4.6), please refer to communication connection 
instructions. 

Figure4.6 Wi-Fi communication function

Internet

GPRS monitoring

Wi-Fi monitoring

Smart phone monitoring

PC monitoring

Web server

Router

Wi-Fi monitoring

Wi-Fi box

4.3.3 Inverter monitoring connection

Summary of Contents for GCI-2G-W

Page 1: ...angshan Ningbo Zhejiang 315712 P R China Tel 86 0 574 6578 1806 Fax 86 0 574 6578 1606 Email info ginlong com Web www ginlong com Please record the serial number of your inverter and quote this when y...

Page 2: ...d 3 4 LCD 4 Installation 4 1 Select Location for the Inverter 4 2 Mounting the Inverter 4 3 Electrical Connections 5 Start Stop 5 1 Start the Inverter 5 2 Stop the Inverter Contents 1 3 5 5 5 6 7 7 7...

Page 3: ...4K 2G W US GCI 4 6K 2G W US GCI 5K 2G W US Figure 1 1 Bottom side view DC Switch Water drill hole DC input AC input RS 485 Wiring box LCD display 4 buttons LED lights 6 Operation 6 1 Main Menu 6 2 In...

Page 4: ...bol indicates important safety instructions which if not correctly followed could result in serious injury or death Improper use may result in potential electric shock hazards or burns This manual con...

Page 5: ...al equipment is connected 3 The electrical installation must meet all the applicable regulations and standards 4 The inverter must be installed according to the instructions stated in this manual 5 Th...

Page 6: ...e inverter should be considered Adequate ventilation must be provided if the inverter is to be installed in a confined space 9 NOTE Nothing should be stored on or placed against the inverter 300mm 500...

Page 7: ...uld be mounted in a vertical position as shown in Figure 4 2 The steps to mount the inverter on the wall are given as follows 1 Locate the wall studs in the desired location and align the wall mount b...

Page 8: ...e inverter WARNING Damage to the DC Disconnect due to enlarged knockouts Enlarged knockouts enable moisture to penetrate the DC Disconnect which could damage electronic components in the DC Disconnect...

Page 9: ...CD displays the information of INITIALIZING 4 After 30 180 seconds depending on local requirement the inverter will start to generate power The green LED will be on continually and the LCD displays GE...

Page 10: ...ain Menu Pressing the ENTER key locks Figure 6 2 a or unlocks Figure 6 2 b the screen 5 2 Stop the Inverter Figure 6 2 Locks and Unlocks the Screen of LCD b a 17 16 6 Operation 6 1 Main Menu During no...

Page 11: ...The screen will require the password as below The default password is 0010 Please press down to move the cursor press up to select the number 18 6 3 Settings The following submenus are displayed when...

Page 12: ...rd 6 5 Advanced Settings Technicians Only Select Advanced Settings from the Main Menu to access the following options 1 Select Standard 2 Grid ON OFF NOTE To access to this area is for fully qualified...

Page 13: ...l access to the following submenu see Figure 6 12 Figure 6 12 Press the UP DOWN keys to scroll through items Press the ENTER key to edit the highlighted item Press the UP DOWN keys again to change the...

Page 14: ...030V 0100W 040V 0200W Pressing UP DOWN keys to set power curve Pressing ENTER key to move the selected digit to the next from left to right Press the ESC key to save the power curve point see Figure...

Page 15: ...Over DC voltage Over DC bus voltage Under DC bus voltage Grid interference Initialization system fault Over Temperature Ground fault Table 8 1 Fault message and description ILeak FAULT Relay FAULT DCi...

Page 16: ...tor or the service center Please keep ready with you the following information before contacting us 1 Serial number of GCI Single Phase Inverter 2 The distributor dealer of GCI Single Phase Inverter i...

Page 17: ...31 208V 240V 183V 229V 211V 264V Adjustable NEMA 3R 30 208V 240V 183V 229V 211V 264V adjustable NEMA 3R...

Page 18: ...33 208V 240V 183V 229V 211V 264V Adjustable NEMA 3R 32 208V 240V 183V 229V 211V 264V adjustable NEMA 3R...

Reviews: