


Connect the battery charger to the
mains PSU, and plug the PSU into a
mains socket. The red monitor LED on
the charger lights up.
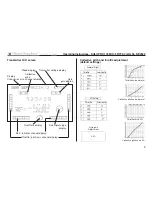
Connect the battery to the charger, and
use "+" or "-" to set the charge current
(high = fast, low = longer battery life).
Press the Start button. The monitor
LED flashes. When the charge process
is finished, all the LEDs on the charger flash, and you will hear an
audible beep. Disconnect the battery from the charger, then discon-
nect the mains PSU from the wall socket.
This procedure is only necessary
if individual components are re-
placed.
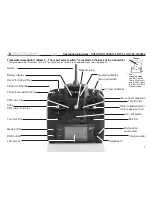
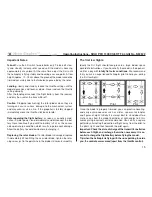
Move the Trainer switch to the for-
ward position (Fig. 1), then switch
the transmitter on (Fig. 2). The
transmitter's LCD screen displays
"S-H" and flashes, and at the same
time a constant warning tone is
emitted. Connect the flight battery
(Fig. 3).
Re-binding is complete when the
transmitter's LCD screen switches
to Normal mode and the warning
sound ceases. Do not move the
model or the transmitter during the
binding process.
Charging the flight battery
Re-binding the transmitter
11
Safety Notes
The battery must not be left unsupervised during the char-
ge process or be placed on an inflammable surface. Protect
from damp. Do not subject it to direct sunshine, and do not
cover the charger.
Do not charge batteries that are hot to the touch. Allow batte-
ries to cool down to ambient temperature. Charge the battery
only using the charger included in the set; do not use any
other charger. The charger should only be used to charge
the battery included in the set. Not suitable for charging the
transmitter battery!
Operating Instructions - SOLO PRO 130 EC145 RTF 2.4 GHz No. NE2522
Fig. 1
Fig. 2
Fig. 3


