background image

F

23

Tech

ni

cal
 Not

e

s an

d

 Index

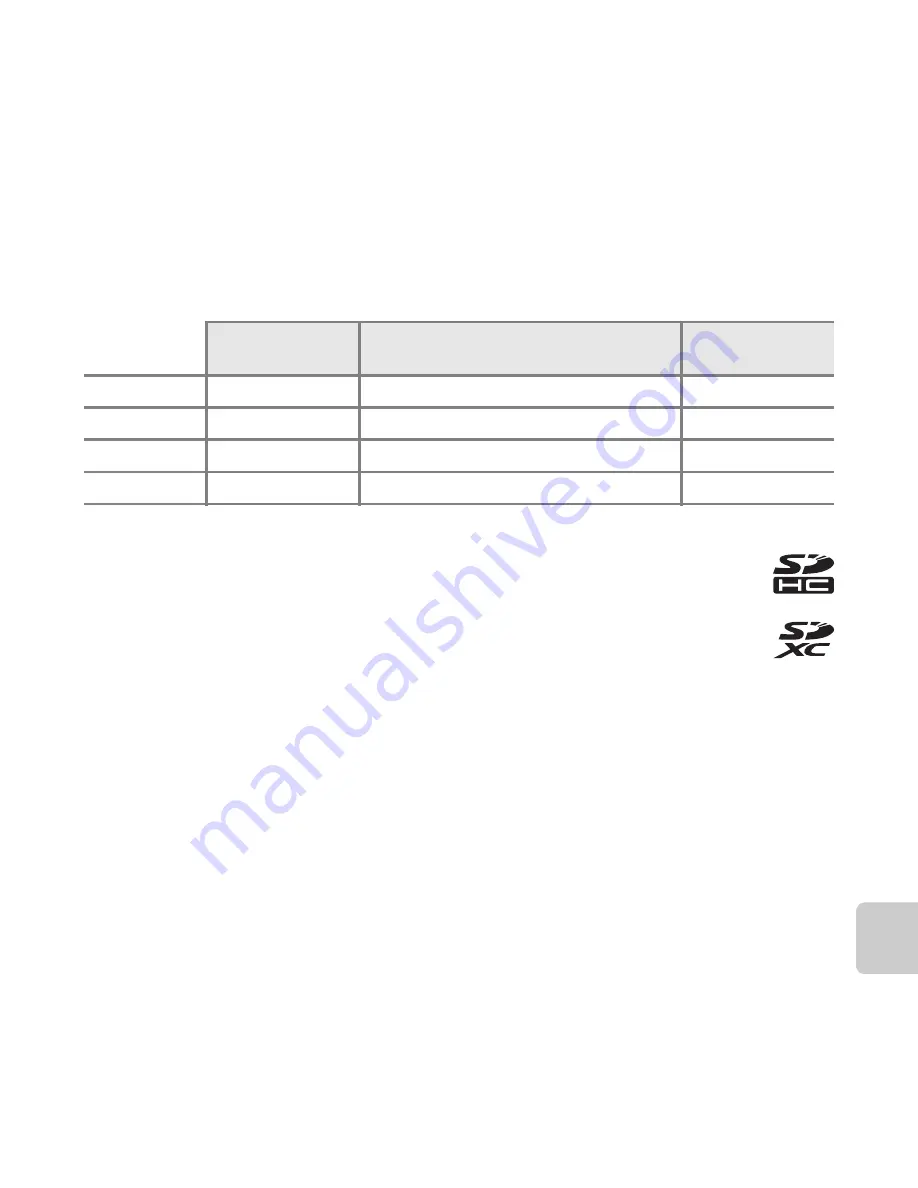
Approved Memory Cards

The following Secure Digital (SD) memory cards have been tested and approved for use in 
this camera.

Memory cards with an SD Speed Class rating of 6 or faster are recommended for recording 
movies. When using a memory card with a lower Speed Class rating, movie recording may 
stop unexpectedly.

1

If the memory card will be used with a card reader or similar device, make sure that the device 
supports 2 GB cards.

Contact the manufacturer for details on the above cards. We cannot guarantee camera 
performance when using memory cards made by other manufacturers.

SD memory card

SDHC memory card

2

SDXC memory 

card

3

SanDisk

2 GB

1

4 GB, 8 GB, 16 GB, 32 GB

64 GB, 128 GB

TOSHIBA

2 GB

1

4 GB, 8 GB, 16 GB, 32 GB

64 GB

Panasonic

2 GB

1

4 GB, 8 GB, 16 GB, 32 GB

64 GB

Lexar

4 GB, 8 GB, 16 GB, 32 GB

64 GB, 128 GB

2

SDHC compliant.
If the memory card will be used with a card reader or similar device, make sure that the 
device supports SDHC.

3

SDXC compliant.
If the memory card will be used with a card reader or similar device, make sure that the 
device supports SDXC.

Summary of Contents for COOLPIX S6400

Page 1: ...DIGITAL CAMERA Reference Manual En ...

Page 2: ...ct M Target finding AF A74 The Target finding AF function allows the camera to determine the main subject of the image such as a person flower or small object The camera automatically focuses on the subject letting you freely compose the image without worrying about the focus In addition the camera automatically adjusts the focus area to match the size of the subject ensuring a sharp focus on the ...

Page 3: ...Introduction Parts of the Camera The Basics of Shooting and Playback Shooting Features Playback Features Recording and Playing Back Movies General Camera Setup Reference Section Technical Notes and Index ...

Page 4: ...g the Package Contents In the event that any items are missing please contact the store where you purchased the camera A plug adapter is included if the camera was purchased in a country or region that requires a plug adapter The shape of the plug adapter varies with the country or region of purchase A16 NOTE A memory card is not included with the camera COOLPIX S6400 Digital Camera Camera Strap S...

Page 5: ...ut This Manual If you want to start using the camera right away see The Basics of Shooting and Playback A13 To learn about the parts of the camera and information that is displayed in the monitor see Parts of the Camera A1 ...

Page 6: ...uttons or messages displayed on a computer monitor appear in bold In this manual images are sometimes omitted from monitor display samples so that monitor indicators can be more clearly shown Illustrations and monitor content shown in this manual may differ from the actual product Symbol Description B This icon indicates cautions and information that should be read before using the camera C This i...

Page 7: ...ikon com Use Only Nikon Brand Electronic Accessories Nikon COOLPIX cameras are designed to the highest standards and include complex electronic circuitry Only Nikon brand electronic accessories including battery chargers batteries Charging AC adapters and AC adapters certified by Nikon specifically for use with this Nikon digital camera are engineered and proven to operate within the operational a...

Page 8: ...ormation in these manuals is accurate and complete we would appreciate it were you to bring any errors or omissions to the attention of the Nikon representative in your area address provided separately Notice Concerning Prohibition of Copying or Reproduction Note that simply being in possession of material that was digitally copied or reproduced by means of a scanner digital camera or other device...

Page 9: ...f making illegal copies or to infringe copyright laws Disposing of Data Storage Devices Please note that deleting images or formatting data storage devices such as memory cards or built in camera memory does not completely erase the original image data Deleted files can sometimes be recovered from discarded storage devices using commercially available software potentially resulting in the maliciou...

Page 10: ...d service representative for inspection Do not disassemble Touching the internal parts of the camera or Charging AC Adapter could result in injury Repairs should be performed only by qualified technicians Should the camera or Charging AC Adapter break open as the result of a fall or other accident take the product to a Nikon authorized service representative for inspection after unplugging the pro...

Page 11: ...attery to flame or to excessive heat Do not immerse in or expose to water Put the battery in the battery case before transporting it Do not transport or store with metal objects such as necklaces or hairpins The battery is prone to leakage when fully discharged To avoid damage to the product be sure to remove the battery when no charge remains Discontinue use immediately should you notice any chan...

Page 12: ...ng infants when the flash should be no less than 1 m 3 ft 4 in from the subject Do not operate the flash with the flash window touching a person or object Failure to observe this precaution could result in burns or fire Avoid contact with liquid crystal Should the monitor break care should be taken to avoid injury caused by broken glass and to prevent liquid crystal from the monitor touching the s...

Page 13: ...an radiate radio frequency energy and if not installed and used in accordance with the instructions may cause harmful interference to radio communications However there is no guarantee that interference will not occur in a particular installation If this equipment does cause harmful interference to radio or television reception which can be determined by turning the equipment off and on the user i...

Page 14: ...tices for customers in Europe CAUTIONS RISK OF EXPLOSION IF BATTERY IS REPLACED BY AN INCORRECT TYPE DISPOSE OF USED BATTERIES ACCORDING TO THE INSTRUCTIONS This symbol indicates that this product is to be collected separately The following apply only to users in European countries This product is designated for separate collection at an appropriate collection point Do not dispose of as household ...

Page 15: ...play Language Date and Time 20 Step 1 Turn the Camera On 24 Turning the Camera On and Off 25 Step 2 Select a Shooting Mode 26 Available Shooting Modes 27 Step 3 Frame a Picture 28 Using the Zoom 29 Step 4 Focus and Shoot 30 The Shutter release Button 31 Step 5 Play Back Images 32 Step 6 Delete Unwanted Images 34 Shooting Features 37 A Auto Mode 38 Using Quick Effects 39 Scene Mode Shooting Suited ...

Page 16: ...rding and Playing Back Movies 95 Recording Movies 96 Features That Can Be Set with F Movie Menu 99 Playing Back Movies 100 General Camera Setup 103 Features That Can Be Set with F Setup Menu 104 Reference Section E1 Using the Draw Option E2 Using Easy Panorama Shooting and Playback E3 Shooting with Easy Panorama E3 Viewing Images Captured with Easy Panorama E6 Favorite Pictures Mode E7 Adding Imag...

Page 17: ... Sensitivity E58 C Continuous Shooting E59 w White Balance Adjusting Hue E62 p Quick Effects E65 G AF Area Mode E66 The Smart Portrait Menu E67 e Skin Softening E67 y Blink Proof E68 a Smile Timer E68 The Playback Menu E69 b Slide Show E69 d Protect E71 a Print Order Creating a DPOF Print Order E73 f Rotate Image E77 E Voice Memo E78 h Copy Copy Between Internal Memory and Memory Card E80 N Choose...

Page 18: ... Optional Accessories E119 Error Messages E120 Technical Notes and Index F1 Maximizing Camera Life and Performance F2 The Camera F2 The Battery F3 Charging AC Adapter F4 Memory Cards F5 Cleaning and Storage F6 Cleaning F6 Storage F6 Troubleshooting F7 Specifications F17 Supported Standards F22 Approved Memory Cards F23 Index F25 ...

Page 19: ...tion that is displayed in the monitor The Camera Body 2 Attaching the Camera Strap 4 Operating the Touch Panel 4 Using the Stylus 5 Indicators of the Monitor Touch Panel 6 Shooting Mode 6 Playback Mode 8 Using Menus 10 If you want to start using the camera right away see The Basics of Shooting and Playback A13 ...

Page 20: ...ide angle 29 g telephoto 29 h thumbnail playback 81 i playback zoom 80 3 Self timer lamp 61 AF assist illuminator 104 4 Power switch power on lamp 24 5 Microphone stereo 85 96 6 Flash 58 7 Lens cover 8 Lens 9 Eyelet for camera strap 4 10 USB audio video output connector 16 86 11 HDMI mini connector Type C 86 12 Connector cover 16 86 ...

Page 21: ...lamp 58 3 A shooting mode button 38 40 52 54 4 c playback button 32 82 5 Battery chamber memory card slot cover 14 15 6 Tripod socket 7 Power connector cover for connection with optional AC Adapter E119 8 Battery latch 14 9 Battery chamber 14 10 Memory card slot 18 11 Monitor touch panel 6 12 Speaker 85 100 ...

Page 22: ...operation to Select icons Select images in thumbnail playback mode A81 Perform touch shutter touch AF AE or subject tracking operations A69 Dragging Drag your finger across the touch panel and remove it from the touch panel Use this operation to Scroll through images in full frame playback mode A32 Move the visible portion of an image enlarged with playback zoom A80 Use sliders to adjust exposure ...

Page 23: ...o the touch panel B Notes About Tapping Dragging The camera may not respond if your finger is left in one place too long The camera may not respond if the followings are performed Bounce your finger off the display Drag your finger over too short a distance Stroke the display too lightly Move your finger too quickly The camera may not respond if something else is touching the touch panel when your...

Page 24: ... is displayed when the camera is turned on and when the camera is being operated and some of the information is hidden after a few seconds when Photo info is set to Auto info in Monitor settings A104 To redisplay the information tap A 29 29 0 0 999 999 1 1 1 F3 1 F3 1 F3 1 250 250 250 9999 9999 999 999 29 29 0 0 29 29 0 0 26 28 29 27 30 11 13 12 23 22 24 25 31 1 8 9 10 15 16 17 18 14 19 a b 6 5 2 ...

Page 25: ...ncellation control 69 E57 16 Macro mode 63 17 Slider display control 41 53 18 Information redisplay control 104 19 Menu display control 10 68 99 103 20 Movie recording time remaining 96 21 Number of exposures remaining still images 24 22 Internal memory indicator 24 96 23 Aperture value 30 24 Shutter speed 30 25 a Scene effect adjustment slider 41 b Special effects adjustment slider 53 26 Focus ar...

Page 26: ...en the camera is being operated and some of the information is hidden after a few seconds when Photo info is set to Auto info in Monitor settings A104 To redisplay the information tap the monitor 15 15 11 11 2012 15 2012 15 30 30 999 999 999 999 9999 9999 JPG JPG 9999 JPG 15 11 2012 15 30 19 18 25 26 27 23 999 999 999 999 9999 9999 9999 9999 0 0 29 29 0 0 29 29 a b 12 13 15 16 21 20 22 24 2 3 11 1...

Page 27: ...4 E28 8 Eye Fi communication indicator 105 9 Protect icon 84 E71 10 Print order icon 84 E73 11 Battery level indicator 24 12 3D image icon 50 13 Sequence display when Individual pictures is selected 105 E14 E110 14 Display previous next image 32 15 Small picture icon 84 E31 16 Crop icon 80 E32 17 Image mode1 69 E49 18 Easy panorama 48 19 Movie options1 99 20 Menu display control 10 84 103 21 Inter...

Page 28: ... is displayed in shooting mode The playback menu A32 is displayed in playback mode 2 Tap B or C to scroll through the options on the screen Scroll through the options to display the desired options Scroll to the bottom of the shooting menu to display the movie menu options A99 3 Tap a menu option The setting screen is displayed 25 25 0 0 1010 1010 Shooting menu Touch shooting Image mode Continuous...

Page 29: ...ottom of the shooting or playback menu and tap z Set up For information about the available setting options see Features That Can Be Set with F Setup Menu A104 Image mode 4608 3456 3264 2448 4608 3456 2272 1704 1600 1200 640 480 White balance Auto Auto Auto Incandes Incandes Incandes Fluorescent Fluorescent Fluorescent Daylight Daylight Daylight Cloudy Cloudy Cloudy Preset manual Preset manual Pre...

Page 30: ...12 ...

Page 31: ...Preparation 2 Charge the Battery 16 Preparation 3 Insert a Memory Card 18 Preparation 4 Setting the Display Language Date and Time 20 Shooting Step 1 Turn the Camera On 24 Step 2 Select a Shooting Mode 26 Step 3 Frame a Picture 28 Step 4 Focus and Shoot 30 Playback Step 5 Play Back Images 32 Step 6 Delete Unwanted Images 34 ...

Page 32: ...fully insert the battery 2 When the battery is inserted correctly the battery latch will lock the battery in place B Inserting the Battery Correctly Inserting the battery upside down or backwards could damage the camera Be sure to check that the battery is in the correct orientation 3 Close the battery chamber memory card slot cover Charge the battery before the first use or when the battery is ru...

Page 33: ...y card slot cover and slide the orange battery latch up in the direction indicated by the arrow 1 The battery can then be removed by hand 2 Do not pull it at an angle B High Temperature Caution The camera battery and memory card may be hot immediately after using the camera Observe caution when removing the battery or memory card B Notes About the Battery Be sure to read and follow the warnings fo...

Page 34: ...chased The Charging AC Adapter comes with the plug adapter attached in Argentina and Korea 2 Make sure the battery is installed in the camera and then connect the camera to the Charging AC Adapter in order of 1 to 3 Keep the camera turned off Be sure that plugs are properly oriented Do not attempt to insert plugs at an angle and do not use force when connecting or disconnecting the plugs The charg...

Page 35: ...ing the Camera During Charging If you press the power switch while using the Charging AC Adapter to charge the battery in the camera the camera turns on and you can play back images except when the camera is connected via HDMI Shooting is not possible Status Description Flashes slowly green The battery is charging Off The battery is not charging When charging is complete the charge lamp stops flas...

Page 36: ...to turn off the camera before opening the cover 2 Insert the memory card Slide the memory card in until it clicks into place B Inserting the Memory Card Correctly Inserting the memory card upside down or backwards could damage the camera and the memory card Be sure to check that the memory card is in the correct orientation 3 Close the battery chamber memory card slot cover Memory card slot ...

Page 37: ...ncluded with your memory card for more information Removing Memory Cards Turn the camera off and be sure that the power on lamp and the monitor have turned off before opening the battery chamber memory card slot cover Gently push the memory card into the camera 1 to partially eject the card and then remove the card 2 Do not pull it at an angle B High Temperature Caution The camera battery and memo...

Page 38: ...amera clock are displayed 1 Press the power switch to turn on the camera When the camera is turned on the power on lamp green will light and then the monitor will turn on the power on lamp turns off when the monitor turns on 2 Tap the desired language For more information about operating the touch panel see Operating the Touch Panel A4 3 Tap Yes Language Time zone and date Choose time zone and set...

Page 39: ... the daylight saving time option tap p again 5 Tap the desired date format 6 Edit the date and time and tap I Tap the desired field and tap A or B to edit the value 7 Tap Yes When settings are finished the lens extends and the camera switches to shooting mode Home time zone London Casablanca 00 00 Date format Year Month Day Month Day Year Day Month Year Date and time 01 01 2012 00 00 Y M D Date an...

Page 40: ...one and date setting in the setup menu to set the date and time A104 C The Clock Battery The camera s clock is powered by a backup battery that is separate from the camera s main battery The backup battery charges when the main battery is inserted into the camera or when the camera is connected to an optional AC adapter and can provide several days of backup power after about ten hours of charging...

Page 41: ...23 ...

Page 42: ... the camera and images will be saved in the internal memory approximately 78 MB The number of exposures remaining depends on the amount of available memory in the internal memory or memory card and also varies depending on the image quality and image size determined by the image mode setting E50 Display Description b The battery level is high B The battery level is low Prepare to charge or replace...

Page 43: ...m any of the following operations Press the power switch shutter release button A shooting mode button c playback button or b e movie record button The time that elapses before the camera enters standby mode can be changed using the Auto off setting in the setup menu A104 By default the camera enters standby mode in about one minute when you are using shooting mode or playback mode If you are usin...

Page 44: ...ooting mode selection menu which allows you to select the desired shooting mode is displayed 2 Tap the desired shooting mode icon A auto mode is used in this example The shooting mode setting is saved even after the camera is turned off Shooting mode Special effects Scene Auto mode Smart portrait ...

Page 45: ...era settings are optimized according to the scene that you select When using scene auto selector d the camera automatically selects the optimum scene mode when you frame a picture making it even easier to take pictures using settings that suit the scene To select a scene tap the icon of the desired scene mode in the shooting mode selection menu R Special effects A52 Effects can be applied to image...

Page 46: ...r objects away from the lens flash AF assist illuminator microphone and speaker When taking pictures in portrait tall orientation turn the camera so that the flash is above the lens 2 Frame the picture The focus area is displayed in the center of the frame Position the main subject near the center of the frame 25 25 0 0 1010 1010 ...

Page 47: ...es to the maximum wide angle position A zoom indicator is displayed at the top of the monitor when the zoom control is rotated Digital zoom which allows you to further magnify the subject up to approximately 4 the maximum optical zoom ratio can be activated by rotating and holding the zoom control to g when the camera is zoomed in to the maximum optical zoom position C Digital Zoom and Interpolati...

Page 48: ...e button is pressed halfway the focus area or focus indicator may flash red This indicates that the camera is unable to focus Modify the composition and press the shutter release button halfway again 2 Press the shutter release button the rest of the way down A31 The shutter is released and the image will be saved to the memory card or internal memory 3 To apply an effect to the captured image tap...

Page 49: ...n the monitor to set the focus and exposure on it instead of releasing the shutter C AF assist Illuminator and Flash If the subject is dimly lit the AF assist illuminator A104 may light when the shutter release button is pressed halfway and the flash A58 may fire when the shutter release button is pressed all the way down C To Make Sure You Do Not Miss a Shot If you are concerned that you might mi...

Page 50: ...emory card from the camera to play back images saved in the camera s internal memory C is displayed near the current image number total number of images display To return to shooting mode press the A button the shutter release button or the b e movie record button c playback button To display the previous image drag the image to the right or tap G To display the next image drag the image to the le...

Page 51: ...nd by default only the first image in the sequence key picture is displayed to represent them A105 Tap R to display them as individual images Tap J to return to the key picture only display C Notes About the Quick Effects Function When Y is displayed in full frame playback mode you can tap Y to apply an effect to the image When the effect selection screen is displayed tap an effect tap I in the co...

Page 52: ... F Select images Multiple images can be selected and deleted A35 H All images All images are deleted If step 1 is performed in thumbnail playback mode A81 select either Select images or All images 3 Tap Yes Deleted images cannot be recovered To cancel tap No Playback menu Delete Paint Protect Print order Favorite pictures Slide show Delete Current image Select images All images Yes No Erase 1 imag...

Page 53: ...images cannot be recovered Copy important images to a computer or other media before deleting them from the camera Protected images A84 cannot be deleted B Deleting Images in a Sequence If you tap F and delete a key picture while only key pictures are displayed for sequences of images A33 all images in the sequence including the key picture are deleted To delete individual images in a sequence tap...

Page 54: ...36 ...

Page 55: ...ind of images you want capture A Auto Mode 38 Scene Mode Shooting Suited to Scenes 40 Special Effects Mode Applying Effects When Shooting 52 Smart Portrait Mode Capturing Images of Smiling Faces 54 Basic Shooting Settings 57 Using the Flash Flash Modes 58 Using the Self timer 61 Using Macro Mode 63 Adjusting Brightness Exposure Compensation 65 Features That Can Be Set with F Shooting Menu 68 Featu...

Page 56: ...ne focus areas containing the subject closest to the camera See Using Target Finding AF A74 for more information The focus area can be changed using the touch shutter or touch AF AE A69 Subject tracking which moves the focus area to track the subject can be set A69 Changing A Auto Mode Settings You can change the settings for the flash mode self timer macro mode and exposure compensation See Basic...

Page 57: ...he desired effect Tap B or C to scroll through the thumbnails See p Quick Effects E20 for information about the effect types 3 Tap I To exit without saving the edited image tap f When a confirmation screen is displayed tap Yes 4 Tap Yes A new edited copy is created and the monitor display returns to the shooting screen Copies created with the quick effects function are indicated by the V icon disp...

Page 58: ... to return to the help selection screen Enter shooting mode M A shooting mode button M C Scene mode M select a scene d Scene auto selector default setting A42 b Portrait A42 c Landscape A42 d Sports A43 e Night portrait A43 f Party indoor A44 Z Beach A44 z Snow A44 h Sunset A44 i Dusk dawn A44 j Night landscape A45 k Close up A45 u Food A46 l Museum A46 m Fireworks show A46 n Black and white copy ...

Page 59: ... of Each Scene A42 and Features That Can Be Set with F Shooting Menu A68 for more information Adjusting Scene Effect The scene effect adjustment slider is displayed by tapping g in the scene modes listed below Tap or drag the scene effect adjustment slider to adjust the degree of effect to be applied to pictures taken in the selected scene mode After you finish making the adjustment tap H to hide ...

Page 60: ... night landscape flash mode is fixed at W off regardless of the setting made and the camera captures one image at a slower shutter speed Depending upon shooting conditions the camera may not select the desired scene mode Should this occur switch to A auto mode A26 or select the desired scene mode manually Digital zoom cannot be used b Portrait When the camera detects a human face it focuses on tha...

Page 61: ...no faces are detected the camera focuses on the subject in the center of the frame Tap F and tap e Night portrait to select u Hand held or w Tripod Hand held default setting When the e icon at the top left of the monitor lights in green press the shutter release button all the way to capture a series of images which will be combined into a single image and saved Once the shutter release button is ...

Page 62: ...he setup menu A104 when using a tripod to stabilize the camera during shooting Z Beach The camera focuses on the area in the center of the frame The focus area can be changed using the touch shutter or touch AF AE A69 z Snow The camera focuses on the area in the center of the frame The focus area can be changed using the touch shutter or touch AF AE A69 h Sunset Use the scene effect adjustment sli...

Page 63: ...oting screen The angle of view i e the area visible in the frame seen in the saved image will be narrower than that seen in the monitor at the time of shooting Tripod Select this option when using a tripod or other means to stabilize the camera during shooting Vibration reduction is disabled even when Vibration reduction A104 in the setup menu is set to On One image is captured at a slow shutter s...

Page 64: ... is not pressed halfway You may hear the sound of the camera focusing l Museum The flash does not fire The camera focuses on the area in the center of the frame The focus area can be changed using the touch shutter or touch AF AE A69 The camera captures a series of up to ten images while the shutter release button is held all the way down and the sharpest image in the series is automatically selec...

Page 65: ...nd dark areas in the same frame Digital zoom cannot be used When the shutter release button is pressed all the way the camera shoots images continuously at high speed and saves the following two images A non HDR composite image An HDR composite image in which the loss of details in highlights or shadows is minimized The second image saved is an HDR composite image If there is only enough memory to...

Page 66: ...sired direction Press the shutter release button all the way down remove your finger from the button and then slowly pan the camera horizontally Shooting automatically ends when the camera captures the specified shooting range The camera focuses at the center of the frame when shooting starts The zoom position is fixed at wide angle Tap F and tap W X Easy panorama to select a shooting range from W...

Page 67: ...an be detected the face displayed largest in the monitor is framed by a double border and the others by single borders When no pet or human faces are detected the camera focuses on the subject at the center of the frame B Notes About Pet Portrait Scene Mode Digital zoom cannot be used Depending on the distance of the pet from the camera the speed of the pet s movement the direction the pet is faci...

Page 68: ...nnot be taken s 3D photography The camera captures one image for each eye to simulate a three dimensional image on a 3D compatible TV or monitor After taking the first picture by pressing the shutter release button or using the touch shutter move the camera horizontally to the right so that the subject is aligned with the guide on the monitor The camera automatically takes the second picture when ...

Page 69: ...fault setting or 1080i HDMI 3D output On default setting When the camera is connected via HDMI and images are played back it may take a while to display images when switching between 3D images and non 3D images Playback zoom is not possible while images are played back in 3D Refer to the documentation included with the TV or monitor for details on how to make the settings B Caution for Viewing 3D ...

Page 70: ...anges the image to black and white and gives it sharp contrast G High key Gives the entire image a bright tone H Low key Gives the entire image a dark tone I Selective color Creates a black and white image in which only the specified color remains l Pop Increases the color saturation of the entire image to create a bright look k Super vivid Increases the color saturation of the entire image and sh...

Page 71: ...e desired color After you select the desired color tap H to hide the slider To display it again tap g Changing Special Effects Mode Settings You can change the settings for the flash mode self timer macro mode and exposure compensation See Basic Shooting Settings A57 for more information If you tap F the menu options for special effects mode are displayed See Features That Can Be Set with F Shooti...

Page 72: ...lease button wait for the subject to smile If the camera detects that the face framed by the double border is smiling the shutter is automatically released See a Smile timer A70 for more information After the camera releases the shutter it will continue to detect faces and smiles and will release the shutter again if it detects a smiling face 3 End shooting Any one of the following operations can ...

Page 73: ...timer the self timer lamp flashes when the camera detects a face and flashes quickly immediately after the shutter is released C Releasing the Shutter Manually The shutter can also be released by pressing the shutter release button If no faces are detected the camera focuses on the subject at the center of the frame Touch shutter A69 can be used when Smile timer is set to Off Changing Smart Portra...

Page 74: ...applied to saved images by using Glamour retouch A84 B Notes About Skin Softening It may take more time than usual to save images after shooting Under some shooting conditions the desired skin softening results may not be achieved and skin softening may be applied to areas of the image where there are no faces If the desired results are not produced switch to another shooting mode and then try sho...

Page 75: ...es that are available vary with the shooting mode as shown below See Default Settings A66 for information about each mode s default settings 1 Varies by the scene See Default Settings A66 for more information 2 Varies by the smart portrait menu setting See Default Settings A66 for more information Features A auto Scene Special effects Smart portrait Flash mode A58 w 1 w w2 Self timer A61 w w w2 Ma...

Page 76: ...ill fire when you press the shutter release button all the way down Flashing The flash is charging The camera cannot take pictures Off The flash will not fire when a picture is taken If the battery is low the monitor will turn off in order to save power while the flash is charging C Effective Range of the Flash When ISO sensitivity is set to Auto the flash has a range of 0 5 to 6 2 m 1 ft 8 in to ...

Page 77: ...g a tripod to stabilize the camera when shooting in dark surroundings X Fill flash The flash fires whenever a picture is taken Use to fill in illuminate shadows and backlit subjects Y Slow sync Auto flash mode is combined with slow shutter speed Suited to evening and night portraits that include background scenery The flash illuminates main subject slow shutter speeds are used to capture backgroun...

Page 78: ... off C Red eye Reduction This camera uses Advanced Red Eye Reduction In Camera Red Eye Fix If the camera detects red eye while saving an image the affected area will be processed to reduce red eye before the image is saved Note the following when shooting More time than usual is required to save images Red eye reduction may not produce the desired results in all situations In some cases red eye co...

Page 79: ...button When using the self timer use of a tripod is recommended Set Vibration reduction to Off in the setup menu A104 when using a tripod to stabilize the camera during shooting 1 Tap the self timer icon 2 Tap Y or Z Y ten seconds Use on important occasions such as weddings Z two seconds Use to prevent camera shake Tap J to return to the shooting screen without changing the setting 3 Frame the pic...

Page 80: ... flashes while the timer is counting down About one second before the shutter is released the lamp stops flashing and glows steadily When the shutter is released the self timer will be set to Off To stop the timer before a picture is taken press the shutter release button again B Camera Settings That Cannot Be Used Simultaneously Some settings cannot be used with other functions A71 1 1 1 F3 1 F3 ...

Page 81: ...se the zoom control to set the zoom ratio to a position where F and the zoom indicator glow green How close you can be to the subject when shooting depends on the zoom ratio When the zoom ratio is set to a position where F and the zoom indicator glow green the camera can focus on subjects as close as approximately 30 cm 1 ft from the lens When the zoom is at the maximum wide angle position at the ...

Page 82: ...the focus until the shutter release button is pressed halfway to lock the focus Therefore the sound of lens focus motor can be heard C The Macro Mode Setting Macro mode cannot be used when using certain shooting modes See Default Settings A66 for more information Some settings cannot be used with other functions A71 The macro mode setting applied in A auto mode is saved in the camera s memory even...

Page 83: ...ly negative exposure compensation You can also drag the slider to change the value 3 Press the shutter release button to take a picture To exit the setting screen without taking a picture tap J To cancel the exposure compensation return to step 1 and revert the value to 0 C Exposure Compensation Value The exposure compensation value applied in A auto mode is saved in the camera s memory even after...

Page 84: ...ts A52 U Off Off 0 0 F smart portrait A54 U1 Off2 Off3 0 0 Scene d A42 U4 Off Off5 0 0 b A42 V Off Off3 0 0 c A42 W3 Off Off3 0 0 d A43 W3 Off3 Off3 0 0 e A43 V6 Off Off3 0 0 f A44 V7 Off Off3 0 0 Z A44 U Off Off3 0 0 z A44 U Off Off3 0 0 h A44 W3 Off Off3 0 0 i A44 W3 Off Off3 0 0 j A45 W3 Off Off3 0 0 k A45 W Off On3 0 0 u A46 W3 Off On3 0 0 l A46 W3 Off Off 0 0 m A46 W3 Off3 Off3 0 03 n A46 W O...

Page 85: ... 6 The setting cannot be changed The flash mode setting is fixed at fill flash with red eye reduction 7 Slow sync with red eye reduction flash mode may be used 8 Flash is fixed at X fill flash when HDR is set to Off and is fixed at W off when HDR is set to On B Camera Settings That Cannot Be Used Simultaneously Some settings cannot be used with other functions A71 A A47 o A47 X8 W8 Off Off3 0 0 p ...

Page 86: ...er shooting modes 2 Additional settings are available for some scene modes See Characteristics of Each Scene A42 for more information Auto mode Scene2 Special effects Smart portrait Image mode1 w w w w Touch shooting w w w w ISO sensitivity w Continuous w White balance w Quick effects w AF area mode w Skin softening w Blink proof w Smile timer w 25 25 0 0 1010 1010 Shooting menu Touch shooting Ima...

Page 87: ...0 1600 or 3200 When Auto is selected the camera sets the ISO sensitivity automatically When Fixed range auto is selected an ISO sensitivity range of either ISO 125 400 or ISO 125 800 can be selected E58 C Continuous Allows you to capture a series of images The available settings are Single default setting Continuous H Continuous L Pre shooting cache Continuous H 120 fps Continuous H 60 fps BSS and...

Page 88: ...r than Off is selected the camera softens skin tones by applying the skin softening function before saving images The default setting is Normal E67 y Blink proof When On is selected the camera automatically releases the shutter twice each time a picture is taken Of the two shots one in which the subject s eyes are open is saved The flash cannot be used The default setting is Off E68 a Smile timer ...

Page 89: ...ng A69 When Touch shooting is set to Subject tracking Macro mode cannot be used Image mode Continuous A69 Image mode is set as follows depending on the continuous shooting setting Continuous H 120 fps O image size 640 480 pixels Continuous H 60 fps M image size 1280 960 pixels Multi shot 16 L image size 2560 1920 pixels Touch shooting Smile timer A70 When Smile timer is used for shooting Touch sho...

Page 90: ...g AF mode the camera does not detect the main subject Monitor settings Quick effects A69 When Quick effects is set to On Image review is fixed at On Print date Continuous A69 When Pre shooting cache Continuous H 120 fps Continuous H 60 fps is selected date and time cannot be imprinted on images Motion detection Subject tracking A69 When Touch shooting is set to Subject tracking Motion detection is...

Page 91: ...ilable E100 When digital zoom is in effect the camera focuses in the center of the frame Shutter sound Continuous A69 When a setting other than Single is selected the shutter sound is disabled Blink warning Continuous A69 When a setting other than Single is selected Blink warning is disabled Restricted function Option Description ...

Page 92: ...ocus areas that are in focus up to nine areas light in green B Notes About Target Finding AF Depending on shooting conditions the subject that the camera determines to be the main subject may vary The camera may not detect the main subject appropriately in the following situations When the image shown on the monitor is very dark or bright When the main subject lacks clearly defined colors When the...

Page 93: ...on is pressed halfway when no faces are detected When Scene auto selector is selected the focus area changes depending on which scene the camera selects In Portrait and Night portrait scene modes or in smart portrait mode the camera will focus on the subject in the center of the frame In Pet portrait scene mode the camera focuses on a pet face if one is detected If no pet faces are detected the ca...

Page 94: ...s or otherwise obstructed When faces take up too much or too little of the frame When the frame includes more than one face the faces detected by the camera and the face on which the camera focuses depend upon a variety of factors including the direction in which the faces are looking In some rare cases such as those described in Subjects Not Suitable for Autofocus A77 the subject may not be in fo...

Page 95: ... dark No contrast between the subject and surroundings e g a portrait subject wearing a white shirt is standing in front of a white wall Several objects are at different distances from the camera e g the subject is inside a cage Subjects with repeating patterns window blinds buildings with multiple rows of similarly shaped windows etc Subject is moving rapidly In the situations noted above try pre...

Page 96: ...of the frame 2 Press the shutter release button halfway Confirm that the focus area glows green Focus and exposure are locked 3 Continue holding down the shutter release button halfway and recompose the picture Be sure to maintain the same distance between the camera and the subject while the shutter release button is pressed halfway 4 Press the shutter release button the rest of the way down to t...

Page 97: ...he features available when playing back images Playback Zoom 80 Thumbnail Display 81 Selecting Certain Types of Images for Playback 82 Features That Can Be Set with F Playback Menu 84 Connecting the Camera to a TV Computer or Printer 86 Using ViewNX 2 88 Installing ViewNX 2 88 Transferring Images to the Computer 91 Viewing Images 93 ...

Page 98: ...9 except images captured in a series the camera zooms in on the face detected at the time of shooting If the camera detected multiple faces when the image was captured tap M or N to display a different face Rotate the zoom control to g i or f h again to change the zoom ratio and return to normal playback zoom To delete images tap E You can crop the image and save the displayed area of the image as...

Page 99: ... change the number of thumbnails displayed by rotating the zoom control to f h or g i To scroll through the images drag your finger up or down on the monitor drag the scroll bar or tap B or C Tap an image to display it in full frame playback mode 15 15 11 11 2012 15 2012 15 30 30 4 4 4 4 0004 0004 JPG JPG 0004 JPG 15 11 2012 15 30 10 Image Thumbnail Display 6 12 and 20 images per screen Full frame...

Page 100: ...ges are played back When you switch from shooting mode to playback mode this mode is selected h Favorite pictures E7 Play back images added to an album You must add images to an album before you can select this mode A84 F Auto sort E11 Images are automatically sorted into categories such as portraits landscapes and movies C List by date E13 Images captured on the selected date are played back ...

Page 101: ...select c Play the playback screen is displayed When an option other than c Play is selected the album category or shooting date selection screen is displayed To return to the current playback mode without switching playback modes press the c button 3 Tap an album category or shooting date For h favorite pictures see E7 For F auto sort see E11 For C list by date see E13 Repeat from step 1 to select...

Page 102: ...ed slide show E69 d Protect1 Protect selected images from accidental deletion E71 a Print order1 2 When using a printer to print images saved on the memory card you can use the Print order function to select which images are printed and how many copies of each image are printed E73 U Paint3 4 Draw on images or add decorations to images Painted copies are stored as separate files E22 M Retouch3 4 E...

Page 103: ...y the key pictures are displayed for sequences of images To use this function tap R to display the images in a sequence individually 5 This function cannot be selected when using favorite pictures mode auto sort mode or list by date mode E Voice memo4 Record voice memos using the camera s built in microphone and attach them to images Voice memo can also be played back and deleted E78 h Copy1 5 All...

Page 104: ...nnecting the camera to an external device make sure the remaining battery level is sufficient and turn the camera off For information about the connection methods and subsequent operations refer to the documentation included with the device in addition to this document Insert the plug straight USB audio video output connector HDMI mini connector Type C How to open the connector cover ...

Page 105: ...efore connecting to a computer install ViewNX 2 on the computer using the included ViewNX 2 CD ROM For information about using the ViewNX 2 CD ROM and transferring images to a computer see page 88 If any USB devices that draw the power from the computer are connected disconnect them from the computer before you connect the camera to it Connecting the camera and other USB powered devices to the sam...

Page 106: ...tion is required Compatible Operating Systems Windows Windows 7 Home Basic Home Premium Professional Enterprise Ultimate Service Pack 1 Windows Vista Home Basic Home Premium Business Enterprise Ultimate Service Pack 2 Windows XP Home Edition Professional Service Pack 3 Macintosh Mac OS X version 10 6 8 10 7 4 Refer to the Nikon website for the latest information on operating system compatibility Y...

Page 107: ...hen choose the desired language the Region Selection button is not available in the European release Click Next to display the installation window 3 Start the installer We recommend clicking Installation Guide in the installation window to check the installation help information and system requirements before installing ViewNX 2 Click Typical Installation Recommended in the installation window 4 D...

Page 108: ...three modules below Nikon Transfer 2 For transferring images to the computer ViewNX 2 For viewing editing and printing transferred images Nikon Movie Editor For basic editing of transferred movies Panorama Maker for creating a single panorama image of a landscape etc from a series of images that each capture a separate portion of the subject 6 Remove the ViewNX 2 CD ROM from the CD ROM drive ...

Page 109: ...era to the computer using the included USB cable The camera automatically turns on To transfer images that are saved in the camera s internal memory remove the memory card from the camera before connecting it to the computer SD card slot If your computer is equipped with an SD card slot the card can be inserted directly in the slot SD card reader Connect a card reader available separately from thi...

Page 110: ...OK 2 Double click Import File If the memory card contains a large number of images it may take a while for Nikon Transfer 2 to start Wait until Nikon Transfer 2 starts B Connecting the USB Cable The connection may not be recognized if the camera is connected to the computer via a USB hub 2 Transfer images to the computer Confirm that the name of the connected camera or removable disk is displayed ...

Page 111: ...computer operating system to eject the removable disk corresponding to the memory card and then remove the card from the card reader or card slot Viewing Images Start ViewNX 2 Images are displayed in ViewNX 2 when transfer is complete Consult online help for more information on using ViewNX 2 C Starting ViewNX 2 Manually Windows Double click the ViewNX 2 shortcut on the desktop Mac OS Click the Vi...

Page 112: ...94 ...

Page 113: ...aying Back Movies Recording and Playing Back Movies You can record movies by simply pressing the b e movie record button Recording Movies 96 Features That Can Be Set with F Movie Menu 99 Playing Back Movies 100 10 10 0 0 ...

Page 114: ...ra focuses on the subject in the center of the frame Focus areas are not displayed during recording C is displayed while saving to the internal memory Tap Q to pause recording except when HS movie recording A99 Tap o again to resume recording Recording automatically stops about five minutes after recording is paused or when the maximum movie length has been recorded 3 Press the b e movie record bu...

Page 115: ...mena may be seen in the monitor while recording movies These phenomena are saved in the recorded movies Banding may occur in images under fluorescent mercury vapor or sodium vapor lighting Subjects that move quickly from one side of the frame to the other such as a moving train or car may appear skewed The entire movie image may be skewed when the camera is panned Lighting or other bright areas ma...

Page 116: ...the battery being fully charged F19 In addition recording may end before either limit is reached if camera temperature becomes elevated C Functions Available for Movie Recording The exposure compensation and white balance settings for the current shooting mode are also applied with movie recording The settings adjusted with the scene effect adjustment slider in scene mode A40 and the hues specifie...

Page 117: ... starts tap the HS movie switch icon at the bottom right of the monitor to switch to HS movie recording E87 D Movie AF mode When A Single AF default setting is selected focus is locked when movie recording begins When B Full time AF is selected the camera focuses continuously while recording When B Full time AF is selected the sound of the camera focusing may be heard in recorded movies If you wan...

Page 118: ... are indicated by the movie options icon A99 Tap R to play back movies To adjust the volume before playback tap F and then tap i A10 Deleting movies See Step 6 Delete Unwanted Images A34 for more information 15 15 11 11 2012 15 2012 15 30 30 15 11 2012 15 30 0 0 10 10 0010 0010 MOV MOV 0010 MOV Movie option ...

Page 119: ... digital camera To Use Description Adjust volume X Tap X to adjust volume Rewind O Tap and hold O to rewind movie Advance P Tap and hold P to advance movie Pause Q Pause playback The following operations can be performed while playback is paused U Rewind movie back one frame Tap and hold U for continuous frame by frame rewind V Advance movie forward one frame Tap and hold V for continuous frame by...

Page 120: ...102 ...

Page 121: ... various settings that can be adjusted in the z setup menu For further details about each setting refer to The Setup Menu in the Reference Section E89 Shooting menu Movie options Wind noise reduction Set up Movie AF mode Open with HS footage AF area mode 25 25 0 0 1010 1010 ...

Page 122: ... and time on images E95 Vibration reduction Reduces the effects of camera shake while shooting E97 Motion detection Allows you to set whether or not the camera automatically increases the shutter speed to reduce blurring caused by camera shake if motion is detected when shooting still images E98 AF assist Allows you to enable or disable the AF assist illuminator E99 Digital zoom When set to On def...

Page 123: ... charging by computer it takes more time to charge the battery than when using the Charging AC Adapter EH 69P E106 Blink warning Allows you to set whether or not closed eyes are detected when taking pictures of people using face detection E108 Sequence display options Allows you to select whether to display only the key picture for a sequence of images captured continuously or to display the seque...

Page 124: ...106 ...

Page 125: ...st by Date Mode E13 Viewing and Deleting Images Captured Continuously Sequence E14 Editing Still Images E17 Connecting the Camera to a TV Viewing Images on a TV E34 Connecting the Camera to a Printer Direct Print E38 Editing Movies E47 Menu The Shooting Menu for A Auto Mode E49 The Smart Portrait Menu E67 The Playback Menu E69 The Movie Menu E83 The Setup Menu E89 Additional Information File and F...

Page 126: ...playback mode and rotate the zoom control to g i again to enlarge the image display by 3 Tap A D B or C to change the portion of the image visible in the monitor Rotate the zoom control to f h to return to the original display size 2 Tap I Tap e before tapping I to undo the last operation applied using the pen or erase tool up to the last five operations can be undone To exit without saving the ed...

Page 127: ...ocus The zoom position is fixed at the maximum wide angle position A grid is displayed in the monitor The camera focuses on the subject at the center of the frame Exposure compensation A65 can be set If the focus and exposure are not correct try using focus lock A78 2 Press the shutter release button all the way and then remove your finger from the shutter release button I is displayed to indicate...

Page 128: ... C Changing Shooting Range In easy panorama scene mode tap F tap W X Easy panorama and tap W Normal 180 or X Wide 360 When the camera is readied in the horizontal position the image size width height is as follows Normal 180 3200 560 when moved horizontally 1024 3200 when moved vertically Wide 360 6400 560 when moved horizontally 1024 6400 when moved vertically When the camera is readied in the ve...

Page 129: ...rts B Notes About Easy Panorama Shooting The range of the image seen in the saved image will be narrower than that seen in the monitor at the time of shooting If the camera is moved too quickly or shaken too much or if the subject is too uniform e g walls or darkness an error may occur If shooting is stopped before the camera reaches the half way point in the panorama range a panorama image is not...

Page 130: ...s listed below can be performed using the camera s touch panel B Notes About Easy Panorama Scroll Playback The COOLPIX S6400 may not be able to scroll the playback of or zoom in on easy panorama images captured with another make or model of digital camera Function Description Pause Tap the monitor to pause scrolling Manual scrolling While paused drag your finger across the monitor to view a differ...

Page 131: ...mage can be added to multiple albums Up to 200 images can be added to each album Adding Images to Albums Images cannot be added to albums in favorite pictures playback mode Tap an album to which you want add the image The image is added to the album and the monitor display returns to the album selection screen You can repeatedly add the same image to other albums by tapping them Drag the current i...

Page 132: ...ng images in full frame playback mode or thumbnail playback mode tap F to select a feature from the favorite pictures menu A84 B Notes About Deletion If an image is deleted while using favorite pictures mode the image will not only be removed from the album but the corresponding image file will also be permanently deleted from the internal memory or the memory card Press the c button playback mode...

Page 133: ...elow Select the desired image in full frame display in favorite pictures mode tap F to display the menu options and then tap h The confirmation dialog is displayed Tap Yes to remove the image from the album Favorite pictures Delete Paint Protect Print order Remove from favorites Slide show Yes No Remove selected picture or pictures from favorites ...

Page 134: ...t icon and color again tap J before tapping the album B Notes About Album Icons Set the album icons separately for the internal memory and for the memory card To change the album icons for the internal memory first remove the memory card from the camera The default setting for the icon is the number icon Press the c button playback mode M c button M h Favorite pictures Favorite pictures 01 04 07 0...

Page 135: ... c button M F Auto sort Option Description Z Smile Images captured in smart portrait mode A54 with the smile timer setting set to On D Portraits Images captured in Portrait Night portrait Party indoor or Backlighting scene mode A40 Images captured in smart portrait mode A54 with the smile timer setting set to Off u Food Images captured in Food scene mode A40 U Landscape Images captured in Landscap...

Page 136: ...You can play back images and movies that could not be sorted into a category by using normal playback mode A32 or list by date mode E13 Images and movies copied from the internal memory to a memory card or vice versa cannot be played back in auto sort mode E80 Images or movies saved by a camera other than the COOLPIX S6400 cannot be played back in auto sort mode O Pet portrait Images captured in P...

Page 137: ...ame playback mode or thumbnail playback mode tap F to select a feature from the list by date menu A84 B Notes About List by Date Mode The 9 000 most recent images can be displayed in list by date mode Images captured when the camera s date is not set are treated as images captured on January 1 2012 Press the c button playback mode M c button M C List by date 1 2 9 3 4 6 7 8 10 12 13 14 16 17 18 19...

Page 138: ...splayed for a sequence tap R to display each image in a sequence individually To display the previous or next image drag the current picture to the left or right or tap G or H To return to key picture only display tap J To display images in a sequence as thumbnails set Sequence display options to Individual pictures in the setup menu E110 A auto mode A38 Scene mode A40 Continuous H Sports Continuo...

Page 139: ...u C Playback Menu Options Available When Using Sequence When F is tapped the following menu operations are available for the images in that sequence 1 If F is tapped when only a key picture is displayed the same settings can be applied to all images in that sequence Tap F after displaying individual images to apply settings to each displayed image 2 This operation is not available when only a key ...

Page 140: ...key picture is selected on the erase selected images screen A35 all pictures in the sequence are deleted All images All images are deleted including the sequence represented by the currently displayed key picture If R was tapped and each individual image in the sequence is displayed before tapping F Deletion methods change as follows Current image The image currently displayed is deleted Select im...

Page 141: ...ng E26 Create a copy of the current image with enhanced brightness and contrast brightening dark portions of the image Stretch E27 Stretch the current image horizontally to make the subject appear thinner or wider Perspective control E28 Adjust the perspective of pictures taken in landscape orientation Apply perspective control similar to that available with shift lenses This option is suited to i...

Page 142: ...ly on another make or model of digital camera It may also be impossible to transfer them to a computer using another make or model of digital camera Editing functions are not available when there is not enough free space in the internal memory or on the memory card Images created in Draw scene mode E2 can only be edited with the paint small picture or crop function To edit an individual image in a...

Page 143: ...d with editing functions are not deleted if the original images are deleted The original images are not deleted if copies created with editing functions are deleted Edited copies are saved with the same shooting date and time as the original Print order E73 and protect settings E71 do not remain effective in edited copies Editing function used Editing functions to use Paint The paint small picture...

Page 144: ...h key Toy camera effect 1 Toy camera effect 2 Low key Cross process red Cross process yellow Cross process green and Cross process blue Mainly adjusts hue and creates a different look for the image Soft Fisheye Cross screen and Miniature effect Processes images with a variety of effects High contrast monochrome Sepia Cyanotype and Selective color 12 colors Turns multicolor images into single color...

Page 145: ... Yes 4 Tap Yes A new edited copy is created Copies created with the quick effects function are indicated by the V icon displayed during playback A8 Quick effects Pop Pop Pop Super vivid Super vivid Super vivid Painting Painting Painting High key High key High key Toy camera effect 1 Toy camera effect 1 Toy camera effect 1 Toy camera effect 2 Toy camera effect 2 Toy camera effect 2 Pop ...

Page 146: ...isplay by 3 Tap A D B or C to change the portion of the image visible in the monitor Rotate the zoom control to f h to return to the original display size Tap e to undo the last operation applied using the pen eraser or decoration tool up to the last five operations can be undone 2 Tap I To exit without saving the edited image tap f When a confirmation screen is displayed tap Yes Press the c butto...

Page 147: ...the Paint Tools Write and Draw on images Tap I to write or draw on images You can change the color and thickness of the pen using the palette To hide the palette tap I or the image Tap or drag the pen color slider to select pen color Tap the pen thickness slider to select pen thickness Erase Paint Tool Additions Tap J to erase additions to images using the paint or decoration tool You can change t...

Page 148: ... image Tap C or D to display seven different frames one at a time B Notes About Shooting Date Decoration When the shooting date decoration is added to pictures taken at an Image mode setting E49 of O 640 480 the shooting date may be difficult to read Set Image mode to q 1600 1200 or larger when shooting The date added with the shooting date decoration uses the Date format setting selected in the s...

Page 149: ...he degree of enhancement and tap I 2 Tap Yes A new retouched copy is created Copies created with the quick retouch function are indicated by the s icon displayed during playback A8 Press the c button playback mode M select an image M tap F M M Retouch M k Quick retouch Quick retouch ...

Page 150: ...splayed on the left and the edited version is displayed on the right 2 Tap Yes A new edited copy is created Copies created with the D Lighting function are indicated by the c icon displayed during playback A8 Press the c button playback mode M select an image M tap F M M Retouch M I D Lighting D Lighting ...

Page 151: ...slider at the bottom of the screen to adjust stretch effect 2 Tap I 3 Tap Yes A new stretched copy is created Stretched copies are indicated by the r icon displayed in playback mode A8 Press the c button playback mode M select an image M tap F M M Retouch M P Stretch Stretch Stretch ...

Page 152: ...the screen to adjust perspective control 2 Tap I 3 Tap Yes A new edited copy is created Copies created using the perspective control function are indicated by the q icon displayed in playback mode A8 Press the c button playback mode M select an image M tap F M M Retouch M O Perspective control Perspective control Perspective control ...

Page 153: ...er of the frame are softened Tap Before or After to view the image with or without the effects If more than one face was retouched tap M or N to display a different face To change the effect tap J to return to step 1 Tap I to display the confirmation dialog for saving the new copy 3 Tap Yes A new edited copy is created Copies created using the glamour retouch function are indicated by the j all or...

Page 154: ...etouch If no faces are detected in the image the glamour retouch function cannot be used The glamour retouch function may not perform as expected depending on the direction in which the faces are looking or the brightness of the faces in the image ...

Page 155: ...ting of l 4608 2592 are saved at 640 360 pixels Proceed to step 2 2 Tap I 3 Tap Yes A new small copy is created compression ratio of approximately 1 16 Copies created with the small picture function are displayed at a smaller size with the C icon during playback Press the c button playback mode M select an image M tap F M M Retouch M g Small picture Small picture Small picture 320 320 240 240 320 ...

Page 156: ...te files 1 Enlarge the picture for cropping A80 2 Refine copy composition Rotate the zoom control to g i or f h to adjust the zoom ratio Drag the current image or tap A B C or D so that only the portion to be copied is visible in the monitor 3 Tap G 4 Tap Yes A cropped copy is created Copies created with the crop function are indicated by the a icon displayed during playback A8 2 0 2 0 2 0 2 0 2 0...

Page 157: ... size during playback C Cropping the Image in Its Current Tall Orientation Use the Rotate image option E77 to rotate the image so that it is displayed in landscape orientation After cropping the image rotate the cropped image back to tall orientation The image displayed in tall orientation can be cropped by zooming in on the image until the black bars displayed on the both sides of the monitor dis...

Page 158: ...TV If your TV is equipped with an HDMI jack a commercially available HDMI cable can be used to connect the camera to the TV 1 Turn off the camera 2 Connect the camera to the TV When using the included audio video cable Connect the yellow plug to the video in jack and the white and red plugs to the audio in jacks on the TV White Yellow Red ...

Page 159: ...o input See the documentation provided with your TV for details 4 Hold down the c button to turn on the camera The camera enters playback mode and images are displayed on the TV The camera monitor remains off while images are displayed on the television See Operations with TV Connection E36 for more information HDMI mini connector Type C to HDMI jack ...

Page 160: ...era monitor Tap the camera monitor to turn TV display off and display the image in the camera monitor When images are displayed in the camera monitor tap the controls displayed to operate the camera only playback mode is available when connected via HDMI Images will be automatically displayed on the TV in the following situations No operations are performed for a few seconds except when a setting ...

Page 161: ...t connector simultaneously B If Images Are Not Displayed on the TV Be sure that the camera s video mode setting in the TV settings E105 under the setup menu conforms to the standard used by your TV C Using a TV Remote Control HDMI Device Control The remote control of an HDMI CEC compatible TV can be used to control playback It can be used instead of the camera s touch panel to select images start ...

Page 162: ...charged battery to prevent the camera from turning off unexpectedly If the AC Adapter EH 62G available separately is used COOLPIX S6400 can be powered from an electrical outlet Do not use any other make or model of AC adapter as it may cause the camera to heat up or malfunction Take pictures Select images for printing and number of copies using Print order option E73 Connect to the printer E39 Pri...

Page 163: ... the camera 2 Turn on the printer Check printer settings 3 Connect the camera to the printer using the included USB cable Be sure that plugs are properly oriented Do not attempt to insert plugs at an angle and do not use force when connecting or disconnecting the plugs ...

Page 164: ...nu to Off and reconnect the cable C Printing Images Images saved on a memory card can be printed by transferring the images to a computer or connecting the camera directly to a printer The following printing methods are also available Inserting a memory card into a DPOF compatible printer s card slot Taking a memory card to a digital photo lab For printing using these methods specify the images an...

Page 165: ...the desired image and tap I To more easily find the desired image rotate the zoom control to f h to switch to 12 image thumbnail display mode Rotate the zoom control to g i to switch to full frame playback mode 2 Tap Copies 3 Tap the desired number of copies up to nine 15 11 2012 15 11 2012 15 11 2012 Print selection 20 20 20 20 PictBridge 0prints Copies Start print Paper size Copies ...

Page 166: ...efault in the paper size option 6 Tap Start print 7 Printing begins Monitor display returns to the print selection screen shown in step 1 when printing is complete PictBridge Copies Start print Paper size 4 prints Paper size 5 7 in 3 5 5 in Default 100 150 mm PictBridge 4 prints Copies Start print Paper size Printing 2 4 Cancel Current number of copies total number of copies ...

Page 167: ...isplayed tap F 2 Tap Paper size To exit the print menu tap J 3 Tap the desired paper size Tap B or C to display the previous or next page To specify paper size using settings on the printer select Default in the paper size option 15 11 2012 15 11 2012 15 11 2012 Print selection 20 20 20 20 Print menu DPOF printing Print all images Print selection Paper size Paper size 5 7 in 3 5 5 in Default 100 1...

Page 168: ...he numeral indicating the number of copies to be printed If no copies have been specified for images the selection is canceled Rotate the zoom control to g i to switch back to full frame playback or f h to display 12 thumbnails Tap n to cancel the selection of all images Tap I when setting is complete When the screen shown on the right is displayed tap Start print to start printing Tap Cancel to r...

Page 169: ...el to return to the print menu DPOF printing Print images for which a print order was created using the Print order option E73 When the screen shown on the right is displayed tap Start print to start printing Tap J to return to the print menu To view the current print order tap View images To print images tap I Print all images Start print Cancel 20 prints DPOF printing 20 prints Start print View ...

Page 170: ...mplete C Paper Size The camera supports the following paper sizes Default the default paper size for the printer connected to the camera 3 5 5 in 5 7 in 100 150 mm 4 6 in 8 10 in Letter A3 and A4 Only sizes supported by the printer will be displayed Printing 2 20 Cancel Current number of copies total number of copies ...

Page 171: ...ie edit screen is displayed 3 Tap W choose start point When editing begins the frame where playback was paused is the start point Tap G or H to move the start point to the beginning of the desired portion of the movie To cancel editing tap J 4 Tap X choose end point Tap G or H to move the end point on the right edge to the end of the desired portion of the movie 1 1 30 30 Choose start point 8 8 30...

Page 172: ...iting When the battery level display is B movie editing is not possible A movie that was created by editing cannot be trimmed again To trim another area of the movie select and edit the original movie Movies are trimmed in one second intervals therefore the actual trimmed portion of the movie may differ slightly from the selected start and end points Movies cannot be trimmed so that they are less ...

Page 173: ...3456 pixels Enter shooting mode M Tap F M A Image mode Image mode Description Q 4608 3456P Images will be higher quality than P The compression ratio is approximately 1 4 P 4608 3456 Best choice in most situations The compression ratio is approximately 1 8 R 3264 2448 r 2272 1704 q 1600 1200 Smaller size than P R or r and therefore allows more images to be saved The compression ratio is approximat...

Page 174: ...reen for the number of images that can be saved when saving to the internal memory approx 78 MB 1 If the number of exposures remaining is 10 000 or more the number of exposures remaining display shows 9999 2 Print size at an output resolution of 300 dpi Print sizes are calculated by dividing the number of pixels by printer resolution dpi and multiplying by 2 54 cm 1 in However at the same image si...

Page 175: ... by simply tapping the monitor E53 s Subject tracking Use this option to take pictures of moving subjects Tap the subject on which the camera will focus The focus area will automatically move to track the subject E55 r Touch AF AE Tap the monitor to set the focus area Press the shutter release button to take the picture with the focus and exposure achieved with the focus area E57 ...

Page 176: ... copy Backlighting and 3D photography scene modes A40 Special effects mode A52 Portrait and Night portrait scene modes A40 Only a border displayed by face detection A75 can be selected 1 Landscape Sunset Dusk dawn Night landscape Fireworks show and Easy panorama scene modes A40 The shutter can be released using Touch shutter but the focus area cannot be changed See Characteristics of Each Scene A4...

Page 177: ...a resulting in blurred images When digital zoom is in effect the camera focuses on the subject in the center of the frame The shutter release button can also be used when the touch shutter option is selected If X is displayed when the monitor is tapped the shutter cannot be released Tap an area within X Enter shooting mode M tap F M q s r Touch shooting M q Touch shutter 25 25 0 0 1010 1010 25 25 ...

Page 178: ...s Only one picture can be taken at a time using the touch shutter function Prevent shooting with accidental tapping of the monitor by changing the touch shooting setting to Touch AF AE E57 not available in some shooting modes At this setting the shutter is not released when the monitor is tapped When shooting a subject that is not suitable for autofocus the subject may not be in focus A77 When a s...

Page 179: ...an be registered X is displayed in the monitor Tap an area within X When a subject is registered a yellow focus area is displayed on the subject and the camera begins tracking the subject Tap another subject to change a subject to follow To cancel the registration of the subject tap a on the right side of the monitor If the camera can no longer track the registered subject the focus area will disa...

Page 180: ...ing the subject If these settings are adjusted after the subject has been registered subject registration will be canceled It may be impossible to register the desired subject or the camera may be unable to track the registered subject or may begin tracking a different subject if the subject is moving rapidly if there is a significant amount of camera shake or if the camera detects a similar subje...

Page 181: ...acquired is tapped X will be displayed in the monitor Tap an area within X 2 Press the shutter release button to take a picture Press the shutter release button halfway to acquire focus and exposure and press it all the way down to release the shutter B Notes About Touch AF AE The focus area that can be set varies depending on the shooting mode E52 When shooting a subject that is not suitable for ...

Page 182: ... Notes About ISO Sensitivity Some settings cannot be used with other functions A71 Select A auto mode M tap F M E ISO sensitivity Option Description Auto default setting Sensitivity is ISO 125 when there is sufficient lighting the camera compensates by raising sensitivity to a maximum of ISO 1600 when lighting is dim Fixed range auto Select the range in which the camera automatically adjusts ISO s...

Page 183: ...is released q Pre shooting cache Pre shooting cache makes it easy to capture perfect moments by saving images from before the shutter release button was pressed all the way Pre shooting cache shooting begins when the shutter release button is pressed halfway and continues when the shutter release button is pressed all the way E61 Frame rate up to 18 fps Number of frames Up to 5 frames including up...

Page 184: ...e may occur in images that were captured under lighting that flickers at high speeds such as fluorescent mercury vapor or sodium vapor lighting Some settings cannot be used with other functions A71 B Notes About BSS BSS is suited for shooting stationary subjects BSS may not produce the desired results if the subject moves or the composition changes D BSS Best Shot Selector The Best Shot Selector i...

Page 185: ...ess than five shooting with the pre shooting cache is not possible Before shooting check that there are five or more exposures remaining C Images Captured in Continuous Shooting Mode Each time images are captured using Continuous H Continuous L Pre shooting cache Continuous H 120 fps or Continuous H 60 fps the captured images are saved as a sequence E14 C More Information See Subjects Not Suitable...

Page 186: ...ng that matches the light source before shooting Although Auto default setting can be used under most types of lighting white balance can be adjusted to suit the sky conditions or light source and achieve more natural color tones in the image Tap an option to select it and tap I Select A auto mode M tap F M w White balance Option Description a Auto default setting White balance is automatically ad...

Page 187: ...hite light Use the procedure below to measure the white balance value under the lighting used during shooting 1 Place a white or gray reference object under the lighting that will be used during shooting 2 Tap F and tap w 3 Tap b and tap I The lens extends to the zoom position for measurement Shooting menu Touch shooting Image mode Continuous White balance Quick effects ISO sensitivity White balan...

Page 188: ... the new white balance value for preset manual is set No image is saved When the monitor display returns to the screen shown in step 3 tap f to complete the setting B Notes About White Balance Some settings cannot be used with other functions A71 Set the flash to W off when white balance is set to any setting other than Auto and Flash A58 B Notes About Preset Manual A value for flash lighting cann...

Page 189: ...Description o On default setting The screen shown on the right is displayed immediately after the shutter is released Tap OK to display the effect selection screen and enable the quick effects function A39 When you tap Cancel or when no operations are performed for about five seconds the monitor display returns to the shooting screen p Off Disables the quick effects function during shooting OK Can...

Page 190: ...pected A77 Some settings cannot be used with other functions A71 Select A auto mode M tap F M G AF area mode Option Description y Center default setting The camera focuses on the subject in the center of the frame The focus area is always displayed in the center of the screen M Target finding AF When the camera detects the main subject it focuses on that subject See Using Target Finding AF A74 for...

Page 191: ...g Check the degree of skin softening performed in playback mode Enter shooting mode M A shooting mode button M F Smart portrait mode M tap F M e Skin softening Option Description S High When the shutter is released the camera detects one or more human faces up to three faces and processes the image to soften facial skin tones before saving the image You can select the amount of effect that is appl...

Page 192: ... Smart portrait mode M tap F M y Blink proof Option Description o On Enables blink warning Flash cannot be used when On is selected If the camera saved an image in which the subject s eyes may have been closed the dialog shown on the right is displayed for a few seconds p Off default setting Turns the blink warning off Enter shooting mode M A shooting mode button M F Smart portrait mode M tap F M ...

Page 193: ... M Retouch b Slide Show Play back images saved in the internal memory or on a memory card one by one in an automated slide show 1 Tap Start To change the effect tap x Effects before tapping Start To change the interval between images tap y Frame intvl and select the desired interval before tapping Start To repeat the slide show automatically tap m Loop before tapping Start Press the c button playb...

Page 194: ... only is selected as the method to display sequences E14 only the key picture is displayed Images captured using easy panorama A48 E3 are displayed full frame when played in a slide show They do not scroll Slide show effects cannot be specified when the camera is connected via HDMI and 3D pictures are played back in 3D A51 Classic is automatically selected The maximum playback time is up to 30 min...

Page 195: ...ll permanently delete protected files E103 Protected images are indicated by the s icon during playback A8 Protecting One Image Tap o On The selected image is protected To continue protecting another image drag the current image To exit without protecting images tap J Press the c button playback mode M select an image M tap F M d Protect Protect On Off ...

Page 196: ...nail display 2 Tap I The selected images are protected Removing Protection from Images To remove protection from an image display a protected image in full frame playback mode follow the procedure in Protecting One Image E71 and tap Off in Protecting One Image To remove protection from multiple images at a time uncheck protected images in step 1 of Protecting Multiple Images Press the c button pla...

Page 197: ...selected for printing are indicated by the w icon A8 during playback Creating a Print Order for One Image 1 Tap the desired number of copies up to nine and tap I To make a print order for another image drag the current image before tapping I If the total number of images in a print order including images just added exceeds 99 the screen shown at right will be displayed Tap Yes to remove images pre...

Page 198: ... the bottom left of the monitor to specify the number of copies up to nine for each Images selected for printing can be recognized by the check mark y and the numeral indicating the number of copies to be printed If no copies have been specified for images the selection is canceled Rotate the zoom control to g i to switch to full frame playback or f h to switch back to 12 thumbnail display Tap n t...

Page 199: ...mages in the print order Tap I to complete the print order Canceling Print Order To remove a print marking from an image display an image selected for printing in full frame playback mode follow the procedure in Creating a Print Order for One Image E73 and tap 0 in step 1 To remove print markings from multiple images at a time remove the print markings of the desired images in step 1 of Creating a...

Page 200: ...that saved when the image was captured Changing the camera s date using the Date and time or Time zone in the Time zone and date option in the setup menu after an image has been captured has no effect on the date printed on the image B Notes About Print Order Print orders cannot be created for images captured in 3D photography scene mode C Print Date Using the Print date option E95 in the setup me...

Page 201: ...tes About Image Rotation Images captured with another make or model of digital camera or captured with 3D photography A50 cannot be rotated on the COOLPIX S6400 Images captured in sequence cannot be rotated when only the key pictures are displayed for them First display the images individually and then rotate the desired image E14 Press the c button playback mode M select an image M tap F M M Reto...

Page 202: ...at have a voice memo i e images that display p in full frame playback mode Recording Voice Memos Tap W to record a voice memo up to about 20 seconds Do not touch the microphone during recording During recording o flashes in the monitor Tap S to end recording When recording ends the voice memo playback screen is displayed Tap J to return to the playback menu Press the c button playback mode M selec...

Page 203: ...deleted You cannot delete voice memos attached to protected images E71 Voice memos cannot be recorded for an image that already has a voice memo attached to it The current voice memo must be deleted before a new voice memo can be recorded The COOLPIX S6400 cannot record voice memos for images captured with another make or model of digital camera Voice memos cannot be recorded for images captured i...

Page 204: ...ory card r Card to camera Copy images from memory card to internal memory 2 Tap the desired copy option F Selected images Copy images selected Proceed to step 3 H All images Copy all images When a confirmation dialog is displayed tap Yes Images are copied To return to the playback menu without copying tap No Press the c button playback mode M tap F M h Copy Copy Camera to card Card to camera Camer...

Page 205: ... copied Files saved in any other format cannot be copied If voice memos E78 are attached to images selected for copying the voice memos are copied with the images Operation is not guaranteed with images captured with another make of camera or that have been modified on a computer When copying images for which Print order E73 options are enabled the print order settings are not copied However when ...

Page 206: ...d into the camera Memory contains no images will be displayed when the camera is switched to playback mode Tap F and tap h Copy to display the copy options screen and copy the images saved in the camera s internal memory to the memory card C More Information See File and Folder Names E117 for more information N Choose Key Picture When Sequence display options E110 in the setup menu is set to Key p...

Page 207: ... about maximum movie length When recording normal speed movies select one of the normal speed movie options E83 and when recording HS high speed movies select one of the HS movie options E84 Normal Speed Movie Options The frame rate is approximately 30 fps for all options Enter shooting mode M tap F M D Movie options Type Movie bitrate Description c HD 1080pP 1920 1080 default setting Approx 18 Mb...

Page 208: ...Tap an HS movie option After selecting the option tap f to return to the shooting screen Type Movie bitrate Description f HS 60 fps 1280 720 Approx 6 Mbps 1 2 speed slow motion movies with a 16 9 aspect ratio are recorded Max recording time 30 seconds playback time 1 minute g HS 15 fps 1920 1080 Approx 12 Mbps 2 speed fast motion movies with a 16 9 aspect ratio are recorded Max recording time 2 mi...

Page 209: ...e maximum length for HS movies E84 or when the HS movie switch icon is tapped the camera switches to normal speed movie recording The camera switches between normal speed movie recording and HS movie recording each time the HS movie switch icon is tapped When recording HS movies the maximum movie length display changes and displays the remaining movie length for HS movie recording The movie option...

Page 210: ...15 fps 1920 1080 movies that can be played back in fast motion at a speed two times faster than normal speed can be recorded Portions recorded at f HS 60 fps 1280 720 High speed recording is possible for up to 30 seconds and the captured portion can be played back in slow motion at a speed two times slower than normal speed Portions recorded at g HS 15 fps 1920 1080 A movie of up to two minutes in...

Page 211: ...ording starts Enter shooting mode M tap F M N Open with HS footage Option Description o On default setting Record HS movies when movie recording begins p Off Record normal speed movies when movie recording begins Tap the HS movie switch icon E85 to switch to HS movie recording at the point where the camera should record for slow motion or fast motion playback ...

Page 212: ...n the distance between the camera and the subject will remain fairly consistent B Full time AF Camera focuses continuously Select this option when the distance between the camera and subject will change significantly during recording The sound of the camera focusing may be heard in the recorded movie Use of Single AF is recommended to prevent the sound of the camera focusing from interfering with ...

Page 213: ...splays an image selected for the welcome screen When the image selection screen is displayed tap an image and tap I to set it as the welcome screen On the image selection screen rotate the zoom control to g i to switch to full frame playback display or f h to switch back to 12 thumbnail display As the selected image is saved in the camera it will be displayed when the camera is turned on even if t...

Page 214: ...ed Edit the value Tap A or B Apply the setting Tap I Date format The available date formats are Year Month Day Month Day Year and Day Month Year Time zone Home time zone w can be specified and daylight saving time can be enabled or disabled When Travel destination x is selected the time difference between the travel destination and the home time zone w is automatically calculated and the date and ...

Page 215: ...r changes according to the region currently selected 3 Tap o The travel destination screen is displayed Time zone and date London Casablanca 15 11 2012 15 30 Date format Time zone Date and time Time zone Home time zone Travel destination London Casablanca 15 11 2012 15 30 Time zone Home time zone Travel destination London Casablanca 15 11 2012 15 30 ...

Page 216: ...itor when the camera is in shooting mode C w Home Time Zone To switch to the home time zone tap w Home time zone in step 2 To change the home time zone tap w Home time zone in step 2 and perform the same procedure as for x Travel destination to set the home time zone C Daylight Saving Time When daylight saving time starts or ends turn the daylight saving time function on or off from the time zone ...

Page 217: ...captured image is displayed immediately after shooting The default setting is On Brightness Select from five settings for monitor brightness The default setting is 3 Shooting mode Playback mode Show info Auto info default setting If no operations are performed for a few seconds some of the control icons and information are hidden To display the control icons and information again tap A during shoo...

Page 218: ... operation guide is displayed as in Auto info Movie frame auto info In addition to information shown with Auto info a frame is displayed before recording begins that represents the area that will be captured when recording movies It is not displayed when recording movies The current settings or operation guide is displayed as in Auto info Shooting mode Playback mode 25 25 0 0 1010 1010 15 15 11 11...

Page 219: ...ight portrait when Hand held is selected Night landscape when Hand held is selected Backlighting when HDR is set to On Easy panorama or 3D photography scene mode When the continuous shooting setting A69 is set to Pre shooting cache Continuous H 120 fps or Continuous H 60 fps When shooting movies Dates imprinted at an Image mode setting E49 of O 640 480 may be difficult to read Select an Image mode...

Page 220: ...r When printing with a DPOF compatible printer that can print the shooting date and shooting information you can use the Print order option E73 to print this information on images even if the Print date function was set to Off at the time of shooting ...

Page 221: ... displayed when Off is selected B Notes About Vibration Reduction After turning on the camera or after switching from playback mode to shooting mode wait for the shooting mode screen to be displayed completely before taking pictures Due to characteristics of the vibration reduction function images displayed in the camera s monitor immediately after shooting may be displayed blurry Vibration reduct...

Page 222: ... is too dark The images captured using motion detection may be somewhat grainy in appearance Tap F M z setup menu M Motion detection Option Description U Auto default setting When the camera detects subject movement or camera shake the ISO sensitivity and shutter speed are automatically increased to reduce blurring However motion detection does not function in the following situations When the fla...

Page 223: ...sist the focus operation when the subject is dimly lit The illuminator has a range of about 1 9 m 6 ft 3 in at the maximum wide angle position and about 1 5 m 4 ft 11 in at the maximum telephoto position Note that for some scene modes such as Museum A46 and Pet portrait A49 or focus areas the AF assist illuminator may not light even when Auto is selected p Off AF assist illuminator does not light ...

Page 224: ...ntinuous is set to Multi shot 16 When Scene auto selector Portrait Night portrait Night landscape Backlighting when HDR is set to On Easy panorama Pet portrait or 3D photography is selected in scene mode When smart portrait mode is selected Tap F M z setup menu M Digital zoom Option Description o On default setting When the camera is zoomed in to the maximum optical zoom position rotating the zoom...

Page 225: ...Select On default setting or Off When On is selected a beep will sound once when operations are completed successfully twice when the camera acquires focus on the subject and three times when an error is detected Start up sound will also play when the camera is turned on Shutter sound Select On default setting or Off The shutter sound is disabled even if On is selected when using any continuous sh...

Page 226: ...ll turn off automatically When the power on lamp is flashing pressing any of the following buttons will turn the monitor back on Power switch shutter release button A button c button or b e movie record button C Notes About Auto Off The time that passes before the camera enters standby mode is fixed in the following situations When a menu is displayed Three minutes minimum or 5 min or 30 min if th...

Page 227: ...Memory Cards When a memory card is inserted in the camera the Format card option is displayed in the setup menu B Notes About Formatting Internal Memory and Memory Cards Album icon settings E10 are reset to their default settings number icons when the internal memory or memory card is formatted Do not turn the camera off or open the battery chamber memory card slot cover during formatting The firs...

Page 228: ...p menu M Language Czech Romanian Danish Finnish German Swedish default setting Vietnamese Spanish Turkish Greek Ukrainian French Arabic Indonesian Bengali Italian Simplified Chinese Hungarian Traditional Chinese Dutch Hindi Norwegian Japanese Polish Korean Brazilian Portuguese Tamil European Portuguese Thai Russian ...

Page 229: ... Auto is selected the option best suited to the TV to which the camera is connected is automatically selected from 480p 720p or 1080i HDMI device control Select whether or not the camera can receive signals from a TV that supports the HDMI CEC standard when it is connected to the TV via HDMI When On default setting is selected the TV s remote control can be used to control the camera during playba...

Page 230: ...he camera off and then disconnect the USB cable About 3 hours and 15 minutes are required to charge a fully exhausted battery Charging time increases when images are transferred while the battery is charging When the camera is connected to a computer an application installed on the computer such as Nikon Transfer 2 may start If the camera was connected to the computer for the sole purpose of charg...

Page 231: ...wing chart explains charge lamp status when the camera is connected to a computer Status Description Flashes slowly green Battery charging Off Battery not charging If the charge lamp changes from slow flashing green to off while the power on lamp is lit charging is complete Flashes quickly green The ambient temperature is not suited to charging Charge the battery indoors with an ambient temperatur...

Page 232: ... blink warning does not function at continuous settings other than Single E59 Tap F M z setup menu M Blink warning Option Description On When the camera detects that one or more human subjects may have blinked in an image captured using face detection the Did someone blink screen is displayed in the monitor The face of the human subject that may have blinked when the shutter was released is framed...

Page 233: ...utomatically returns to shooting mode Function Description Enlarge the detected face that blinked Rotate the zoom control to g i Switch to full frame playback Rotate the zoom control to f h Select the face to be displayed If the camera detects that more than one human subject blinked tap M or N to switch the display to another face Delete the image Tap E Switch to shooting mode Tap I or press the ...

Page 234: ...A81 Settings are applied to all sequences and the setting is saved in the camera s memory even if the camera is turned off Tap F M z setup menu M Sequence display options Option Description L Individual pictures Set all pictures in all sequences to be displayed individually h is displayed on the playback screen A8 K Key picture only default setting Set all sequences to be displayed using their key...

Page 235: ...ctures taken may not be displayed correctly Eye Fi cards are for use only in the country of purchase Observe all local laws concerning wireless devices Leaving the setting as Enable will result in the battery being depleted in a shorter period of time C Eye Fi communication indicator The communication status of the Eye Fi card in the camera can be confirmed on the monitor A6 w Eye Fi upload is set...

Page 236: ...oting Menu Tap F M z setup menu M Reset all Option Default value Flash mode A58 Auto Self timer A61 Off Macro mode A63 Off Exposure compensation A65 0 0 Option Default value Image mode E49 l 4608 2592 Touch shooting E51 Touch shutter ISO sensitivity E58 Auto Continuous E59 Single White balance E62 Auto Quick effects E65 On AF area mode E66 Center ...

Page 237: ...ndscape A45 Hand held HDR in backlighting scene mode A47 Off Easy panorama A48 Normal 180 Continuous shooting in pet portrait mode A49 Continuous Pet portrait auto release in pet portrait mode A49 On Option Default value Special effects setting in the shooting mode selection menu A52 Soft Option Default value Skin softening E67 Normal Blink proof E68 Off Smile timer E68 On Option Default value Mov...

Page 238: ... E93 3 Print date E95 Off Vibration reduction E97 On Motion detection E98 Auto AF assist E99 Auto Digital zoom E100 On Button sound E101 On Shutter sound E101 On Auto off E102 1 min HDMI E105 Auto HDMI device control E105 On HDMI 3D output E105 On Charge by computer E106 Auto Blink warning E108 Off Sequence display options E110 Key picture only Eye Fi upload E111 Enable Option Default value ...

Page 239: ...card A34 before selecting Reset all The following menu settings will remain unaffected when menus are reset with Reset all Shooting menu Preset manual data E63 acquired for White balance Playback menu Choose key picture E82 Setup menu Time zone and date E90 Language E104 and Video mode E105 under TV settings Others Favorite album icon E10 Option Default value Paper size E41 E43 Default Slide show ...

Page 240: ...E116 Reference Section Firmware Version View the current camera firmware version Tap F M z setup menu M Firmware version Firmware version COOLPIX S6400 Ver x x ...

Page 241: ...N0001 JPG Identifier not shown on camera monitor Original still images voice memo attachment included and movies DSCN Small copies voice memo attachment included SSCN Cropped copies voice memo attachment included RSCN Images created by an image editing function other than small picture or crop voice memo attachment included and movies created by the movie editing function FSCN Copies created in Dr...

Page 242: ...ssigned in ascending order starting from the largest folder number on the destination medium E80 A single folder can hold up to 200 images if the current folder already contains 200 images a new folder named by adding one to the current folder name will be created the next time an image is captured If the current folder is numbered 999 and contains 200 images or an image is numbered 9999 no furthe...

Page 243: ... 50 min AC adapter AC Adapter EH 62G connect as shown Be sure that the power connector cord has been properly aligned in power connector and battery chamber grooves before closing the battery chamber memory card slot cover If part of the cord runs out of the grooves the cover or cord may be damaged when the cover is closed 1 2 3 ...

Page 244: ...ff to prevent overheating Inside of the camera has become hot Turn off camera and allow battery to cool down before resuming use Q flashes red Camera cannot focus Refocus Use focus lock 30 77 78 Please wait for the camera to finish recording Camera cannot perform other operations until saving is complete Wait until message clears from display automatically when saving is complete Memory card is wr...

Page 245: ... format the memory card F5 Out of memory Memory card is full Select smaller image size Delete images Insert new memory card Remove memory card and use internal memory 69 E49 34 100 18 19 Image cannot be saved Error occurred while saving image Format internal memory or memory card E103 Camera has run out of file numbers Insert a new memory card or format internal memory or memory card E103 E117 Ima...

Page 246: ... the memory card Select memory card with faster write speed 18 Memory contains no images No images in the internal memory or memory card Remove the memory card from the camera to play back images saved in the camera s internal memory To copy the images saved in the camera s internal memory to the memory card tap F and tap h Copy 18 E80 No images have been added to the selected album Add images to ...

Page 247: ... first shot could not be successfully taken Try shooting again In some shooting conditions such as when the subject is moving dark or low in contrast shooting may not be possible 50 Failed to take second shot When taking 3D images the second shot could not be successfully taken after the first shot Try shooting again After taking the first shot move the camera horizontally and frame the subject so...

Page 248: ... status Printer error Check printer After solving the problem tap Resume to resume printing Printer error check paper Specified size of paper is not loaded in printer Load the specified paper size and tap Resume to resume printing Printer error paper jam Paper has jammed in printer Remove the jammed paper and tap Resume to resume printing Printer error out of paper No paper is loaded in printer Lo...

Page 249: ... Maximizing Camera Life and Performance F2 The Camera F2 The Battery F3 Charging AC Adapter F4 Memory Cards F5 Cleaning and Storage F6 Cleaning F6 Storage F6 Troubleshooting F7 Specifications F17 Supported Standards F22 Approved Memory Cards F23 Index F25 ...

Page 250: ... glass and to prevent the liquid crystal from the display touching the skin or entering the eyes or mouth B Keep Dry The device will be damaged if immersed in water or subjected to high humidity B Avoid Sudden Changes in Temperature Sudden changes in temperature such as when entering or leaving a heated building on a cold day can cause condensation to form inside the device To prevent condensation...

Page 251: ...he device Images in the monitor may be difficult to see under bright lighting The monitor is lit by an LED backlight Should the monitor begin to dim or flicker contact your Nikon authorized service representative The Battery Be sure to read and follow the warnings in For Your Safety Aviii x before use Check the battery level before using the camera and replace or charge the battery if necessary Do...

Page 252: ... on or off while the battery is exhausted can result in reduced battery life Recharge the battery at least once every six months and completely exhaust it before returning it to storage After removing the battery from the camera or optional battery charger put the battery in the included battery case and store it in a cool place A marked drop in the time a fully charged battery retains its charge ...

Page 253: ... data on the memory card If there is data saved on the memory card that you wish to keep copy that data to a computer before formatting If the message Card is not formatted Format card is displayed when the camera is turned on the memory card must be formatted If there is data on the memory card that you do not want to delete tap No Copy that data to a computer before formatting To format the memo...

Page 254: ...ery F3 in Maximizing Camera Life and Performance F2 Lens Avoid touching glass parts with your fingers Remove dust or lint with a blower typically a small device with a rubber bulb attached to one end that is pumped to produce a stream of air out the other end To remove fingerprints or other stains that cannot be removed with a blower wipe the lens with a soft cloth using a spiral motion that start...

Page 255: ... currently being recorded will be lost data that have already been recorded will not be affected by removing or disconnecting the power source 25 E119 Battery inserted in the camera cannot be charged Confirm all connections Off is selected for Charge by computer in the setup menu When charging by connecting the camera to a computer battery charging stops when the camera is turned off When charging...

Page 256: ...d Reconnect the USB cable Inside of the camera has become hot Leave the camera off until the inside of the camera has cooled and then try turning it on again 24 105 F3 16 86 91 E39 Monitor is blank Camera is off Standby mode for saving power press the power switch the shutter release button A button c button or b e movie record button When flash lamp flashes wait until flash has charged Camera and...

Page 257: ...t in the setup menu 20 104 E90 Date not imprinted on images even when Print date is enabled The current shooting mode is one that does not support Print date The date cannot be imprinted on movies 104 E95 Screen for setting time zone and date is displayed when camera is turned on Clock battery is exhausted all settings were restored to their default values 20 22 Camera settings reset Monitor turns...

Page 258: ...the subject is moving dark or low in contrast the second shot may not be taken or the 3D image may not be saved Camera cannot focus Subject is too close Try shooting using macro mode or the Scene auto selector or Close up scene mode The intended subject is one with which autofocus does not perform well Set AF assist in the setup menu to Auto Turn camera off and then on again 42 45 63 77 104 E99 25...

Page 259: ...Easy panorama Pet portrait or 3D photography is selected in scene mode When smart portrait mode is selected 104 E100 69 E55 69 E59 42 43 49 54 Image mode not available Another function that restricts the Image mode option is enabled 71 No sound when shutter is released Off is selected for Sound settings Shutter sound in setup menu No sound is produced with some shooting modes and settings even whe...

Page 260: ...are too bright overexposed Adjust exposure compensation 65 Unexpected results when flash set to V auto with red eye reduction When taking pictures with V auto with red eye reduction or fill flash with slow sync and red eye reduction in Night portrait scene mode In Camera Red Eye Fix may be applied to areas not affected by red eye in rare cases Use any scene mode other than Night portrait and chang...

Page 261: ... HDR is set to On scene mode When the skin softening function is applied while shooting When using continuous shooting mode 60 43 45 47 42 43 70 69 E59 A ring shaped belt or rainbow colored stripe appears in the monitor or images When shooting with backlighting or when a very strong light source such as sunlight is in the frame a ring shaped belt or rainbow colored stripe ghosting may occur Change...

Page 262: ... COOLPIX S6400 may not be able to zoom in on images captured with another make or model of digital camera 50 Cannot record voice memos Voice memos cannot be attached to movies Voice memos cannot be attached to images captured with other cameras Voice memos attached to images using another camera cannot be played back on this camera 85 E78 Cannot edit images Editing functions used for still images ...

Page 263: ...to a category other than the category currently displayed Images saved by a camera other than the COOLPIX S6400 and images copied using the Copy option cannot be displayed in auto sort mode Images saved in the internal memory or on the memory card may not be played back correctly if overwritten by a computer Up to 999 images and movies in total can be added to each category If the desired category...

Page 264: ...e printer 105 E106 Images to be printed are not displayed Memory card contains no images Replace the memory card Remove the memory card to print images from the internal memory Images captured using 3D photography cannot be printed 18 19 50 Cannot select paper size with camera Paper size cannot be selected from the camera in the following situations even when printing from a PictBridge compatible ...

Page 265: ...5 format Vibration reduction Lens shift Motion blur reduction Motion detection still pictures Autofocus AF Contrast detect AF Focus range W Approx 50 cm 1 ft 8 in T Approx 1 2 m 4 ft Macro mode Approx 10 cm 4 in wide angle position All distances measured from center of front surface of lens Focus area selection Face priority auto 9 area automatic selection center manual focus area can be selected ...

Page 266: ... sensitivity Standard output sensitivity ISO 125 1600 ISO 3200 available when using Auto mode Exposure Metering mode 256 segment matrix center weighted digital zoom less than 2 spot digital zoom 2 or more Exposure control Programmed auto exposure and exposure compensation 2 0 2 0 EV in steps of 1 3 EV Shutter Mechanical and CMOS electronic shutter Speed 1 2000 1 s 1 4000 s maximum speed during hig...

Page 267: ... Portuguese European and Brazilian Romanian Russian Spanish Swedish Tamil Thai Turkish Ukrainian Vietnamese Power sources One Rechargeable Li ion Battery EN EL19 included AC Adapter EH 62G available separately Charging time Approx 3 h when using Charging AC Adapter EH 69P and when no charge remains Battery life1 Still pictures Approx 160 shots when using EN EL19 Movies actual battery life for reco...

Page 268: ...ngth of time menus and images are displayed 2 Individual movie files cannot exceed 4 GB in size or 29 minutes in length Recording may end before this limit is reached if camera temperature becomes elevated Rechargeable Li ion Battery EN EL19 Charging AC Adapter EH 69P Type Rechargeable lithium ion battery Rated capacity DC 3 7 V 700 mAh Operating temperature 0 C 40 C 32 F 104 F Dimensions W H D Ap...

Page 269: ...1 Technical Notes and Index B Specifications Nikon will not be held liable for any errors this manual may contain The appearance of this product and its specifications are subject to change without notice ...

Page 270: ...be printed from print orders saved on memory cards Exif version 2 3 Exchangeable image file format Exif version 2 3 for digital still cameras is a standard that allows information saved with photographs to be used for optimal color reproduction when images are output from Exif compliant printers PictBridge A standard developed cooperatively by the digital camera and printer industries allowing pho...

Page 271: ...ports 2 GB cards Contact the manufacturer for details on the above cards We cannot guarantee camera performance when using memory cards made by other manufacturers SD memory card SDHC memory card2 SDXC memory card3 SanDisk 2 GB1 4 GB 8 GB 16 GB 32 GB 64 GB 128 GB TOSHIBA 2 GB1 4 GB 8 GB 16 GB 32 GB 64 GB Panasonic 2 GB1 4 GB 8 GB 16 GB 32 GB 64 GB Lexar 4 GB 8 GB 16 GB 32 GB 64 GB 128 GB 2 SDHC co...

Page 272: ...oft Corporation in the United States and or other countries Macintosh Mac OS and QuickTime are trademarks of Apple Inc registered in the U S and other countries Adobe and Acrobat are registered trademarks of Adobe Systems Inc SDXC SDHC and SD Logos are trademarks of SD 3C LLC PictBridge is a trademark HDMI logo and High Definition Multimedia Interface are trademarks or registered trademarks of HDM...

Page 273: ...68 84 99 103 f Exit icon 10 J Return icon 10 R 50 Numerics 3D photography s 50 3D pictures 50 A AC adapter 25 E119 AF area mode 70 E66 AF assist 2 104 E99 Album E10 adding images to 84 removing images from 84 Aperture value 30 31 Audio video cable 87 E34 Audio video in jack 87 E34 Auto flash 59 Auto mode 38 Auto off 25 105 E102 Auto sort mode 82 E11 Autofocus 99 E88 B Backlighting o 47 Battery 14 ...

Page 274: ...rmat 21 E90 Daylight E62 Daylight saving time 21 22 E92 Delete 34 E16 E79 Digital zoom 104 E100 Direct print 87 E38 D Lighting 84 E26 DPOF F22 DPOF print E45 Drag 4 Draw A 47 E2 DSCN E117 Dusk dawn i 44 E Easy panorama p 48 E3 Easy panorama playback 48 E6 EH 69P ii 16 EN EL19 ii 14 16 Exposure compensation 65 Extension E117 Eye Fi upload 105 E111 Eyelet for camera strap 2 F Face detection 42 43 49...

Page 275: ...HDR 47 Help 40 High key G 52 High contrast monochrome F 52 High speed continuous 69 E59 HS movie 99 E84 I Identifier E117 Image copy E80 Image mode 69 E49 Image review E93 Image size 69 E49 Imprinting date and time E95 Internal memory 19 Internal memory indicator 7 9 24 32 96 ISO sensitivity 69 E58 J JPG E117 L Landscape c 42 Language 105 E104 Lens 2 F17 Lens cover 2 List by date mode 82 E13 Low k...

Page 276: ...E22 Panorama Maker 90 Paper size E42 E43 Party indoor f 44 Perspective control 84 E28 Pet portrait auto release 49 Pet portrait O 49 Photo info E93 PictBridge 87 E38 F22 Playback 32 100 E79 Playback menu 84 E69 Playback mode 32 82 Playback zoom 80 Pop l 52 Portrait b 42 Power 24 25 Power switch 2 24 25 Power on lamp 2 24 25 Preset manual E63 Pre shooting cache 69 E59 E61 Pressing halfway 31 Print ...

Page 277: ...nd E101 Shutter speed 30 31 Shutter release button 30 Single 69 E59 Single AF 99 E88 Skin softening 56 70 E67 Slide show 84 E69 Slow sync 59 Small picture 84 E31 Smart portrait menu 68 E67 Smart portrait mode 54 Smile timer 70 E68 Snow z 44 Soft O 52 Sound settings 104 E101 Speaker 3 Special effects mode 52 Sports d 43 SSCN E117 Strap 4 Stretch 84 E27 Stylus 5 Subject tracking 38 69 E55 Sunset h 4...

Page 278: ...able 86 91 E39 USB audio video output connector 86 91 E34 E39 V Vibration reduction 104 E97 Video mode E105 ViewNX 2 88 Voice memo 85 E78 Volume 100 101 E79 W WAV E117 Welcome screen 104 E89 White balance 69 E62 Wind noise reduction 99 E88 Z Zoom 29 Zoom control 2 29 Zoom in 29 Zoom out 29 ...

Page 279: ......

Page 280: ...reproduction in any form of this manual in whole or in part except for brief quotation in critical articles or reviews may be made without written authorization from NIKON CORPORATION YP2I02 11 6MNA7811 02 ...

Reviews: