137
136
Refer
ence—Adv
anced Photog
raph
y
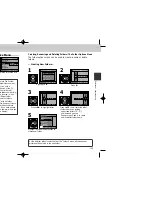
Fine-Tuning White Balance
At settings other than “
A
” (auto) and
(preset), white
balance can be “fine-tuned” by highlighting the desired
setting and selecting an adjustment from a sub-menu. A
adjustments can be made in the range of +3 to –3 or, in
the case of
(fluorescent), by selecting the type of bulb
from the following sub-menu:
F
L
1
F
L
2
F
L
3
OFF
SELECT
SET
WHITE BALANCE
Auto
Auto
White Bal Preset
White Bal Preset
Fine
Fine
Incandescent
Incandescent
Fluorescent
Cloudy
Cloudy
Speed
Speed l i ght
ght
Auto
White Bal Preset
Fine
Incandescent
Fluorescent
Cloudy
Speed l i ght
Option
Description
FL1
W (default)
FL2
N
FL3
D
Raising white balance gives images a blue, “cold” cast; lowering white balance
makes pictures appear “warmer”—that is, slightly yellow or red. After selecting the
desired adjustment, press
>
on the Multi selector to put your choice into effect.
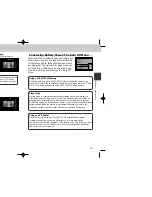
— Preset White Balance —
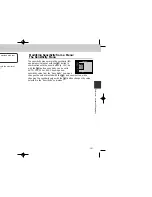
Preset white balance is used to adjust white balance when
shooting under mixed lighting or to compensate for light
sources with a strong color cast (for example, to make
pictures taken under a lamp with a red shade look as
though they had been taken under white light). When
(White Bal Preset) is selected from the white-balance
menu, the camera will zoom in and the menu shown at
right will be displayed in the monitor.
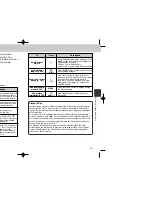
Option
Description
Cancel
Recalls the most recent setting for preset white balance from
memory and sets white balance to this value.
To measure a new value for white balance, place a white object,
such as a piece of paper, under the lighting that will be used in
the final picture. Frame this object so that it fills the square in the
center of the menu shown above. Highlight “Measure” and press
the Multi selector to the right to measure a new value for preset
white balance (camera will zoom out and shutter will be released,
but no picture will be recorded).
Measure
WHITE BALANCE PRESET
Cancel
Measure
OFF
SELECT
SET
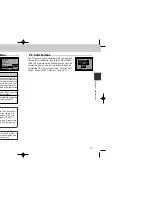
At setting other than AUTO, the current white-
balance setting is indicated by an icon in the
monitor.
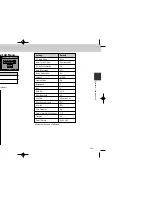
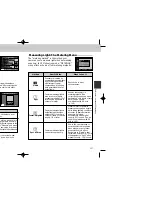
Measuring Light: The Metering Menu
The “metering method” is the method your
camera uses to measure light when determining
exposure. In CSM shooting mode, “METERING”
menu offers a choice of four metering methods:
METERING
OFF
SELECT
SET
Matrix
Spot
Center-Weighted
Spot AF Area
Method
q
Matrix
e
Spot
w
Center-Weighted
r
Spot AF Area
How It Works
Exposure calculated by
comparing measurements
from 256 areas of frame
with library of typical
compositions, producing
best possible setting for
entire frame.
Camera measures light in
area in center of frame
occupying roughly 1/32 of
total, shown by square in
center of monitor.
Camera measures light in
entire frame but assigns
weight of 80% to area in
center of frame occupying
roughly 1/4 of total.
Camera measures light in
current focus area only.
When to Use It
Best choice in most
circumstances.
Ensures that subject in
metering target will be
correctly exposed even when
background very bright or very
dark. Can be used in
combination with AE hold
(p. 148).
Classic meter for portraits;
preserves background details
while letting lighting conditions
at center of frame determine
exposure. Selected
automatically when digital
zoom (p. 90) is used. Can be
used in combination with AE
hold (p. 148).
Use to link spot metering to
currectly selected focus area
when manual or auto focus-
area selection is in effect.
Equivalent to “Matrix” when
focus-area selection (p. 150) is
off; equivalent to “Spot” when
manual focus (p. 151) is used.
COOLPIX885 (E) 01.10.22 6:02 PM Page 136

