29
En
1
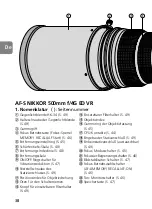
Set the focus mode switch to “A/M“, “M/A“ or “M“. (Fig. 1)
2
Focus on a subject that you want to memorize the focused
distance. Press the Memory Set button (Fig. 6) and a beep
sounds, indicating that the focused distance was stored in
memory.
• Memory set is possible regardless of the position of the Focus mode switch or
Focus operation selection switch.
• The focused distance is kept stored in the memory even when the camera is
turned off or the lens is detached from the camera.
Note:
If the distance scale ring turns from right to left about 10 times when
setting, and at the same time one short beep and three long beeps sound,
perform Memory set again.
3
Set the Focus operation selection switch (Fig. 3) to “MEMORY RECALL“.
4
Press the Focus operation button (Fig. 4).
• While softly pressing the shutter release button, press the focus operation
button to recall the memorized focus distance.
5
Two beeps sound to indicate the focused distance was recalled. Then depress
the shutter release button all the way to take the picture.
Note:
To take pictures at the memorized focused distance, fully depress the
shutter release button before removing your finger from the focus
operation button.
• In the A/M or M/A mode, the lens reverts from Memory recall to autofocus or
manual focus only when you remove your finger from the Focus operation
button and lightly depress the shutter release button.
AF-ON
(See page 24 for usable cameras.)
1
Set the Focus mode switch (Fig. 1) to “A/M“ or “M/A“.
2
Set the Focus operation selection switch (Fig. 3) to “AF-ON“.
3
Press the focus operation button (Fig. 4) to take pictures.
• Autofocus is activated while you are pressing the Focus operation button.
7. Vibration reduction mode
(See page 24 for usable cameras.)
1
Set the vibration reduction ON/OFF ring switch to “ON“
2
, while pressing the button on the ring switch
1
.
(Fig. 7)
2
Set the vibration reduction mode switch (Fig. 8) to
“NORMAL“ or “TRIPOD“.
• Image vibration in the viewfinder can be reduced by softly
pressing the shutter release button, making auto/manual
focusing and exact framing of the subject easier.
Fig. 6
Fig. 7
Fig. 8
Summary of Contents for AF-S NIKKOR
Page 5: ...5 Jp ...
Page 7: ...7 Jp ...
Page 21: ...21 En ...
Page 23: ...23 En ...
Page 39: ...39 De ...
Page 41: ...41 De ...
Page 57: ...57 Fr ...
Page 59: ...59 Fr ...
Page 75: ...75 Es ...
Page 77: ...77 Es ...
Page 93: ...93 Se ...
Page 95: ...95 Se ...
Page 111: ...111 Ru ...
Page 113: ...113 Ru ...
Page 129: ...129 Nl ...
Page 131: ...131 Nl ...
Page 147: ...147 It ...
Page 149: ...149 It ...
Page 165: ...165 Ck ...
Page 167: ...167 Ck ...
Page 183: ...183 Ch ...
Page 185: ...185 Ch ...
Page 201: ...201 Kr ...
Page 203: ...203 Kr ...
Page 216: ...216 ...
Page 217: ...217 ...
Page 218: ...218 ...
Page 219: ...219 ...
Page 220: ...220 ...
Page 221: ...221 ...
Page 222: ...222 ...
Page 223: ...223 ...

