


52
53
AHD7 DVR Series
Users Manual
Chapter
7:
Menus and Settings
7.6
Advanced Menu
Configure additional settings related to maintenance, hard drive space, and
upgrades.
7.6.1
Maintain
Adjust settings related to default user access and reboot schedules.
Default User:
choose a user to default at the login screen at startup.
Auto Reboot:
Enable
or
Disable
a scheduled reboot.
Reboot:
set the frequency of reboots if this feature is enabled.
Update:
if any of the above settings were changed, click this button to save the
new parameters.
Load Default:
revert back to the standard reboot schedule.
Save Settings:
save reboot settings to a USB flash drive.
Load Settings:
load previously saved settings from a USB flash drive.
Shutdown:
reboot the DVR.
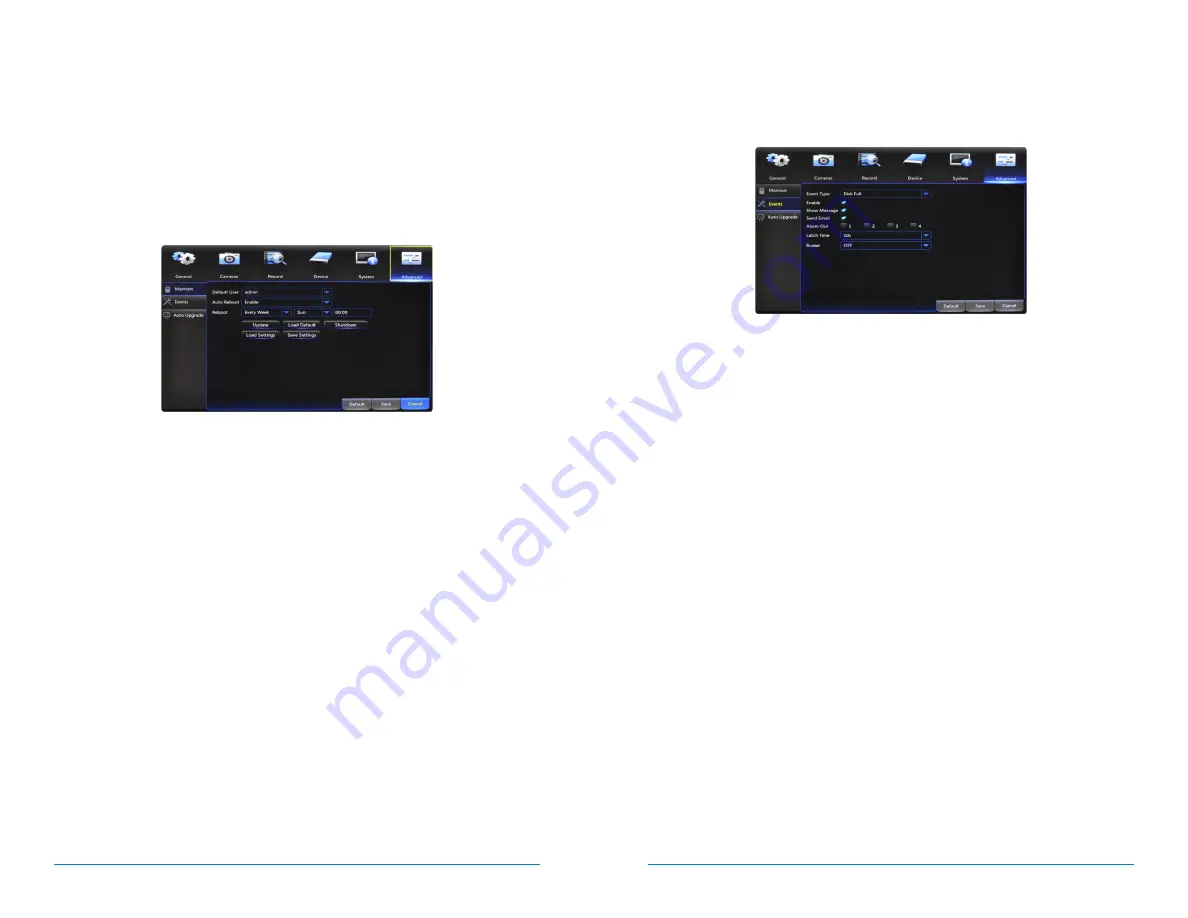
7.6.2
Events
Configure notification settings for other triggered events not related to motion
detection such as disk error, disk full or and/or video loss.
Event Type:
choose the type of event you would like to create a notification for.
Disk Full
means you will receive a notification if the HDD is full.
Disk Error
refers
to the status of the HDD and will notify you if it crashes or has become corrupt.
Video Loss
is the absence of video due to power loss disconnection.
Enable:
turn notifications on or off for the selected Event Type.
Show Message:
enable an icon to be displayed in Live View when the selected
Event Type is triggered.
Send Email:
send an email notification when this Event Type is detected.
Buzzer:
turn an audible buzzer on for a duration of time to alert you when this
Event Type
happens. Choose
OFF
to disable this feature. You can select in
between 10 and 60 seconds.


