background image

SE

FR

FI

DE

GB

IT

NO

DK

NL

Fakta 

  3

Données Techniques   

15

Tiedot 

  27

Fakten 

  7

Facts 

  19

Dati Tecnici 


31

Fakta 

  11

Fakta 

  23

Gegevens 

  35

Installationsavstånd  

4

Distances d’installation 16

Asennusetäisyys  

28

Installationsabstände  

8

Installation distances  

20

Distanze di sicurrezza  

32

Installasjonsavstand  

12

Installationsafstand  

24

Installatieafstand  

36

Prestandadeklaration  

5

Déclaration des performance 

17

Suoritustasoilmoitus  

29

Leistungsdeklaration  

9

Declaration of performance 

21

Dichiarazione di prestazione 

33

Ytelseserklæring  

13

Præstationserklæring  

25

Prestatieverklaring  

37

Montering 

  39

Montage 

  39

Asennus 

  39

Montage 

  39

Assembly 

  39

Montaggio 

  39

Montering 

  39

Montering 

  39

Monteren 

  39

Summary of Contents for Contura C856T

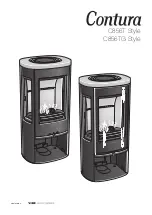
Page 1: ...C856T Style C856TG Style contura eu...

Page 2: ...nces 20 Distanze di sicurrezza 32 Installasjonsavstand 12 Installationsafstand 24 Installatieafstand 36 Prestandadeklaration 5 D claration des performance 17 Suoritustasoilmoitus 29 Leistungsdeklarati...

Page 3: ...The stove becomes very hot During operation certain surfaces of the stove become very hot and can cause burn injury if touched Be aware of the strong heat radiated through the hatch glass Placing flam...

Page 4: ...lass hearth plate accessory increases the connection height to the chimney by 10 mm Permitted area for combustible parts of the building If the stove is placed on a hearth plate made of glass for exam...

Page 5: ...afety Pass Fire classification A1 Minimum distance to flammable materials Rear 100 mm Side 500 mm Ceiling 1035 mm Front 1100 mm Floor 0 mm Corner 200 mm Fire hazard due to burning fuel falling out Pas...

Page 6: ...in kW Two or more manual stages no room temperature control No In standby mode elSB kW With mechanic thermostat room temperature control No With electronic room temperature control No With electronic...

Page 7: ...e insert needs to be put down to be moved loose components should be removed Removal of the hearth cladding is described at the end of these installation instructions 1 Grille 2 Grate disc 3 Hearth cl...

Page 8: ...iger Anschluss an einen Schornstein Bakmontering til skorstein Raccordement par l arri re la chemin e Rear connection to chimney Tilslutning bagud til skorsten Liit nt taaksep in savupiippuun Collegam...

Page 9: ...nto alla canna fumaria dal piano della stufa Prima di collegare la canna fumaria al piano della stufa assicurarsi che la griglia dell aria calda sia montata Bovenaansluiting op een schoorsteen Het het...

Page 10: ...42 HK HK 40 mm 1 2 HK 40 mm HK 40 mm 3 4 SE DE NO FR GB DK FI IT NL Tilluft Zuluft Tilluft Arriv e d air Supply Forbr ndingsluft Tuloilma Alimentazione dell aria Toevoerlucht...

Page 11: ...43 13 13 VANADI UM No 7 CHROME 2 1 3 203120 203116 4...

Page 12: ...44 5...

Page 13: ...oor can be secured in the open position using the locking lever on the left side of the stove Door in open position for cleaning service Sp rring af l gen ved reng ring service L gen kan sp rres i ben...

Page 14: ...erer du ildstedsbekledningen Vermikulitt Voici comment d monter l habillage du foyer Vermiculite How to remove the hearth surround Vermiculite S dan afmonterer du ovnbekl dningen Vermiculite N in irro...

Page 15: ...47 7 8 1 2 9 10...

Page 16: ...811386 IAV SE EX C856T Style 4 2022 02 11 NIBE AB Box 134 285 23 Markaryd Sweden contura eu...

Reviews: