


5. Startup and shutdown
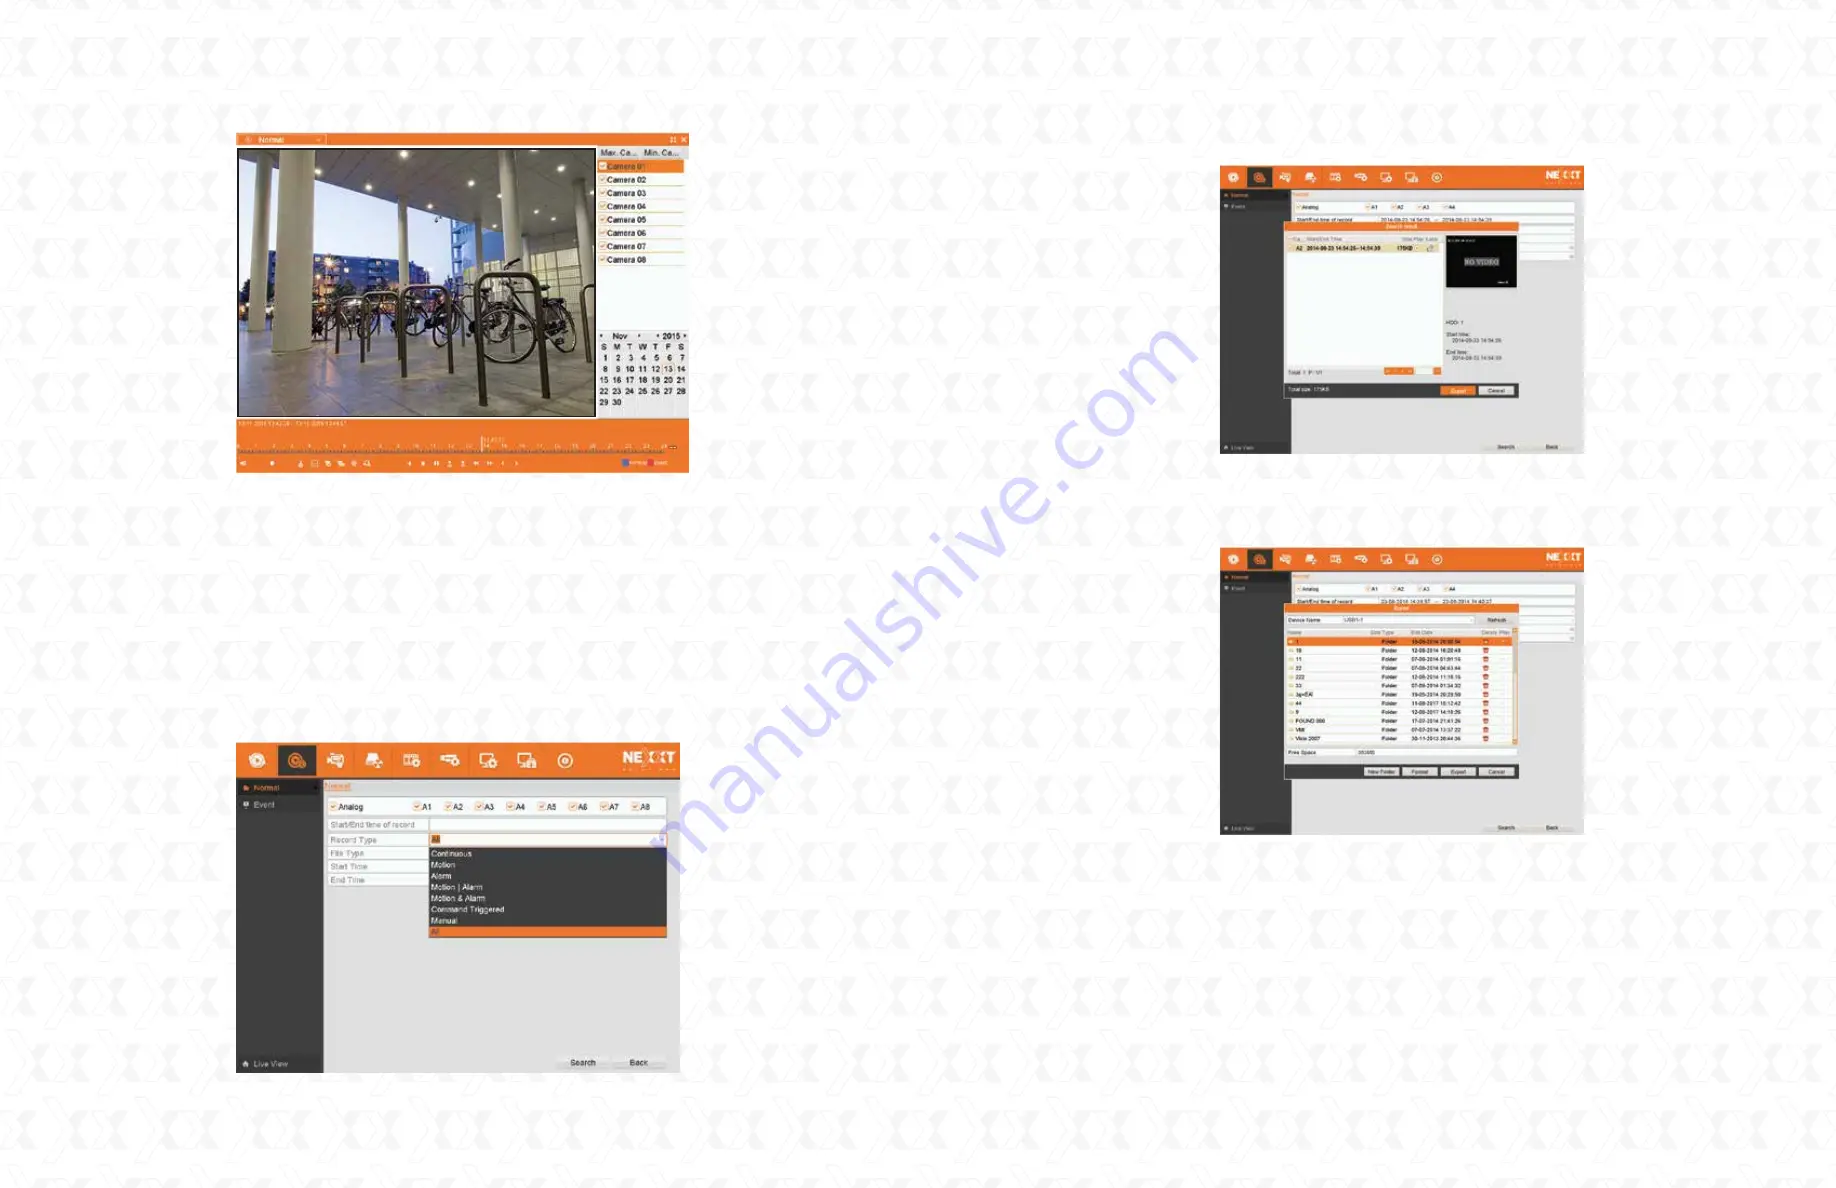
Browse to choose the backup device and click the
Export
button to start the file(s) transfer, as
illustrated below. The user can delete or check the saved files by clicking on the corresponding
icon on the right hand column.
Make sure that voltage of the AC mains or of the UPS system you are using matches the power
requirements of this unit.
Verify that all power and ground connections have been done properly.
When connected, the power indicator LED will glow red.
To disconnect the system, use the mouse to select
Home menu
, followed by the
Shutdown
option in the menu.
Then the
Shutdown
confirmation window will be displayed. If you want to continue, click
Yes
,
as seen in the illustration below.
Proper startup and shutdown procedures are crucial for expanding the life of the DVR.
4.3
5.1
5.2
5.3
5.4
5.5
Select the recorded files and click
Export
.
4.2
4. Backup
In addition, by moving the cursor to the right side of the screen, the complete list of channels
will be displayed. From this window, the user can select the videos recorded by each particular
camera he wants to view.
Click
Home menu > Export > Normal
to enter the video export interface.
Choose the channel(s) and file types you want to back up from the
Record Type
line.
Then click the
Search
button to continue.
Recorded files can be backed up in external memory devices, such as USB flash drives, USB
hard disk drives or a DVD writer.
To export recorded files:
3.3
4.1
Nexxt Solutions - Surveillance systems user guide
17
Nexxt Solutions - Surveillance systems user guide
16


