


Illustration 1 Illustration 2
Illustration 3
Press the "Mode" button once to make the unit clean in "Spiral" mode
only. The Timer will display "1" for one minute and then will show the
cleaning time.
When the RoboVac comes
in
contact
with
any
object
while running
in
this
mode
,
it
will
automatically
stop
its
movement
.
Press the "Mode" button again (Twice)to make the RoboVac clean in
"Special Bounce" mode only. The Timer will display "2" for one minute.
Press the "Mode" button again (Three times) to make the unit run in
"Along Wall" mode only. The Timer will display "3" for one minute.
Press the "Mode" button again (Four times) to make the unit run in "S
Shape" mode only. The timer will display "4" for one minute.
Press the "Mode" button again (5 times) to make the unit run in
"Polygonal Spiral" mode only. The Timer display will show "5" for one
minute.
Press the "Mode" button again (6 times) to go back to "Automatic"
mode (all 5 cleaning patterns). The Timer display will show "A" for one
minute.
6.UV Button: Allows you to turn on or off the ultraviolet light as needed.
7.Vacuum Motor Off Button: Press this button to turn On/Off the vacuum
motor.
This
allows
you
to
use the UV
light
to
disinfect
the
floors
without
the
noise of
the vacuum
motor
.
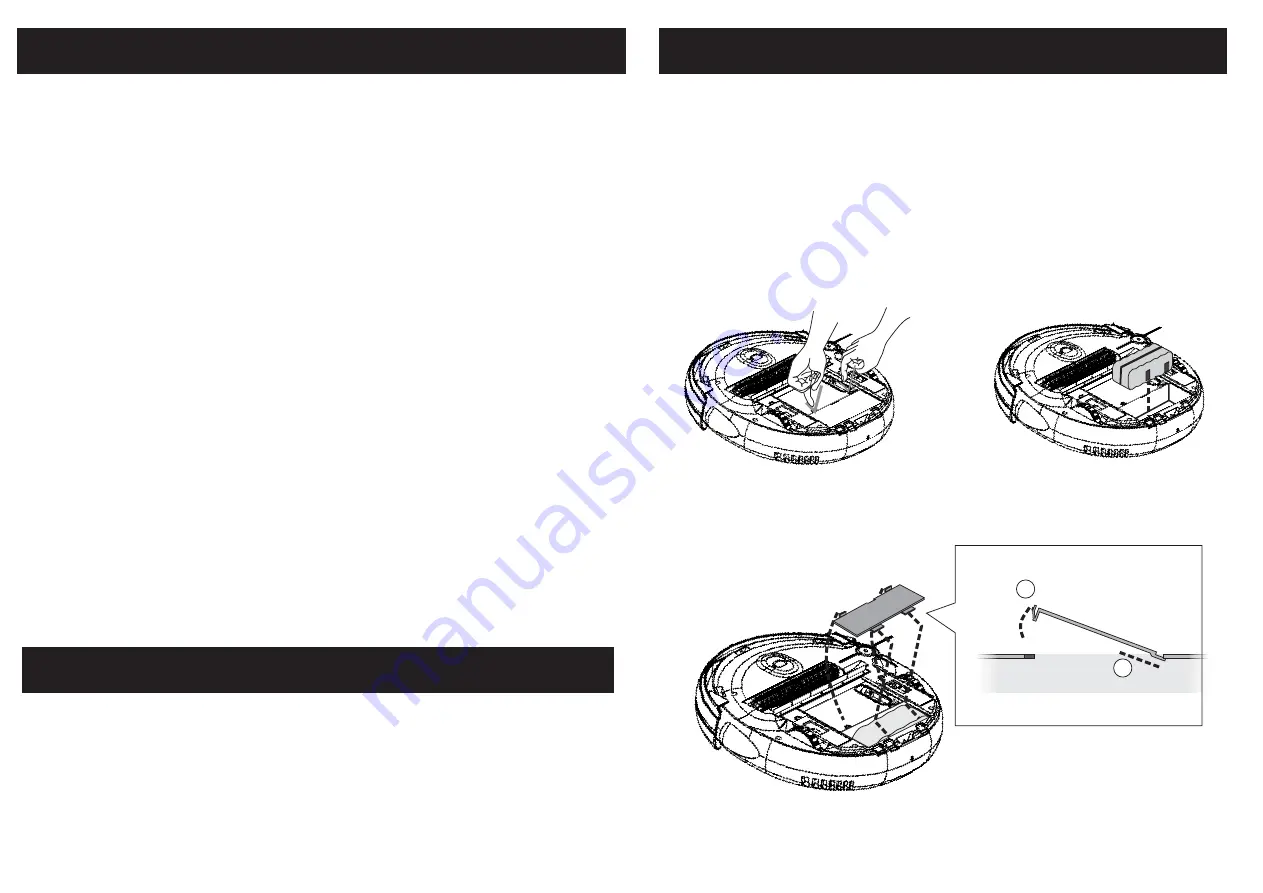
1. Make sure that the power of the unit is turned 'OFF'.
2. Use your fingers
to press the tabs at
the front of the battery cover
.
Lift
up the battery cover
by
these tabs as shown
in Illustration 1.
3. Make sure the battery is inserted in the correct orientation by aligning
the silver strips on the battery with the metal tabs on the inside of the
battery compartment. Battery lifting band should face up after
battery is installed. See Illustration 2.
9
8
Clean Mate 365
QQ-1
Battery Installation and Removal
Remote Control Functions
1
2
Clean Mate 365
QQ-1
Battery Installation and Removal
4. Replace the battery cover by first inserting the tabs into the slots at
the back of the unit, and then pressing down on the front side of the
battery cover until the plastic tabs click in place.
Please see Illustration 3.
RoboVac 200
RoboVac 200
RoboVac 200