background image


25.  Disconnect the power supply and drain out the remaining water from the rear 

drain when the ice machine will not be in use for an extended period of time. 


26.  Please note, the ice cubes of the first cycle may have an odor due to water quality. 

This is not a defect. After several cycles, the smell will go away. If a cycle of ice is 

producing an odor, do not consume this ic 


GETTING TO KNOW YOUR ICE MAKER 


1.  Ice Scoop: Use to easily remove and service ice from the basket. 


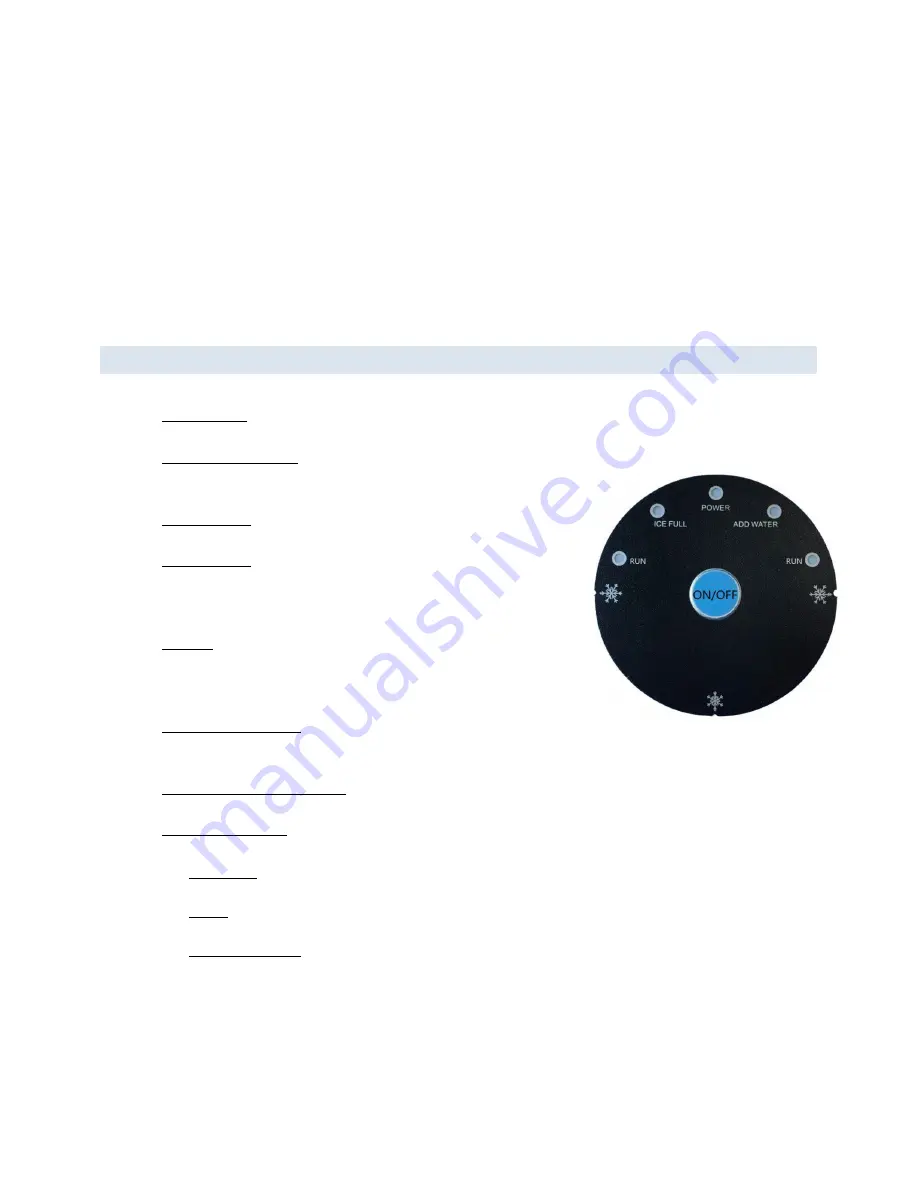
2.  Ice Full Indicator: Lets you know when the ice tray 

is too full for another cycle to begin. 


3.  Ice Basket: Stores finished ice inside the unit. 


4.  Top Cover: Keeps ice cooler, and has a window 

so you can see how much ice you have without 

opening the unit. 


5.  Vents:  Allows internal heat to escape. Please 

allow six inches of space on all sides of the unit 

for proper ventilation.  


6.  Water Drain Cap: Remove to drain excess water 

from the unit. 


7.  Maximum Water Level: Do not fill the water tank above this line. 


8.  Indication Light: 


  ON/OFF: Indicates that the power is on. 

  RUN: Indicates that the unit is operating and creating ice. 

  ADD  WATER: Indicates that the unit needs more water in order to create 

more ice.


Summary of Contents for AI-250W

Page 1: ...1 Portable Countertop Ice Maker AI 250W OWNER S MANUAL Read and save these instructions Manual v1 1...

Page 2: ...exceptional service and support when you need it the most Count on NewAir As a proud NewAir owner welcome to our family There are no robots here real people shipped your product and real people are he...

Page 3: ...g to Know Your Ice Maker 7 Operating Procedures and Maintenance 8 Maintenance and Cleaning 10 Troubleshooting 11 Limited Manufacturer s Warranty 12 Model No AI 250W Voltage 110 120V Frequency 60Hz Cur...

Page 4: ...Registering your product information online is safe secure and takes less than 2 minutes to complete Alternatively we recommend you attach a copy of your sales receipt below and record the following...

Page 5: ...of the appliance in a safe way and understand the hazards involved Children shall not play with the appliance Cleaning and user maintenance should not be conducted by children without supervision 2 Do...

Page 6: ...hine on a flat stable surface 15 Leave the ice maker upright for 24 hours after receiving it before first use 16 Please make sure that the rear drain is firmly plugged before adding water to the water...

Page 7: ...Indicator Lets you know when the ice tray is too full for another cycle to begin 3 Ice Basket Stores finished ice inside the unit 4 Top Cover Keeps ice cooler and has a window so you can see how much...

Page 8: ...tomer service department 1 This unit should be properly grounded for your safety 2 Plug the appliance directly into an appropriate 120V AC outlet that is properly installed and grounded in accordance...

Page 9: ...ght up when the ice bucket is full To restart the process remove the ice and then press ON OFF 5 Change the water in the water reservoir every 24 hours to maintain the cleanliness of your ice If the u...

Page 10: ...ter 3 Clean the interior with diluted detergent warm water and a soft cloth 4 The outside of the ice maker should be cleaned regularly with a diluted detergent and warm water 5 Dry the interior and ex...

Page 11: ...locks melt Change the water in the reservoir Use water between 46o F and 89o F Ice is full but the light is off The location of the ice maker s light is too strong and it effects the infrared detectio...

Page 12: ...such as low voltage defective household wiring or inadequate fuses Accident alteration misuse or abuse of the appliance such as using non approved accessories inadequate air circulation in the room o...

Reviews: