


7
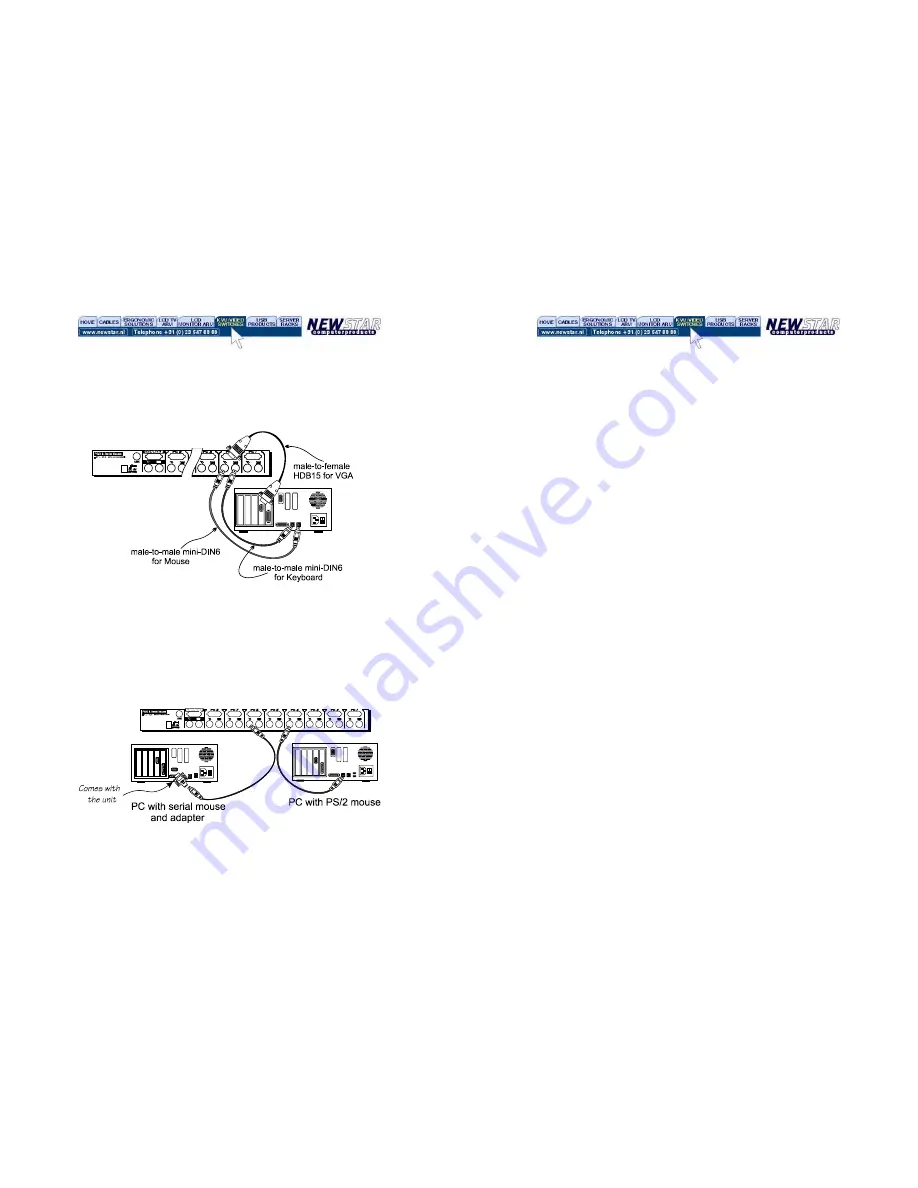
Determine the channel address of each computer. For computers
using PS/2 mouse, connect the computer's mouse and keyboard
cables to the NewStar KVM Switch’s connectors marked with a
mouse and keyboard respectively, as shown in figure 4.
Figure 4: Master computer connection
For computers using serial mouse, connect the DB-9 to mini-DIN-6
adapter (supplied with the NewStar KVM Switch) to the computer
mouse port, then use PS/2 cables to connect the mouse to NewStar
KVM Switch, see figure 5. Connect the computer's monitor cable to
the HD-DB-15 VGA connector. Repeat above steps for all remaining
computers to be connected to the NewStar KVM Switch.
Figure 5: Adapter and serial mouse connection
8
Initial Power-Up
Make sure all computers and NewStar KVM Switchs are powered
down during installation. You must power up the Master
NewStar KVM Switch before turning on any other devices.
For single KVM Switch:
1) Apply a power adapter to the
Master
.
2) Turn on computers.
For cascade:
1) Apply a power adapter to the
Master
.
2) Apply power adapters to all
Slaves
. 3) Turn on computers.
Note: You may hot plug additional powered-down computer and
Slave
without turning any existing NewStar KVM Switch or computer
off after initial power up.
Replace Master Console Devices
You can replace a faulty keyboard or mouse of the
Master
CONSOLE
port at any time without powering down the Master, as
long as your computers are booted with proper device driver for the
new device. Should you encounter any difficulty, just activate
K/M
RESET
by holding both front-panel ‘
1
’ and ‘
2
’ push buttons down for
2 seconds.
Adhesive Rubber Foot
For desk-top operation, you may stick the four round rubber feet
(supplied with the unit) to the bottom of the NewStar KVM Switch.
NOTE: Do not use the rubber feet for rack mount operation.


