


88 Series Outboard / 8803 Dual EQ
Issue 2
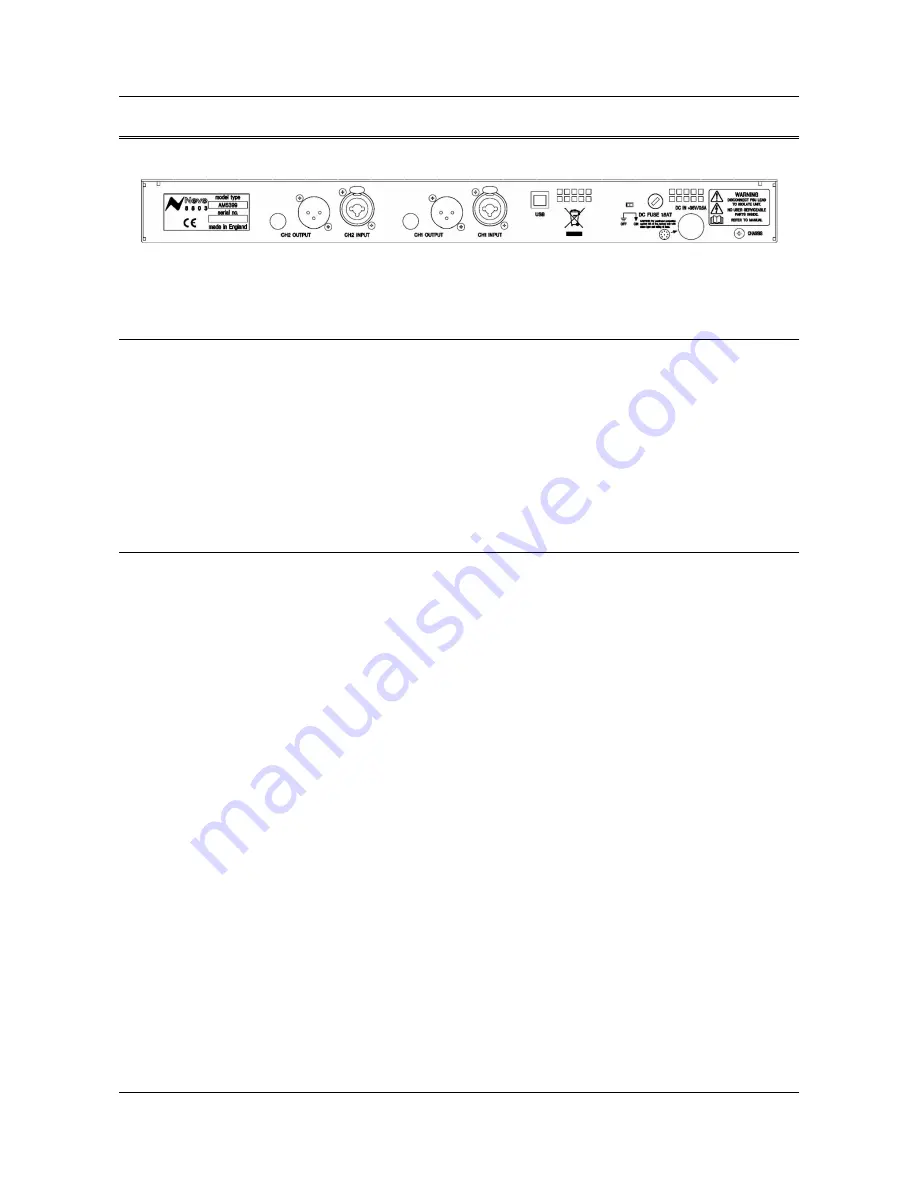
4 - Rear Panel
USB
The USB socket is a Type B connector used to connect the 8803 to a
PC or Mac for Recall store and recall of unit settings.
Audio Connections
Audio Inputs
The input combo socket for each channel accepts input signals from
either male XLR or male ¼” jack connectors. Connection can be
balanced or unbalanced on jack and XLR.
Audio Outputs
Separate male XLR socket and female ¼” jack socket for each
channel provide simultaneous output to female XLR and male jack
connectors. Connection can be balanced or unbalanced on jack and
XLR.
Electrical Connections
Technical Earth Switch
The grounding of the unit can be set to two different points:
•
The mains earth from the power supply, or
•
The studio technical earth via the
Chassis
screw on the
back of the unit.
With the switch in the
Off
position the chassis of the unit is
connected to the mains earth via the power supply.
With the switch in the
On
position the chassis of the unit should be
connected to the studio technical earth using the
Chassis
screw on
the back of the unit.
For safety reasons the chassis is NOT disconnected from the main
Earth but is connected through a filter (a 10 Ohms resistor in
parallel with a 680nF capacitor).
!!!WARNING!!!!
Connections to the technical earth and changes to the unit grounding should only be
carried out by qualified personnel.
Fuse
The removable fuse holder houses a 1.6 AT fuse
Power DIN socket
The 8 pin DIN socket should only be used to connect the power
supply provided with the 8803 unit.
PLEASE NOTE: for technical reasons the orientation of the socket is the opposite way up to
normal. The “top” of the DIN connector will therefore be underneath.
It is not possible to connect the plug the wrong way up.
- Page 8 -
Summary of Contents for 8803
Page 15: ......


