NEUTON CE5.4
Battery-Powered Mower
-
Safety & Operating Instructions
19
Chapter 6:
Troubleshooting Tips
Most difficulties are easy to fix. Consult the Troubleshooting Table for common problems and their solutions. If you continue
to experience problems or need repairs beyond these minor adjustments, visit our website at
www.neutonpower.com
or call
Neuton Power Equipment Toll Free at:
1-866-NEUTON1 (638-8661)
for assistance.
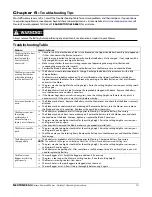
Always remove the Battery before performing any adjustments, maintenance, or repairs to your Mower.
Troubleshooting Table
P
ROBLEM
C
ORRECTIVE
A
CTION
The Motor fails to start
with the Battery
inserted, and the
Control Lever(s)
depressed.
⇒
Check to see if the black button of the Circuit Breaker on the Upper Handlebar Assembly has popped up;
if it has, then depress the Button to reset it.
⇒
Check that you installed the Battery correctly and that the Battery is fully charged. If not, replace with a
fully charged Battery or recharge the Battery.
⇒
Make sure you follow the correct starting sequence of depressing the orange Start Button and
squeezing the orange Control Lever(s).
⇒
Possibly the Blade is obstructed. Remove the Battery, turn the Mower over, and check the Blade.
The Mower stops while
mowing (for reasons
other than releasing
the Control Lever(s).
⇒
The Battery has completely depleted its charge. Recharge the Battery fully or replace it with a fully
charged Battery.
⇒
The Mower was probably overloaded. The Circuit Breaker on the Upper Handlebar Assembly has
tripped to protect the Motor. Reset the Breaker by pushing in the black Button on the Circuit Breaker
and restart the Motor.
⇒
The grass may be too high for the cutting height. Raise the cutting height or narrow your cutting swath
and try again.
⇒
The Blade, Mower Deck, or Side Discharge Chute probably clogged with debris. Remove the Battery,
turn the Mower over, and clean if necessary.
⇒
If the Mower bogs down or stalls in heavy grass, raise the cutting height, walk more slowly, or cut a
narrower swath. If the grass is wet, let it dry before mowing.
Excessive vibration or
noise.
⇒
The Blade may be loose. Remove the Battery; turn the Mower over and check that the Blade is securely
attached.
⇒
The Blade may be unbalanced, bent, or damaged. Remove the Battery, turn the Mower over, remove
the Blade, and check its condition. Replace with a new Blade if necessary.
The Mower runs, but
the cutting
performance is
unsatisfactory, or
there is a loss of power.
⇒
The Battery was probably not at full charge prior to Mowing. Charge the Battery, if necessary.
⇒
The Blade may be dull, bent, loose or damaged. Remove the Battery, turn the Mower over, and check
the condition of the Blade. Sharpen, tighten, or replace the Blade, if necessary.
⇒
The grass may be too high or too thick for the cutting height. Raise the cutting height or narrow your
cutting swath and try again.
⇒
If you previously removed the Blade, make sure you properly reinstalled it.
The Mower is hard to
push.
⇒
The grass may be too high or too thick for the cutting height. Raise the cutting height or narrow your
cutting swath and try again.
⇒
The Wheels may not be rotating freely. Remove the Battery, turn the Mower over, and check the Wheels
for damage.
The Battery loses its
charge quickly.
⇒
The Battery was probably not at full charge prior to Mowing. Charge the Battery, if necessary.
NOTE:
You will need to charge a new Battery at least five (5) times to achieve maximum cutting time.
⇒
The grass may be too high or too thick for the cutting height. Raise the cutting height or narrow your
cutting swath and try again.
⇒
The Battery may be getting old. After some time, usually between three (3) and five (5) years, you will
need to replace the Battery.
The Mower rear
Bagger is collecting
grass poorly.
⇒
The rear Bagger is full. Empty the Bagger, and clean it if necessary.
⇒
The grass is too long or the Mower is cutting too low. Raise the cutting height.
⇒
The Mower is moving too fast, slow down.
⇒
The mesh holes in the rear Bagger are clogged, clean them out.
⇒
The rear Bagger is wet. Allow it to dry thoroughly before using it again.
Summary of Contents for CE5.4
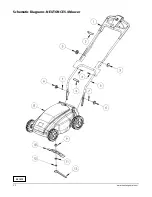
Page 24: ...22 www neutonpower com Schematic Diagrams NEUTON CE5 4 Mower 091019 ...
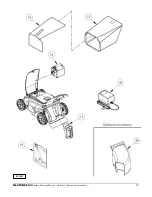
Page 25: ...NEUTON CE5 4 Battery Powered Mower Safety Operating Instructions 23 091021 ...
Page 52: ...22 www neutonowners com Schémas Tondeuse NEUTON CE5 4 091019 ...
Page 53: ...Tondeuse électrique sans fil NEUTON CE5 4 Instructions de sécurité et d utilisation 23 091113 ...

