


240299-00
Pg 2
© 2020 Network Thermostat All Rights Reserved
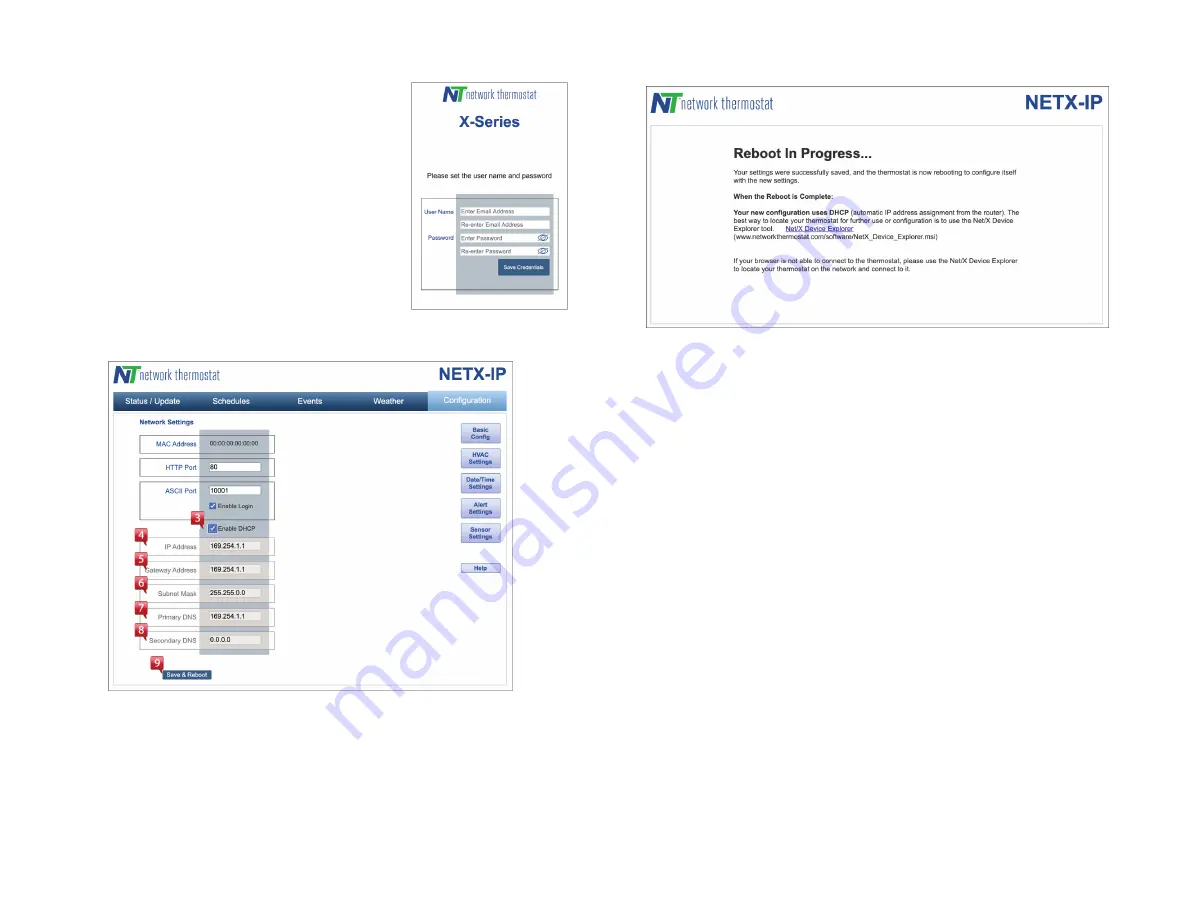
STEP 5: CONFIGURE THERMOSTAT CREDENTIALS
Browse to 169.254.1.1 (Thermostat default when not
on a network)
Create and add your username and password for the
thermostat. Click on the “Save Credentials” button
to save your information. You will be taken to the
login page for the thermostat.
Log in to the thermostat and proceed to
Step 6
.
STEP 6: UPDATE NETWORK SETTINGS ON
THERMOSTAT
1.
Click on the “Configuration” menu bar link on
the upper right
2.
Click the “Network Settings” Button on the right
side of the page
3.
Un-click the “Enable DHCP to set your static IP information
4.
Add the static IP address of the thermostat here
5.
Add the Gateway address
6.
Add the Subnet Mask
7.
Add the Primary DNS
8.
Add the Secondary DNS
9.
Click the “Save and Reboot” button
STEP 7: CONNECT THERMOSTAT TO LOCAL NETWORK
While the thermostat is rebooting, disconnect your computer from the
thermostat. Reconfigure your computer to join its regular network. You can
now connect your thermostat to its new network when it is operational.
STEP 8: VALIDATE IP ADDRESS
When your new network is available, use your browser and connect to the IP
address you set
Step 6
. If you see the login page, you are all set. If not, refer
to the Troubleshooting Guide on the next page.
< –– Troubleshooting on next page –– >


