1 0
②
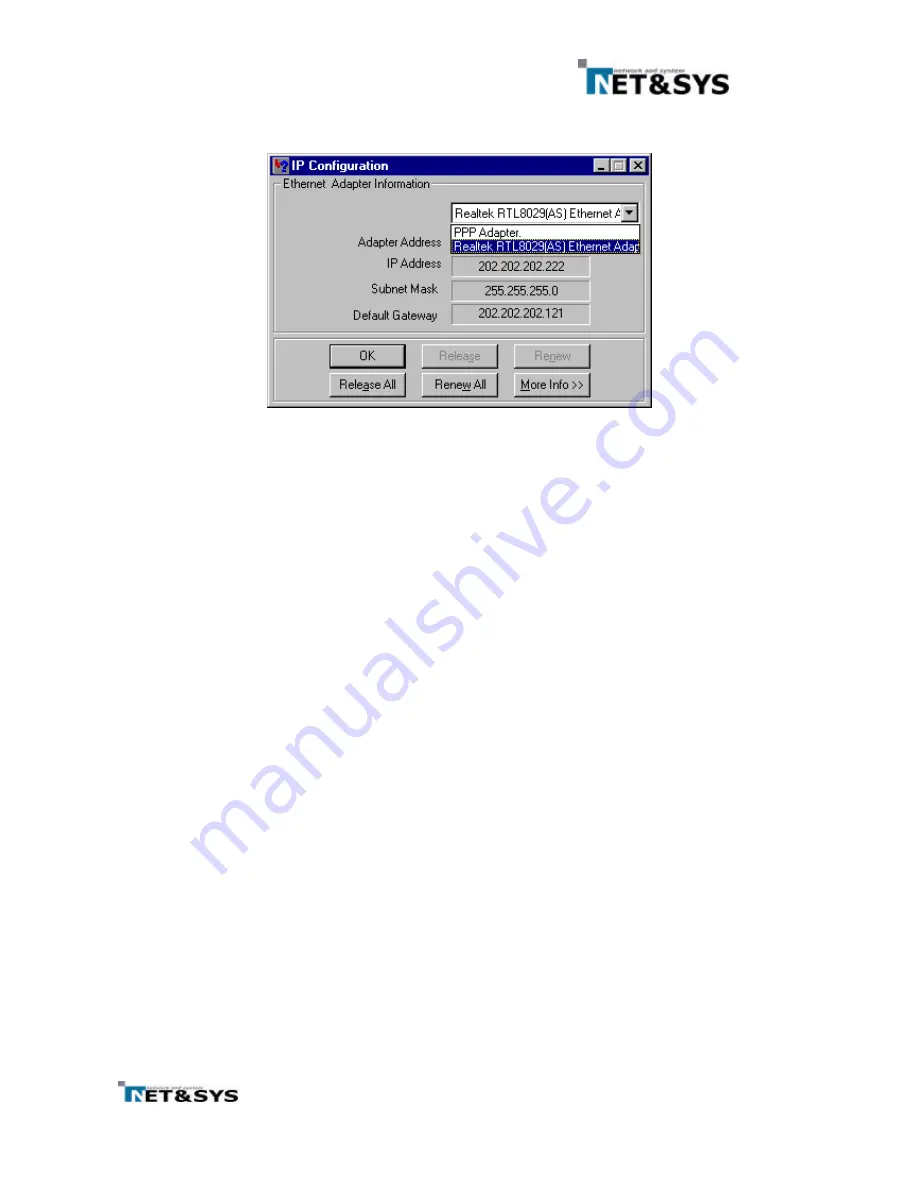
From the IP Configuration popup window, select the correct Ethernet Adaptor.
F i g u r e 7 S e l e c t A d a p t o r ( L A N C a r d )
③
If the Ethernet adaptor’s IP is [0.0.0.0] or [169.X.X.X], the IP needs to be re-assigned for
proper Internet access. First, click [Release All] to release all previously assigned IP’s. The
IP Address should show either [0.0.0.0] or [169.X.X.X] . A new IP address will be assigned
after [Renew All] button is clicked.
④
If the IP does not change from [0.0.0.0] or [169.X.X.X] after the above procedure #3, there
are three possible reasons. Firstly, the cable modem may not be operating properly.
Secondly, LAN card may not be installed properly and thirdly, the server may be down.
⑤
In order to make sure that the cable modem may be the reason, it may be useful to unplug and then
re-connect the DC power from the modem and let it initialize again.
⑥
If the IP address is still not correct, select the menu [Start]=>[Settings]=>[Control
Panel]=>[System]=>[Device Manager]=>[Network Adaptors] and make sure that there is
no (!) in front of the LAN card. The (!) mark shows that the LAN card is not installed properly.
In this case, please try re-installing the LAN card after referring to the LAN card user’s
manual.


