6
netis Wireless High Power Ceiling/Wall mounted AP Router Quick Installation Guide
4.Mounting the device
This device can be ceiling mounted or wall mounted according to your setup.
1. Ceiling Mounted
Attention: For ceiling mounted, we would suggest,
(1) The thickness of ceiling must be over 17mm
(2) The Weight-bearing of ceiling must be over 5kg.
If the ceiling do not meet the requirement as above, please add a plate on the back of the
ceiling to strengthen the thickness and weight-bearing.
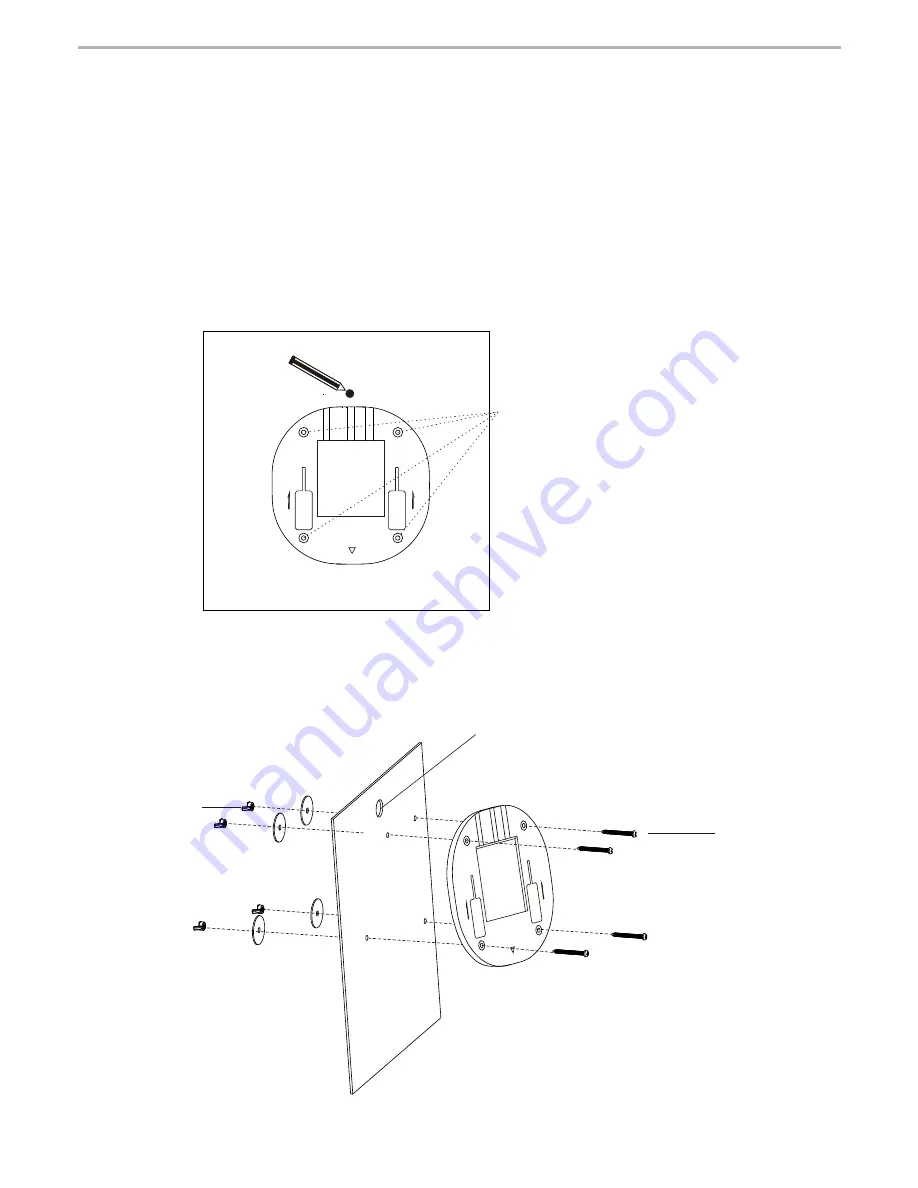
1) Remove the selected ceiling and place the mounting bracket on the suitable location of the
ceiling. Marking four holes of the bracket on the ceiling and one hole for Ethernet cable
which is 5cm in front of the U-shaped notch.
Marking four holes of the
bracket on the ceiling
2) Drill four screw holes for fixing mounting bracket and one hole for Ethernet cable.
3) Attach the mounting bracket to the ceiling by using the provided mounting kit.
Screw nut
Ethernet cable hole
Screw


