background image


Method 2: Push Button  

This method is used when your wireless device has the ability to connect using WPS with a button.  

1.


First, make sure you know how WPS works on your computer or wireless device. If it works 
with WPS, there will be a WPS utility feature and it might have a WPS button. Push the WPS 
button on the front of the Gateway. 


The WPS LED on the front of the gateway begins to blink. 


The Gateway tries to communicate with the wireless computer or device for 2 minutes. 

Any computer or wireless device that will connect via wireless to the gateway is a client. After it 
is added as a client, it will be able to automatically connect to the gateway. 

2.


Go to the wireless computer, and run its WPS configuration utility. Follow the utility’s 
instructions to click the WPS button.   When the computer connects to the wireless network, 
the gateway sends its SSID and WPA-PSK or WPA2-PSK configuration to that computer. 
 

3.


On the computer that just joined the wireless network, make sure you can connect to the 
Internet. You should see the gateway’s Internet LED blink, showing that its Internet connection 
is in use. 

4.


Connecting wireless enabled devices via Wi-Fi 

If you do not have wireless devices that can connect using WPS, you can manually enter in the 
security Passphrase or Network Key. To do this, it will depend on your operating system.  


In Microsoft 

Windows XP

, to link the Router with your PC via Wi-Fi, go to Start > Connect to > 

click on Wireless Network Connection > choose “CG3000DXX” and click Connect. 


In Microsoft 

Windows Vista

, to link the Gateway with your PC via Wi-Fi, go to Start > Connect 

to > choose “CG3000DXX” and click Connect. 


In Microsoft 

Windows 7

, to link the Gateway with your PC via Wi-Fi, click on 

 next to the 

clock on the start bar > choose “CG3000DXX” and click Connect. 


If using a 

MAC

, click on the wireless icon in the menu bar next to the time clock, then select and 

choose “CG3000XX” from the dropdown list. 

5.


Troubleshooting Quick Tips 

This section describes tips for troubleshooting common problems: 

Be sure to restart your network in this sequence.  

1.


Unplug the Gateway’s power. 

2.


Turn off the computers/devices connected to the Gateway. 

3.


Plug in the Gateway to power. Wait 2 minutes. 

4.


Turn on the computer/devices.  

Make sure that the Ethernet cables are securely plugged in.  


The Internet status lights (1, 2, 3, and 4) on the Gateway are on if the Ethernet cable connecting 
the computer and the Gateway is plugged in securely and the computer is turned on.  

Summary of Contents for CG3000D

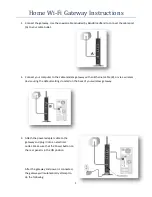
Page 1: ...odem gateway with an Ethernet cable B or via a wireless device using the default settings located on the back of your wireless gateway 3 Attach the power adapter cable to the gateway and plug it into an electrical outlet Make sure that the Power button on the rear panel is in the ON position After the gateway and power is connected the gateway will automatically attempt to do the following ...

Page 2: ... 4 Wait for the LED lights to stop blinking as noted above this could take up to 15 minutes when the Gateway is first powered on Then verify the following The Power LED is solid green The Downstream and Upstream LEDs are lit The Internet LED is solid green indicating a link has been established to the Internet The LAN LED is lit that corresponds to the local Ethernet port where you connected your ...

Page 3: ... a solid metal door or aluminum studs Large expanses of other materials such as glass insulated walls fish tanks mirrors brick and concrete can also affect your wireless signal If placing 2 Gateways or other wireless access points do not place them within 15 feet of one another as the antennas are tuned for this optimum distance Orient the 2 units with the front panels the side with the Power ligh...

Page 4: ...name By default your SSID name of your wireless connection is encrypted specifically for your Gateway for added security The SSID name should always begin with CG3000D To change your SSID click on Wireless Settings under Setup Type the new name of your network in the Name SSID field and click Apply ...

Page 5: ...Passphrase for the gateway is located on the back of the Gateway for your convenience The default wireless Passphrase is secure and can remain as the default However you can change it by clicking on Wireless Settings under Setup WPA PSK TKIP WPA2 PSK AES should already be selected Enter in a new password in the Passphrase box Must be 8 63 characters NOTE It is NOT recommended to disable the Gatewa...

Page 6: ... PIN is used for devices that require manual entry of the WPS PIN or with WPS registrar discovery services found in Windows Vista 1 First make sure you know how WPS works on your computer or wireless device If it works with WPS there will be a WPS utility feature and it might have a WPS button Log into the gateway 2 In the main menu select WPS Settings and then click Next The Add WPS Client screen...

Page 7: ...less enabled devices via Wi Fi If you do not have wireless devices that can connect using WPS you can manually enter in the security Passphrase or Network Key To do this it will depend on your operating system In Microsoft Windows XP to link the Router with your PC via Wi Fi go to Start Connect to click on Wireless Network Connection choose CG3000DXX and click Connect In Microsoft Windows Vista to...

Page 8: ...r this product Ensure that the power switch located on the back of your Gateway is in the ON position The Wireless or Ethernet port lights are not on If neither the Ethernet port lights nor the wireless light come on when the Ethernet connection is made check the following Make sure that the Ethernet cable connections 1 2 3 and 4 are secure at the computer and at the Gateway Make sure that connect...

Reviews: