


NF1901ACV FAQs – PlayStation Setup Guide
2 of 7
FQ01121 v. 1.1 March 2019
© NetComm Wireless 2019
Setting the PlayStation as the DMZ Host
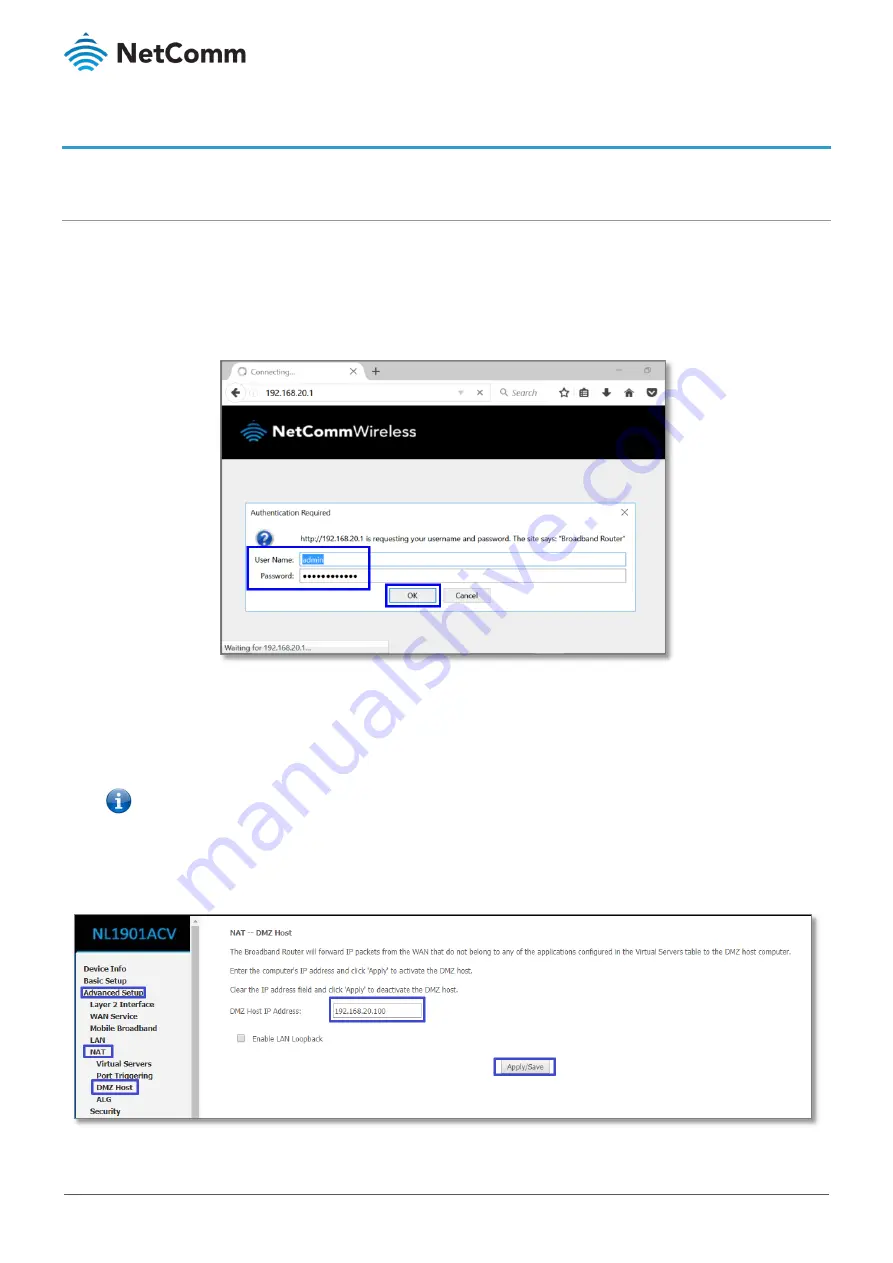
Log in to the web interface
Connect a computer and the NF18ACV using an Ethernet cable. (A yellow Ethernet cable was provided with your
NL1901ACV).
1
Open a web browser (such as Google Chrome or Mozilla Firefox), type following address into the address
bar and press Enter.
2
Enter the following credentials in the User Name and Password fields:
User Name:
admin
Password:
The serial number found on the label on the back of the device
3
Click the OK/Log In button.
Note – If no authentication prompt is displayed or you see a request time out message, refer to the
What if I cannot access Web User
Interface guide
from FAQs section.
1
Select the Click on the Advanced Setup menu at the left of the page, then click on NAT options and then
click on DMZ Host options:


