


Cable the node
|
Stage
3 cont.
4
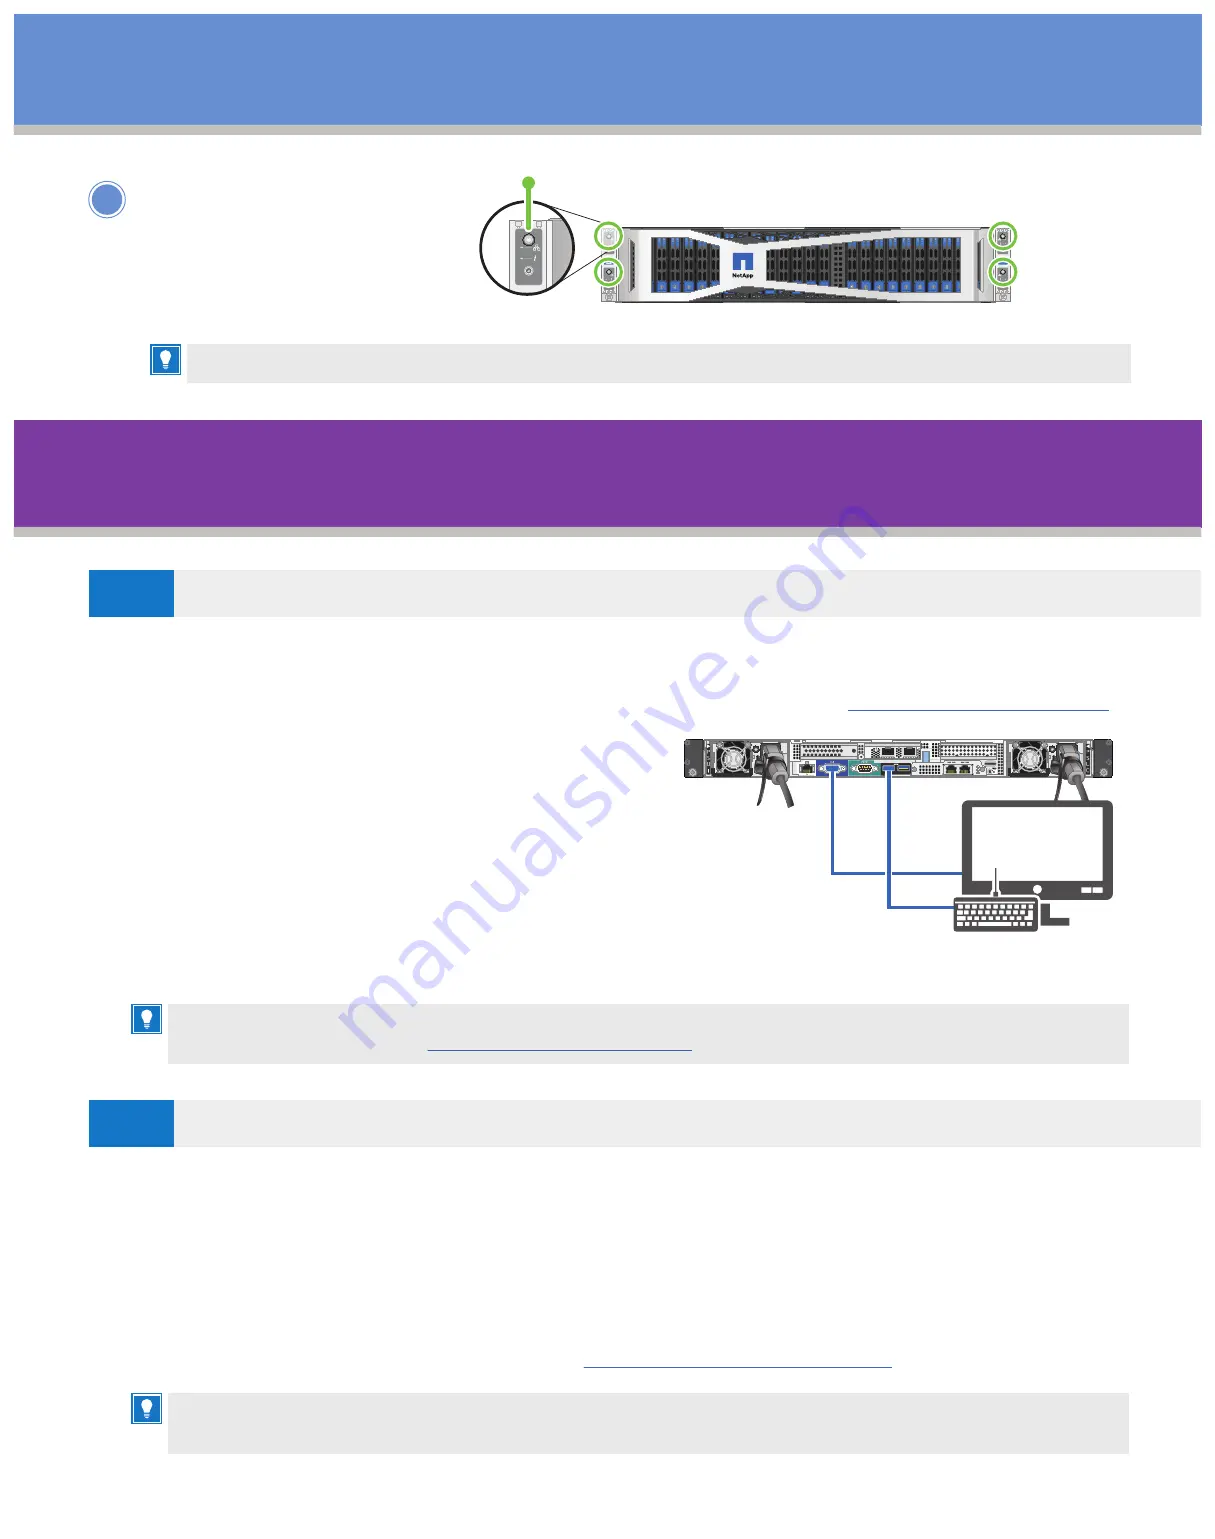
Power on the
NetApp HCI nodes.
FRONT VIEW
HCI
UID
UID
UID
UID
NODE D
NODE D
NODE C
NODE C
NODE A
NODE A
NODE B
NODE B
A0
A1
A2
A3
A4
A5
B0
B1
B2
B3
B4
B5
C0
C1
C2
C3
C4
C5
D0
D1
D2
D3
D4
D5
UID
UID
NODE A
NODE A
NODE B
NODE B
A0
A1
A2
A3
A4
A5
B0
B1
B2
B3
B4
B5
C0
C1
C2
C3
C4
It takes approximately six minutes for the node to boot.
Configure NetApp HCI
|
Stage
4
(Choose option A or B below)
1. Configure an IPv4 address on the management network (Bond1G) on one storage node.
Note:
If you are using DHCP on the management network, you can connect to the DHCP-acquired IPv4 address of the
storage system. For more information about DHCP-acquired IPv4 addresses, see the
a. Plug in a KVM to the back of one storage node.
b. Configure the IP address, subnet mask, and
gateway address for Bond1G in the user interface.
You can also configure a VLAN ID for the
Bond1G network.
2. Using a supported web browser (Mozilla Firefox,
Google Chrome, or Microsoft Edge), navigate to the
NetApp Deployment Engine by connecting to the IPv4
address that you configured in Step 1.
3. Use the NetApp Deployment Engine user interface (UI) to configure NetApp HCI.
Note:
If you are expanding your installation using H615C compute nodes, you must ensure that the cluster runs
on NetApp HCI 1.7 or later.
1. Using a supported web browser, browse to the IP address of the management node.
2. Log in to the NetApp Hybrid Cloud Control by providing the NetApp HCI storage cluster
administrator credentials.
3. Follow the steps in the wizard to add storage and/or compute nodes to your NetApp HCI
installation. The newly installed NetApp HCI nodes on the same network will be discovered
automatically. For more information, see the
All the other NetApp HCI nodes that you installed will be discovered automatically.
For more information, see the
.
Setting up a new NetApp HCI installation
OPTION
A
Expanding an existing NetApp HCI installation
OPTION
B
The cabling and network configuration of the nodes that you add must be identical to the existing
NetApp HCI installation.


