background image


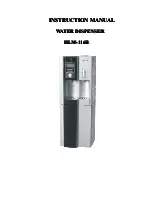
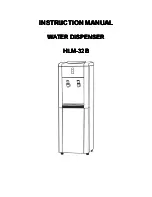
NESCAFÉ® Bean-to-Cup 

Coffee Machine — 

Extended Shutdown and 

Startup Procedure  


Please follow all instructions to sanitize and shutdown the NESCAFÉ Bean-to-Cup Coffee Machine when placing them 
out of commission for extended periods (more than 1 week). 


For Shutdown: 

1.


Open the front door. 

2.


Remove all product from canisters. The beans in the hopper should also be removed, please remember to 
close the hopper gate before removal. 

3.


Disassemble canisters and clean with warm soapy water. Rinse, sanitize, then air dry completely before 
reassembling. Place canister back in the machine after step 7 is completed. 

4.


Empty the solid waste bin. 

5.


Remove the manifold (octopus) and clean it. Remove all mixing bowls, whipper housings, whipper bases. 

6.


Place all parts in a bucket of warm soapy water and wash each part thoroughly. Use a soft bristled brush 
to clean in small areas. Rinse in clean warm water and sanitize then air dry completely before 
reassembling. 

7.


Using a clean cloth dampened with an approved sanitizing solution, clean the inside of the dispenser and 
exterior. Be careful that the dampened cloth is not too wet when cleaning the screen. The drip tray 
should also be emptied and cleaned. 

8.


Replace the whipper blades, mixing bowls, and the manifold once they are dry.  Replace the canisters and 
hopper once dried from step 3. 

9.


Unplug the dispenser, and turn off the water supply.  


Summary of Contents for Vitality Express

Page 1: ...ners and discard as product must be used within 7 days of opening DO NOT REFREEZE 3 Clean and sanitize the Concentrate Compartment and Dispense Area 4 Clean and disinfect the outer surface of the dispenser with an approved sanitizing solution let stand for 2 3 minutes and then dry with a soft towel 5 Empty drip tray and wash rinse and sanitize the drip tray screen and drip tray 6 Shut off water at...

Page 2: ... on the water supply Confirm the drip tray and drip tray screen are in place 2 Insert thawed concentrate containers 3 Dispense product out of each nozzle and taste to ensure unit is functioning properly If you have any questions please do not hesitate to call ...

Page 3: ...olution 3 Slowly and carefully pour several ounces of warm water through the pump opening in the bottom of the concentrate compartment until clean The drip tray will catch the water 4 Remove troughs separate the cover from the trough and wash thoroughly in warm soapy water Use a soft bristled brush to clean the outlet end of the trough Rinse in WARM water andsanitize 5 The drip tray must be remove...

Page 4: ...nser 2 Once it has heated we can proceed to clean the machine to prepare it for dispensing 3 Dispense hot water for 15 seconds into a pitcher and discard 4 Finally insert product bag s into the compartments 5 Machine is ready for use If you have any questions please do not hesitate to call ...

Page 5: ...he machine after step 7 is completed 5 Remove mixing bowls 6 Place all parts in a bucket of warm soapy water and wash each part thoroughly Use a soft bristled brush to clean in small areas Rinse in clean warm water and sanitize then air dry completely before reassembling 7 Carefully wipe the interior of the machine using a cloth and sanitizing solution 8 Place dried canisters back in machine 9 The...

Page 6: ...4 Open the front door 5 Turn the canister chutes in the up position 6 Remove canisters and fill product to desired level 7 Place filled canisters in the assigned slots and turn chute to the down position 8 Press flush button to flush machine 9 Empty water from drip tray 10 Machine is ready for use If you have any questions please do not hesitate to call ...

Page 7: ...p 7 is completed 4 Empty the solid waste bin 5 Remove the manifold octopus and clean it Remove all mixing bowls whipper housings whipper bases 6 Place all parts in a bucket of warm soapy water and wash each part thoroughly Use a soft bristled brush to clean in small areas Rinse in clean warm water and sanitize then air dry completely before reassembling 7 Using a clean cloth dampened with an appro...

Page 8: ...o see the five icons on the top panel Tap on the water drop icon and this will give you the option to rinse the bowls and brewer chamber to get the dispenser ready for dispensing 3 Refill all canisters with product and the hopper with beans 4 Machine is ready for use If you have any questions please do not hesitate to call ...

Page 9: ...containers and discard as product must be used within 7 days of opening DO NOT REFREEZE 3 Clean and sanitize the Concentrate Compartment and Dispense Area 4 Clean and disinfect the outer surface of the dispenser with an approved sanitizing solution let stand for 2 3 minutes and then dry with a soft towel 5 Empty drip tray and wash rinse and sanitize the drip tray screen and drip tray 6 Shut off wa...

Page 10: ... on the water supply Confirm the drip tray and drip tray screen are in place 2 Insert thawed concentrate containers 3 Dispense product out of each nozzle and taste to ensure unit is functioning properly If you have any questions please do not hesitate to call ...

Page 11: ...mixing bowls whipper housings whipper bases impellers locking collars and steam tray 6 Place all parts in a bucket of warm soapy water and wash each part thoroughly Use a soft bristled brush to clean in small areas Rinse in clean warm water and sanitize then air dry completely before reassembling 7 Carefully wipe the interior of the machine using a cloth and sanitizing solution 8 Place dried canis...

Page 12: ...t to the required fill line 7 Place filled canisters in the assigned slots and turn chute to the down position 8 Reset canister count by pressing buttons F1 edit on the service key then select yes to confirm 9 Initiate a rinse cycle Push hold buttons 1 2 simultaneously for more than 5 seconds to start the rinse process of all mixing bowls Discard water from the drip tray 10 Machine is ready for us...

Reviews: