


Apex Classic Setup and Programming Guide v2.2
Page
74
USING THE AQUACONTROLLER APEX
VIEWING STATUS
Status Screens can be viewed from both the Apex Display and the Web Interface.
The information shown on the Status Screens are edited according to the
instructions in the section titled Edit Status Screens.
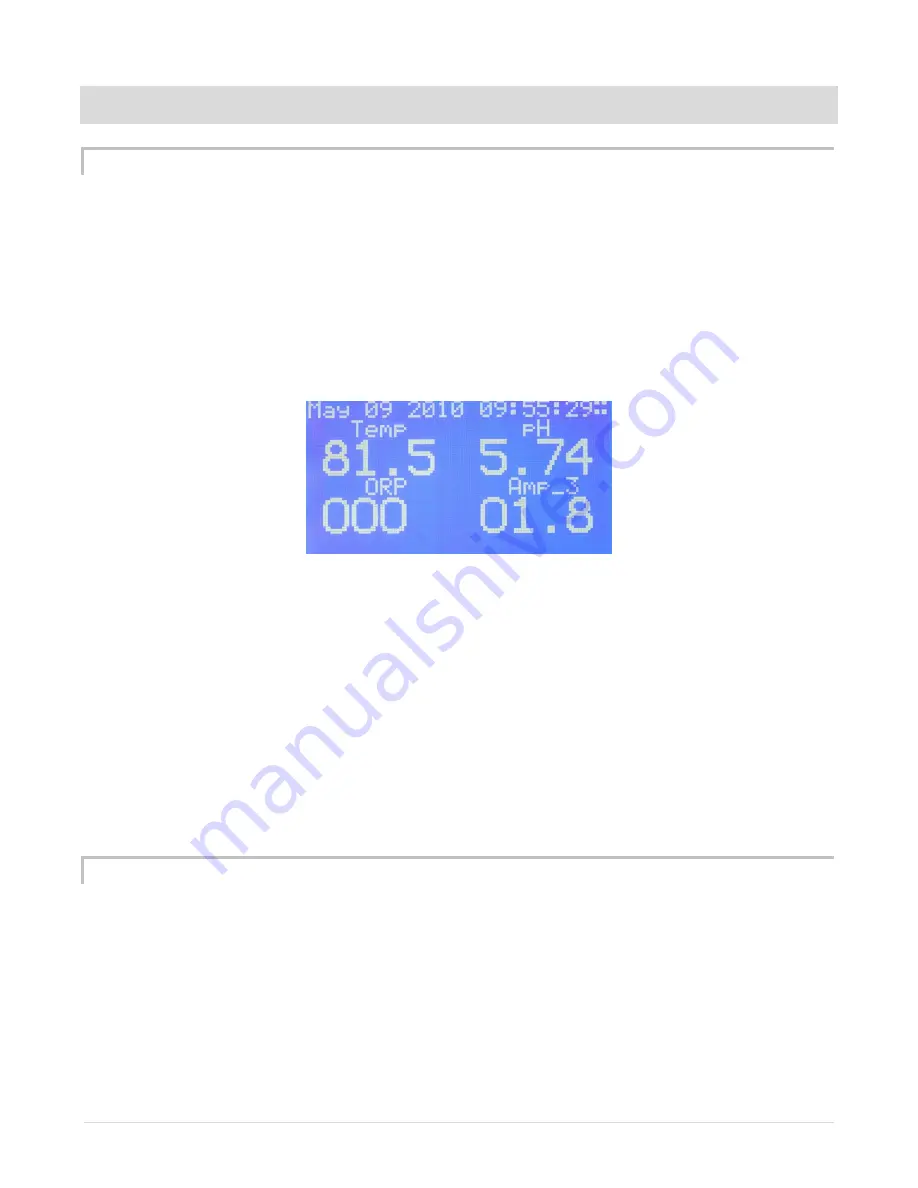
The 4 dots in the upper right corner of the Apex Display screen indicate which of
the 4 Status Screens is currently displayed. On the screen shown in Figure 8 -
Home Screen Display, you can see the 4 dots in the upper right corner indicating
this is Status Screen 4.
Figure 8 - Home Screen Display
To select the Status screen to view:
Apex Display: Home – the home screen on the Apex display shows one of
the Status Screens. Simply pressing the left and right arrow keys will cycle
through each of the 4 Status Screens.
Web Interface: Status – as you hover over the Status Menu item, choose
the Status Display you wish to view. All Status displays the status of all
probes and outlets on the Apex system. The 4 Status Screens on the Web
Interface display the same information as the 4 Status Screens that are
viewed from the Apex Display.
MANUAL CONTROL
The AquaController Apex provides an easy way to override the AquaController
Apex program for outlets configured on the system. You may wish to do this to
turn an item off to perform maintenance, to test operation, or simply to turn the
lights on in the middle of the night.
NOTE: For items or groups of items you frequently need to turn off or on for
maintenance or other events, consider setting up a Feed Timer which will


