background image

GB-20


Repeat A-B can be set by pressing the 

A-B

 button.

-  First press 

:  Select the start point, the words “

A-

” will stay lit.

-  Second press  :  Select the end point, the words “

A-B

” will stay lit.

-  Third press 

:  To cancel repeat play, the word “

A-B

” will disappear.

Note:

 The section A and B can be set only within the same track.

Use the USB 

Caution: 
Do not use a high-capacity USB hard disks. Only USB flash memory can be used.

By connecting an USB mass storage device (including USB flash memory, USB flash players 

or memory cards) to this unit, you can enjoy the device's stored music through the unit.

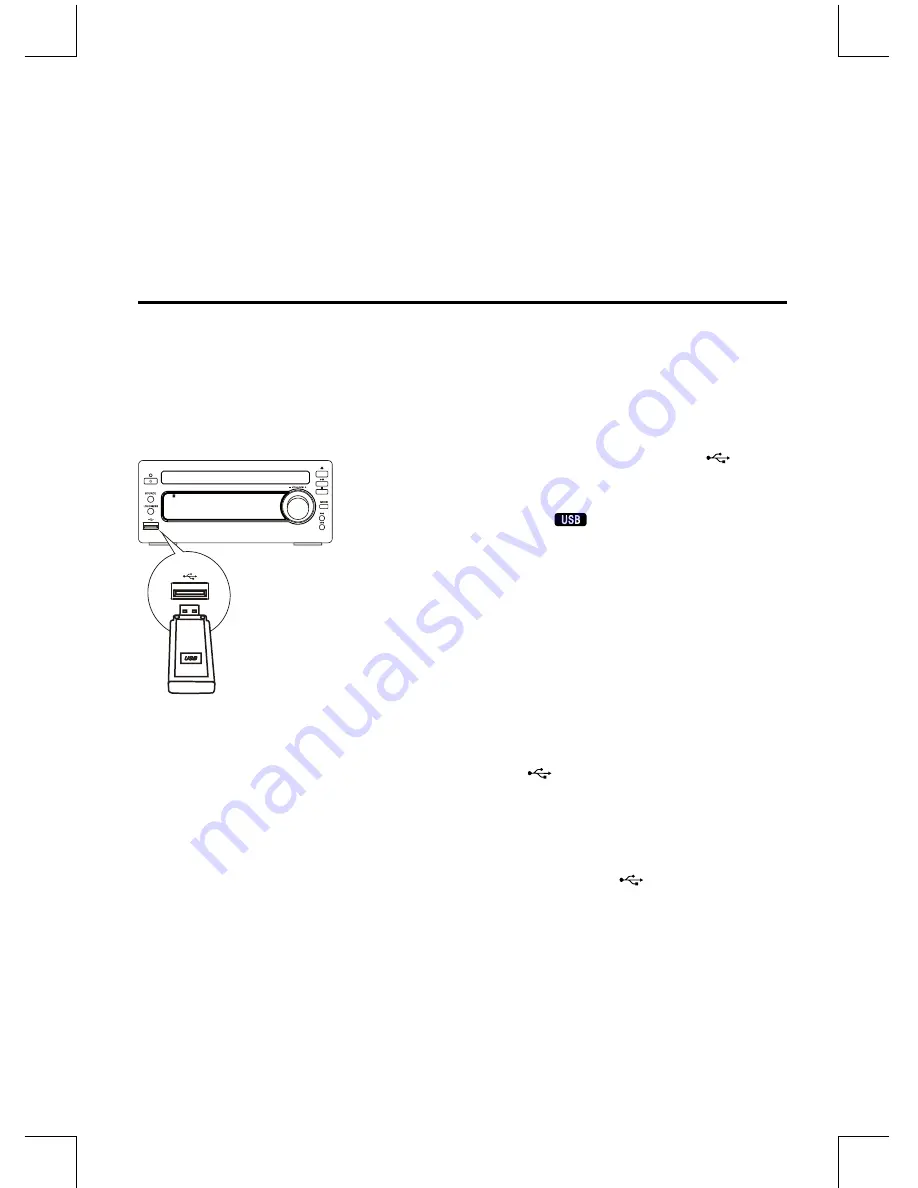
1.  Insert the USB device's USB plug into the 

 socket 

  on the unit.
2.  Repeatedly press the 

FUNCTION

 button on the unit 

 or 

directly press the 

 button on the remote control 

  to select the USB source.
  - The word “USB” will be displayed on the front panel.
3.  The device's stored music will be played automatically.
4.  When you store more than one folder in the USB 

  flash, use the 

ALB+/-

 button on the remote control to 

  select the next/previous folder. Then choose the track 
  with the 

H

/

G

 button to play the folder. 

5.  The player support the USB music file format of MP3, 

  WMA only.

For devices with USB Cables:

1.  Insert one plug of the USB cable (not supplied) to the 

 socket on the unit.

2.  Insert the other plug of the USB cable to the USB output terminal of the USB device.

For memory Cards:

1.  Insert the memory card into a card reader (not supplied).
2.  Use a USB cable (not supplied) to connect the card reader into the 

 socket on the unit.

Summary of Contents for MCB1533

Page 1: ......

Page 2: ...tching ON OFF 14 Switching the system to ECO Power Standby mode 14 Setting the Clock 14 Setting the Clock Manually 14 Setting the Clock Automatically 15 Display the Clock 15 Sound Quality 15 Adjusting...

Page 3: ...ing Playback 19 To Skip Search or Search and Play 19 To Select Album 19 Playing Repeatedly MP3 disc 19 Use the USB 20 Play from Bluetooth device 21 Setting the Sleep Timer 21 Setting the Daily on Time...

Page 4: ...s radiators or gas electric fires Avoid exposure to direct sunlight and other sources of heat Naked Flames Never place any type of candle or naked flame on the top of or near the unit Moisture To redu...

Page 5: ...push anything into the holes slots or any other openings in the case this could result in a fatal electric shock Service To reduce the risk of electric shock do not remove screws The unit does not co...

Page 6: ...h Part 15 of the FCC Rules Operation is subject to the following two conditions 1 This device may not cause harmful interference and 2 this device must accept any interference received including inter...

Page 7: ...or in extreme cases fire or even an explosion ALWAYS Removedead batteriesfromequipment and all batteries from equipment you know you are not going to use for a long time Otherwise the batteriesmay lea...

Page 8: ...GB 7 Pack Contents Make sure all of the following contents are included Speakers x 2 Remote Control battery included The Unit Instruction Manual AC Adaptor FM Antenna...

Page 9: ...tton L Tuning Backward Button L 7 Loudness Button LOUDNESS 8 USB Jack 9 Remote Sensor 10 LCD Display Lens 11 Volume Control Knob VOLUME 12 Next Button G Preset Up Button G 13 Previous Button H Preset...

Page 10: ...12 Play Pause Button BF 13 Album Up Button ALB 14 Album Down Button ALB 15 Mute Button MUTE 16 Number Button 0 9 10 17 Open Close Button K 18 USB Function Button 19 Bluetooth Function Button AUX Func...

Page 11: ...mote control is not going to be used for an extended period of time To avoid possible failure read the following instructions and handle the remote control properly Do not drop or cause impact to the...

Page 12: ...ance may vary according to the brightness of the room Note Make sure that there is no obstacle between the infrared remote sensor of the unit and remote control If you install the unit on rack etc the...

Page 13: ...ing up the unit are as follows 1 The speaker wires between CD player and speaker are to be connected first 2 After the above cables are correctly connected the AC power cord can then be connected to p...

Page 14: ...ng Auxiliary Equipment Connect the AUX Input terminals on the rear of the unit to the line output terminals on the auxil iary equipment with an audio cable not supplied illustrated below 2 If receptio...

Page 15: ...conds or more to switch to ECO Power Standby or normal standby ECO Power standby mode The clock will not be displayed Press the CLOCK button to display the clock on the LCD Normal standby mode The clo...

Page 16: ...he front panel Press the S BASS button again to cancel the effect Controlling the Loudness This unit has a loudness function which can automatically increase the bass sound effect at low volume It can...

Page 17: ...er Its band and fre quency are displayed on the front panel Program radio stations You can program a maximum of 20 preset radio stations FM Automatically Press and hold the PROG button on the remote c...

Page 18: ...he current station e g 95 30MHz CD Operation CD Playing 1 Repeatedly press the FUNCTION button on the unit or directly press the CD function button on the remote control to select the disc source The...

Page 19: ...n once to stop the programme play Press the L button twice to clear programme Playing the Beginning Intro of each Track Press the INTRO button on the remote control to play the beginning of each track...

Page 20: ...remote control ID3 information song title and artist will be displayed or NO TTL NO ALB NO ART if there is no ID3 information Press this button again album track and playing time will be displayed To...

Page 21: ...Repeatedly press the FUNCTION button on the unit or directly press the button on the remote control to select the USB source The word USB will be displayed on the front panel 3 The device s stored mu...

Page 22: ...disable the function from your Bluetooth device Note If the signal strength is weak your Bluetooth receiver may disconnect but it will re enter pairing mode automatically This unit supports A2DP Advan...

Page 23: ...indicator will blink 6 Set the minute with the VOL button 7 Press the TIMER button the volume indicator will blink 8 Adjust volume with the VOL button 9 Press the TIMER button the timer is set and act...

Page 24: ...s not installed properly Be sure to store the disc in its exclusive case when not in use If the surface is soiled B Wipe gently with a soft damp water only cloth When wiping discs always move the clot...

Page 25: ...t side facing inward Wait until the moisture condensation at the lens has cleared Replace or clean the disc Use a finalized CD or correct format disc Cannot display some files in USB device The number...

Page 26: ...al resources and ensure that it is recycled in a manner that protects human health and the environment For more information about where you can drop off your waste for recycling please contact your lo...

Reviews: